


You are using an out of date browser. It may not display this or other websites correctly.
You should upgrade or use an alternative browser.
You should upgrade or use an alternative browser.
Another rotten vehicle thread
- Thread starter Jim Davey
- Start date


Shedendman
Member
- Messages
- 5,652
seen a lot worse,afterall it is a transit
- Messages
- 24,293
- Location
- Birmingham
Is it worth saving?
Shedendman
Member
- Messages
- 5,652
Is it worth saving?
Of course it is,noisy engine,smelly,slow but at least its easy to fix and cheap to
CompoSimmonite
Member
- Messages
- 6,069
- Location
- Werrington, Staffordshire Moorlands.
Those of us of a "certain age" will remember Fords (and other makes) being like this at 4-5 years old ! Strut tops and sills needing replacement for second (or even first) MOT was common.
Paul H
Paul H
Jim Davey
R H Davey Welding Supplies Ltd
- Messages
- 5,653
- Location
- Southampton
Is it worth saving?
Yep, the old Mk 5 is the last decent truck Ford made, light, strong, easy to maintain and cheap to run.
Plus, and this is the major decider for us, the payload is huge compared to a modern Transit. We hired a 12 plate flat bed twin rear wheel Transit with a tail lift while we took one of our older ones off the road for a week. Got it to a weigh bridge to see how many industrial gas cylinders we could legally carry, 960 kilos was all the payload available, with half tanks and no driver!
We get 1400kg legally on a Mk 5 by the time we've done the necessary modifications, that's including driver and full tanks too.
Everyone we've spoken to in the trade says hang onto the old trucks as long as practical as the new breed is much more costly and less suitable for running day in day out loaded to max.
CompoSimmonite
Member
- Messages
- 6,069
- Location
- Werrington, Staffordshire Moorlands.
I cut up my old E reg SWB Hi Top. Despite being rotten around the edges it was still hard work to cut with my Stihl saw as the basic structure was decent thickness metal.
My current Peugeot Expert is an 03 and the front crossmember, that luckily bolts to the subframe, is rotten and need replacing !
Looking at the yellow paint over the white was it originally ex BT ?
Paul H
My current Peugeot Expert is an 03 and the front crossmember, that luckily bolts to the subframe, is rotten and need replacing !
Looking at the yellow paint over the white was it originally ex BT ?
Paul H


Shedendman
Member
- Messages
- 5,652
See,you can make a silk purse from a pigs ear") ,good work there Jim
,good work there Jim
Jim Davey
R H Davey Welding Supplies Ltd
- Messages
- 5,653
- Location
- Southampton
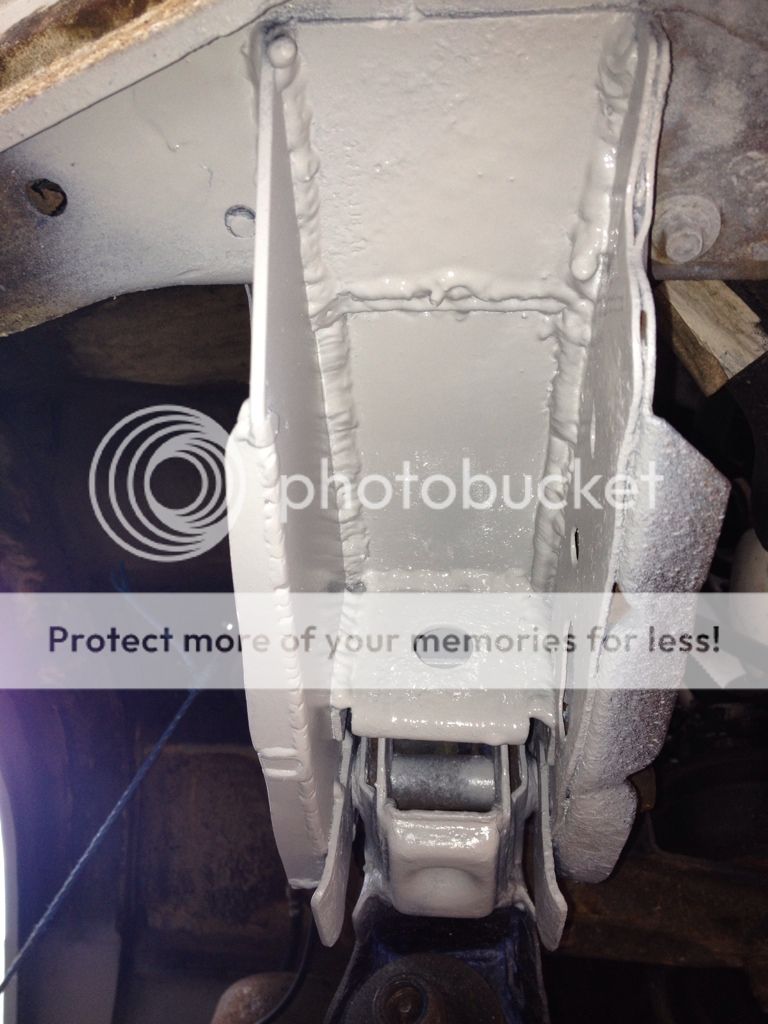
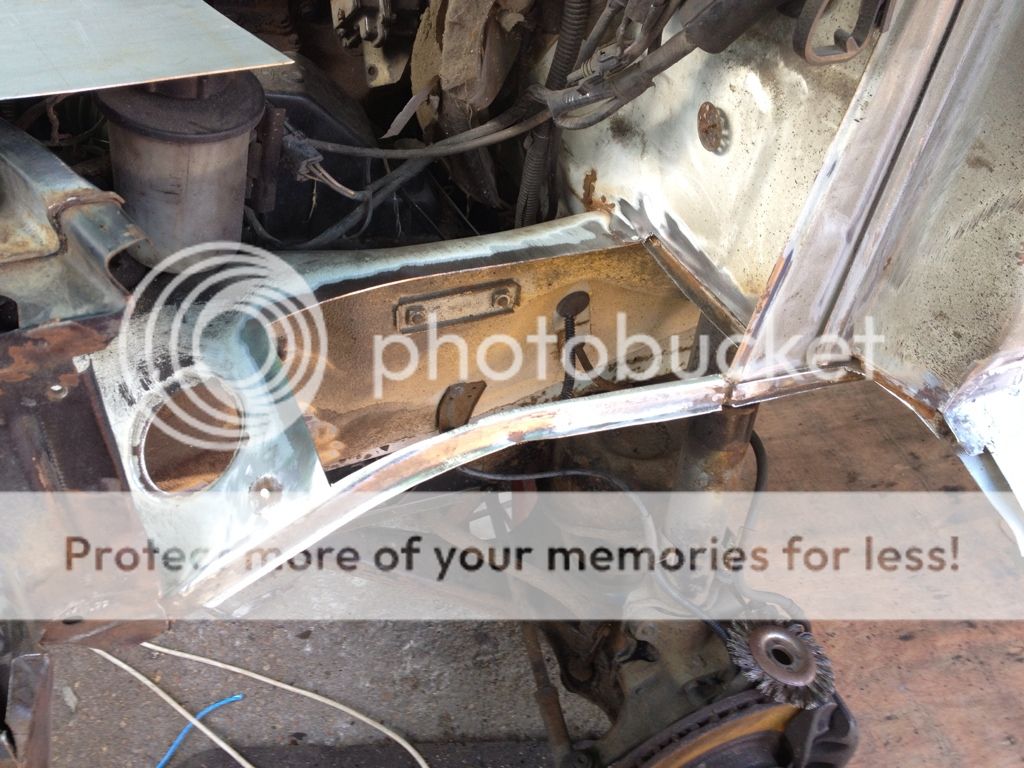
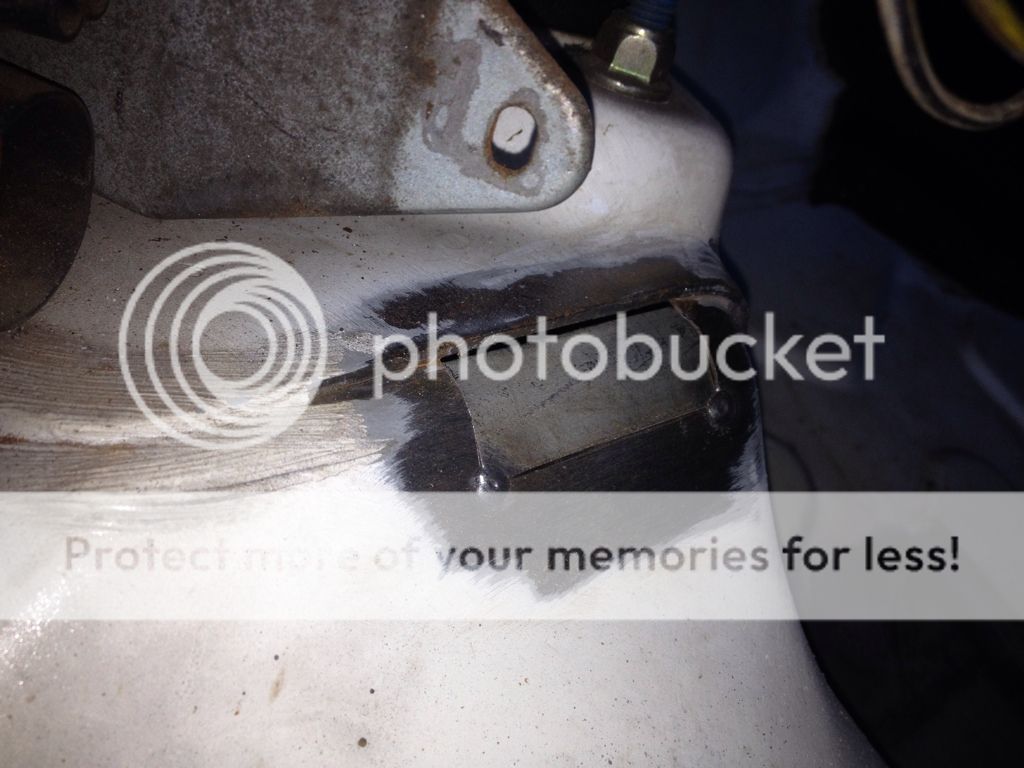
Front right subframe mount was rotted out, apparently you can buy this section from Ford. People always tell you that after you make one...


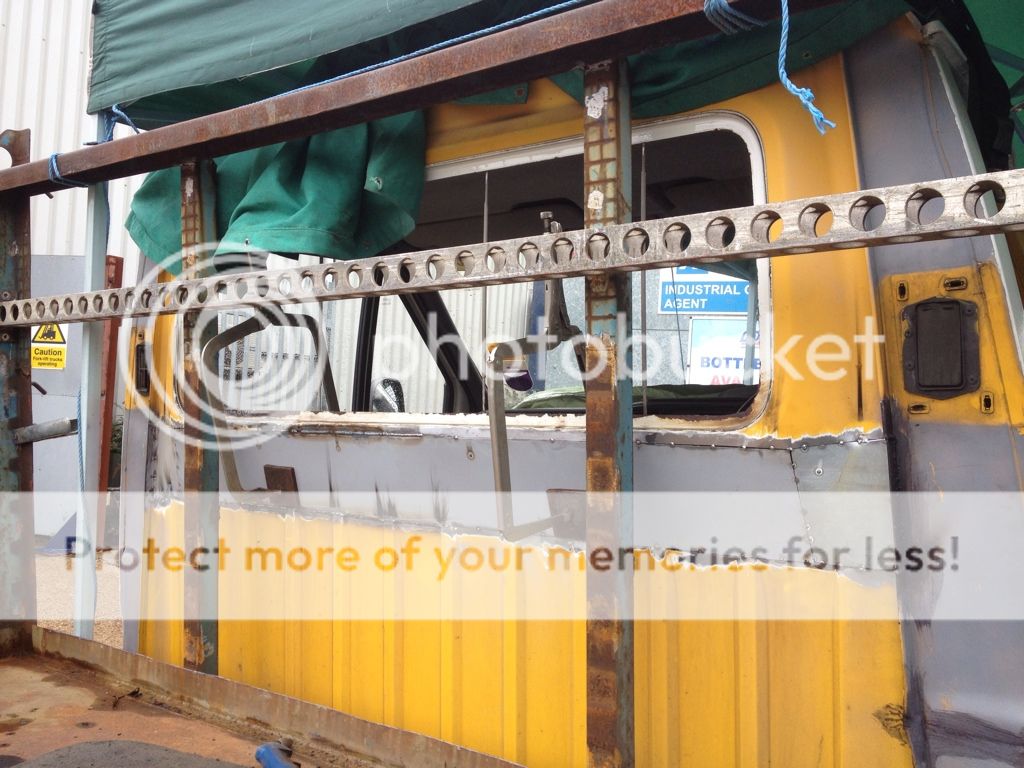
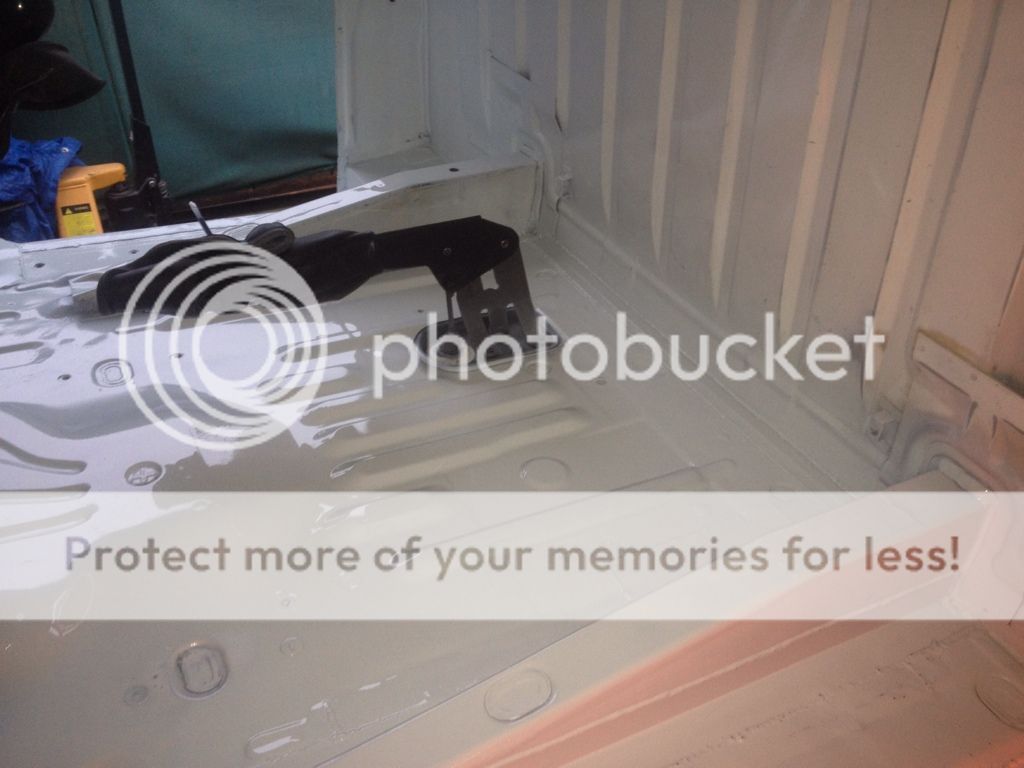
Had to put some strength back into the rear of the cab...
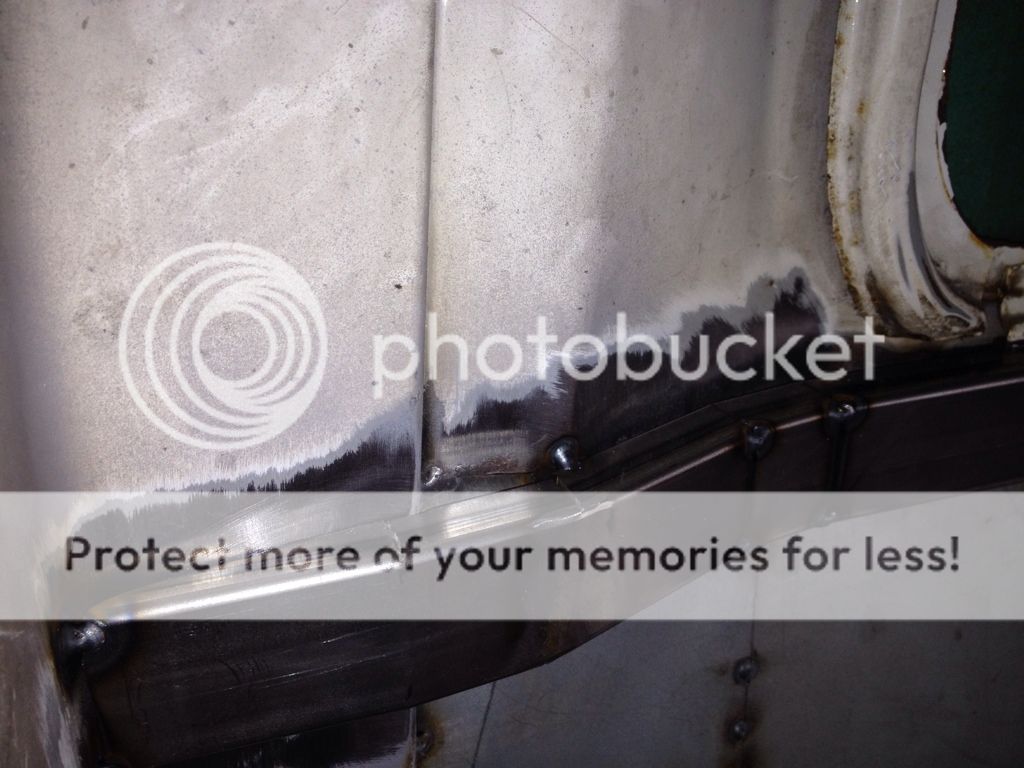

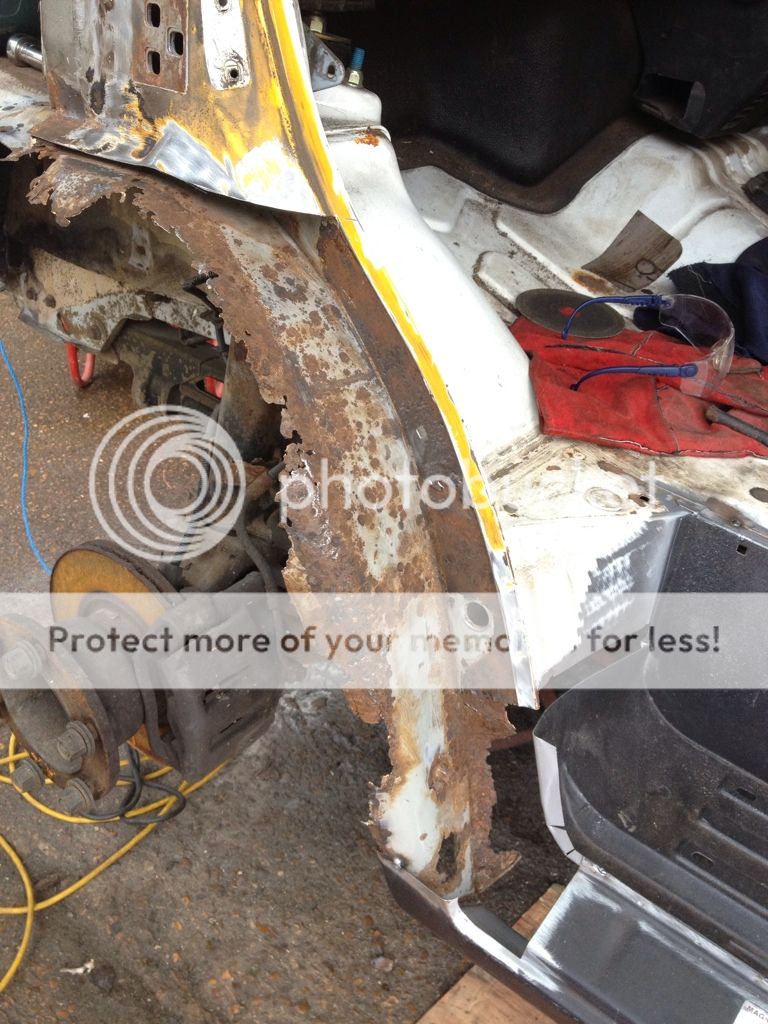
The nearside arch and step were even worse, accident damage and some really ropey repairs had allowed rust to really go to town...


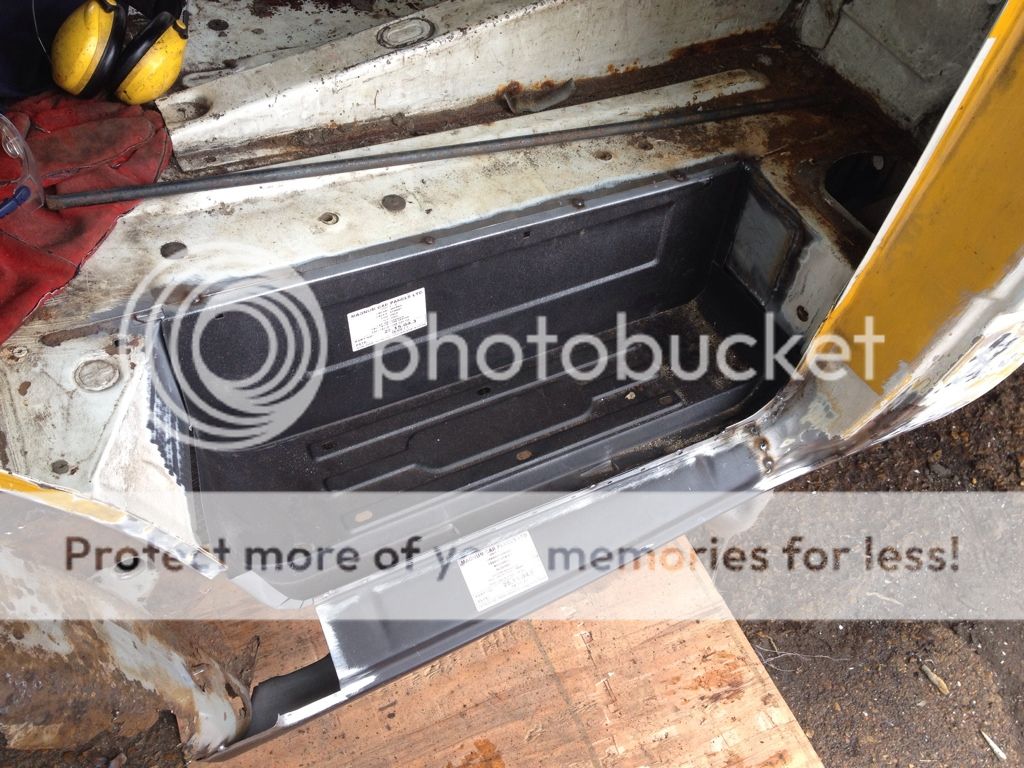
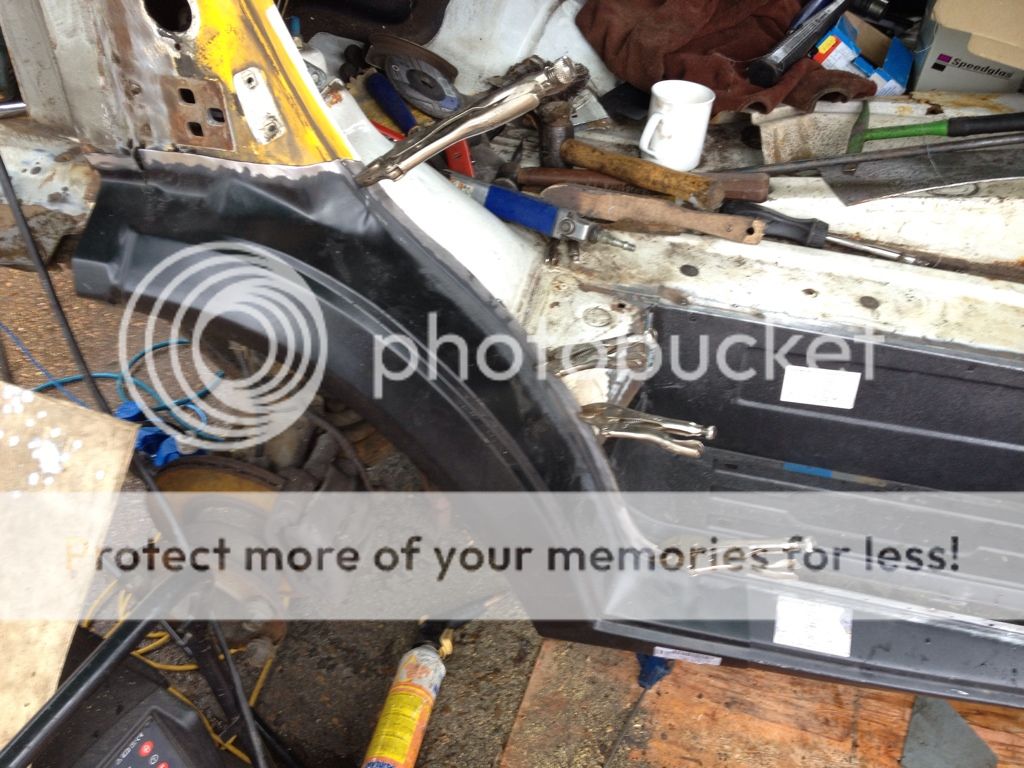
Nice when you can get bits off the shelf to go straight in without much messing...
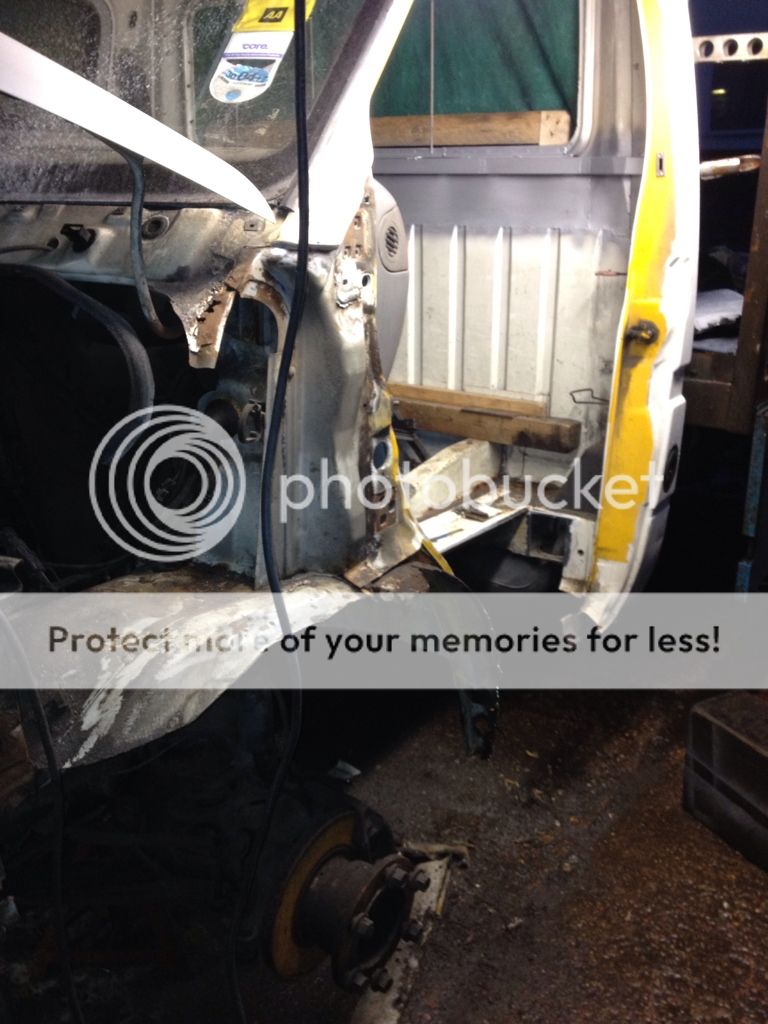
Inner wing was rotted all the way round...

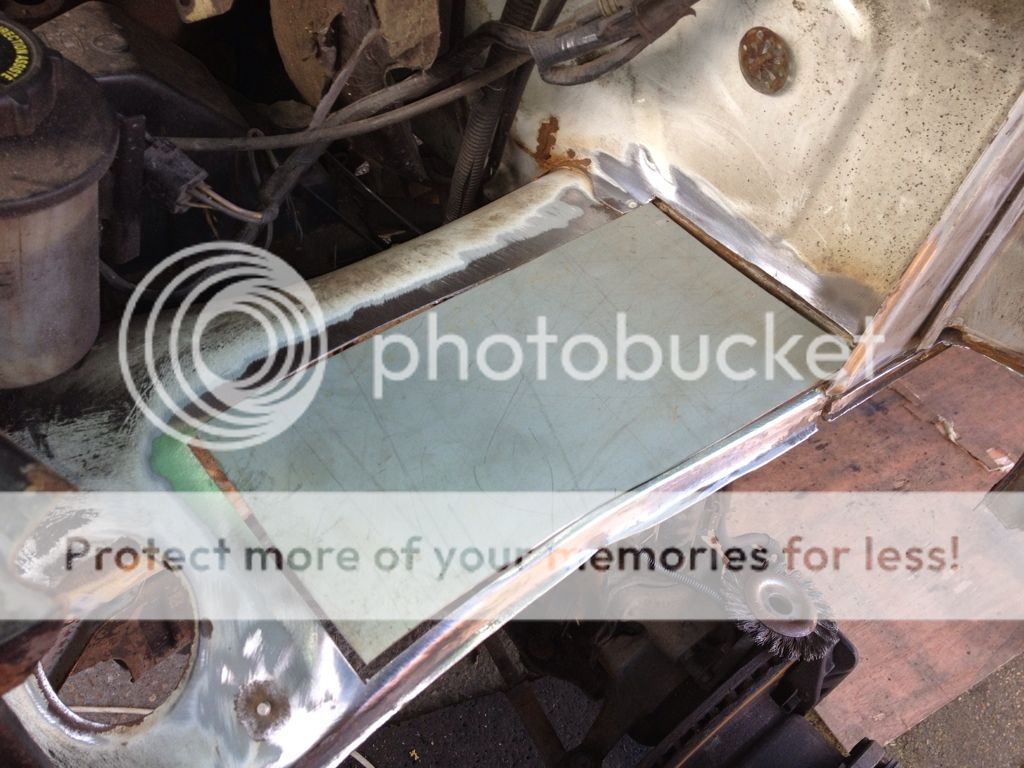
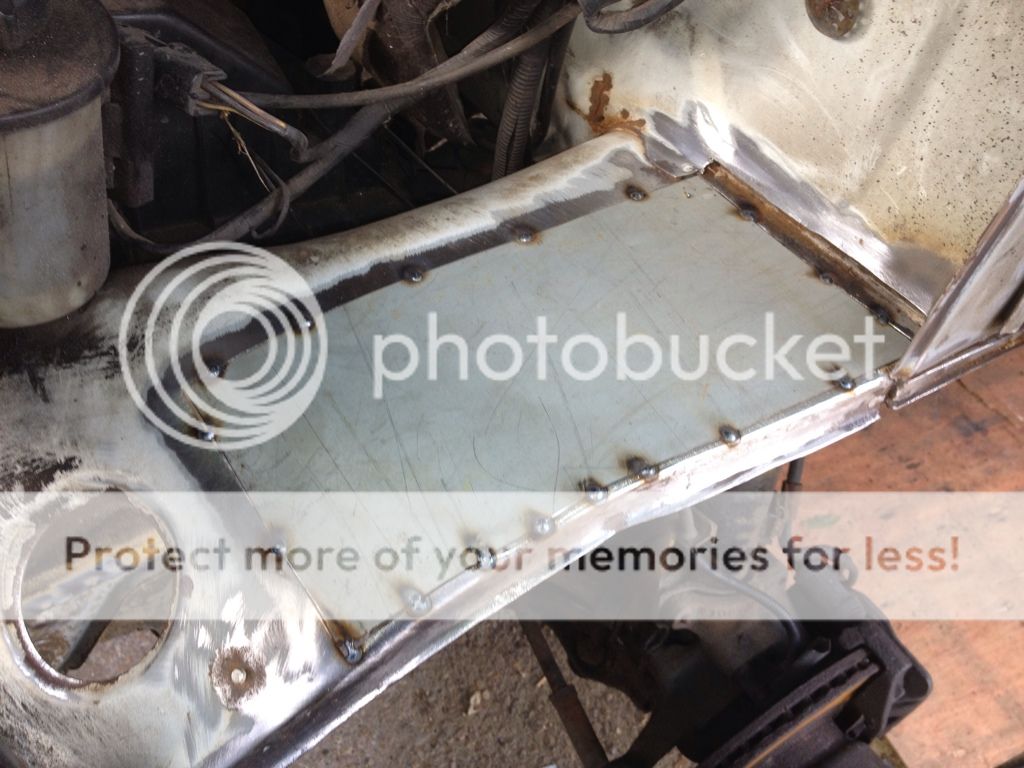


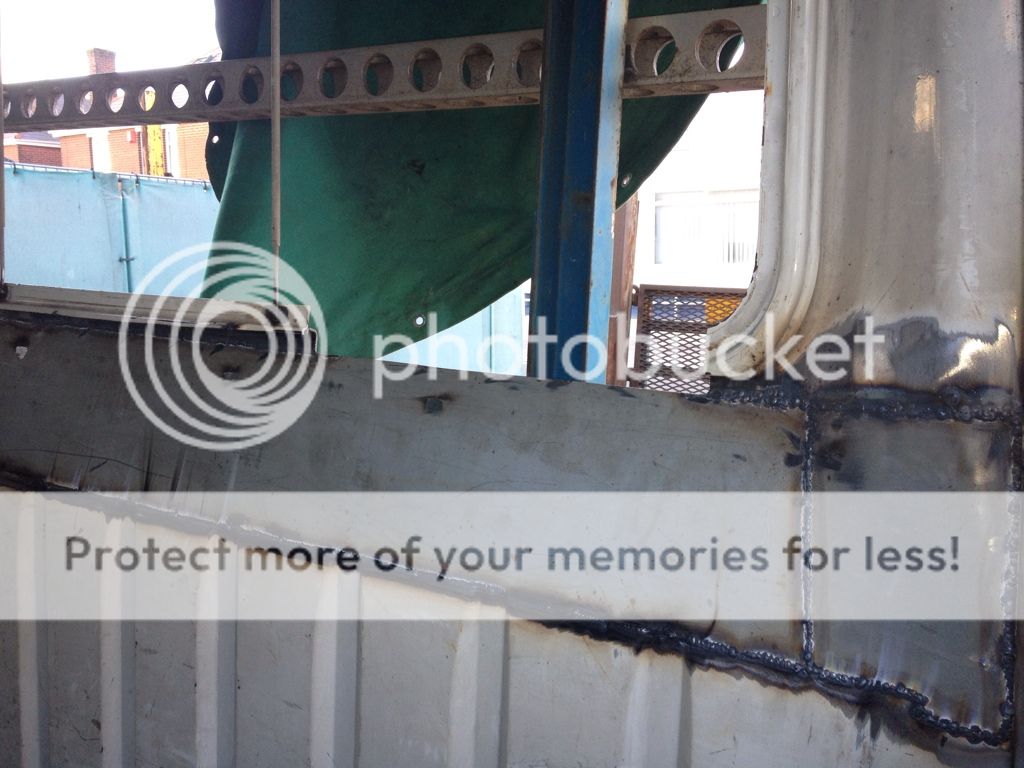
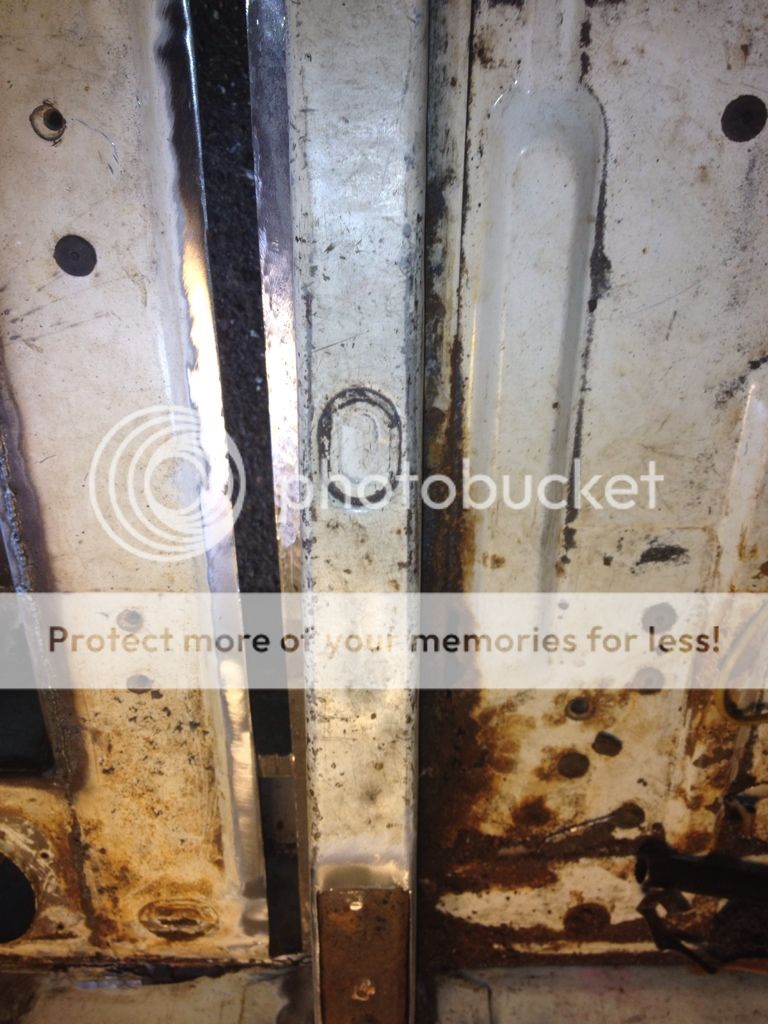
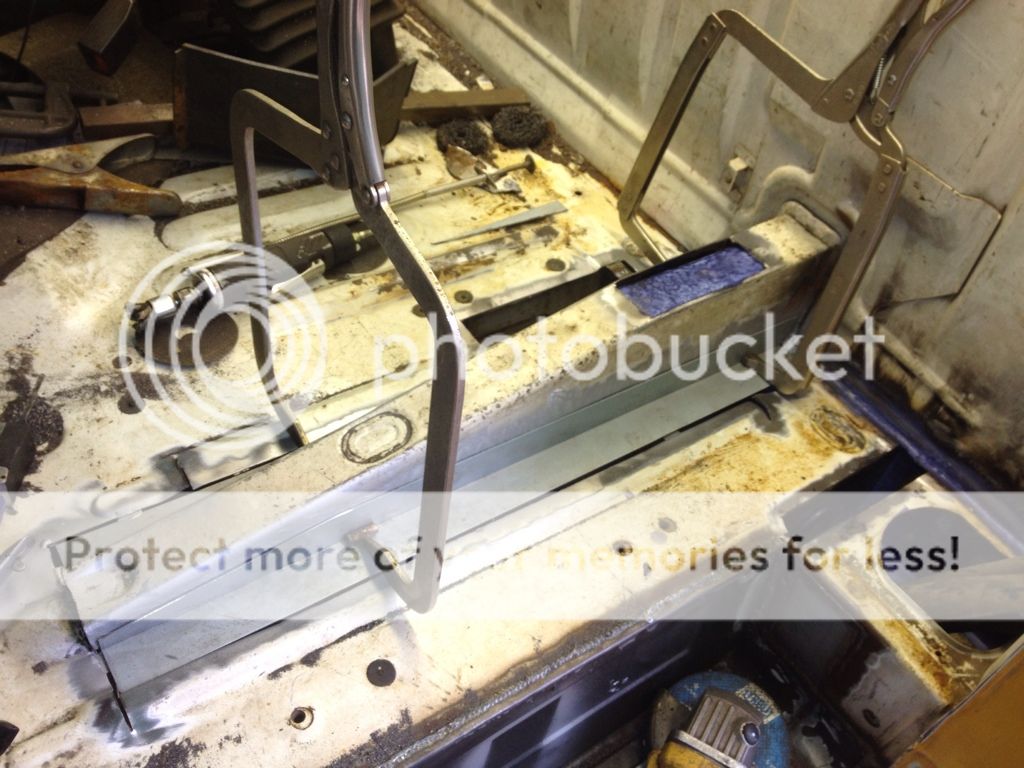
Floor of the cab around the chassis rails was pretty far gone from wet ratchet straps left in the cab each winter...
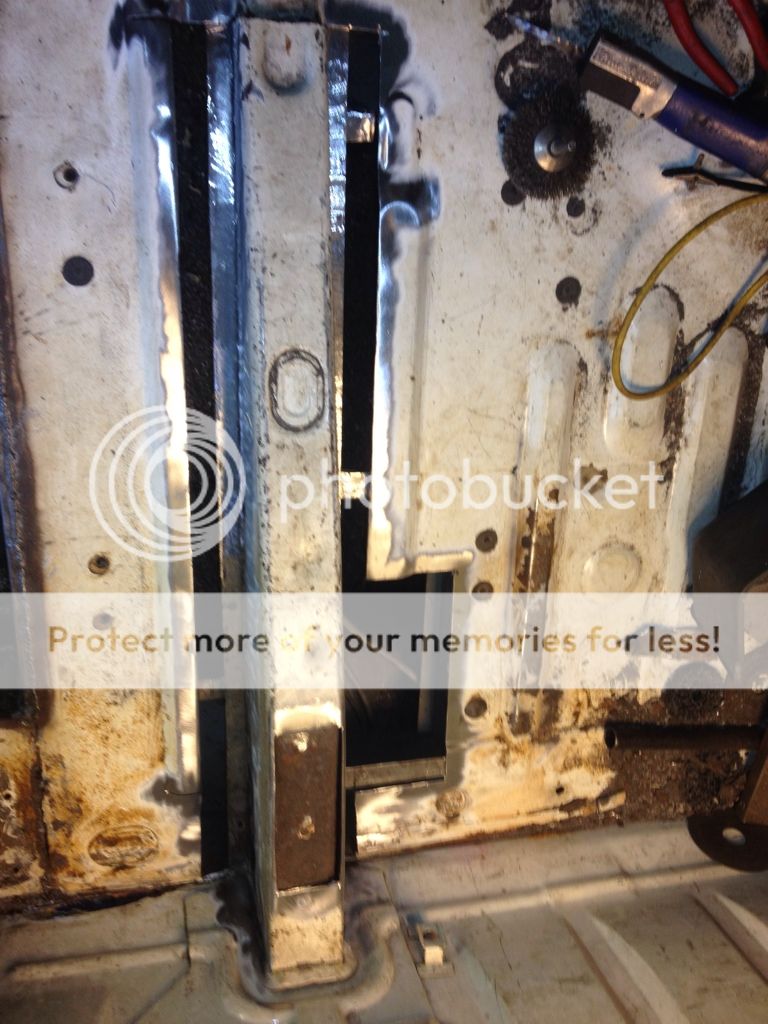

Got one of my customers to fold me up some channel to make this repair a little easier...
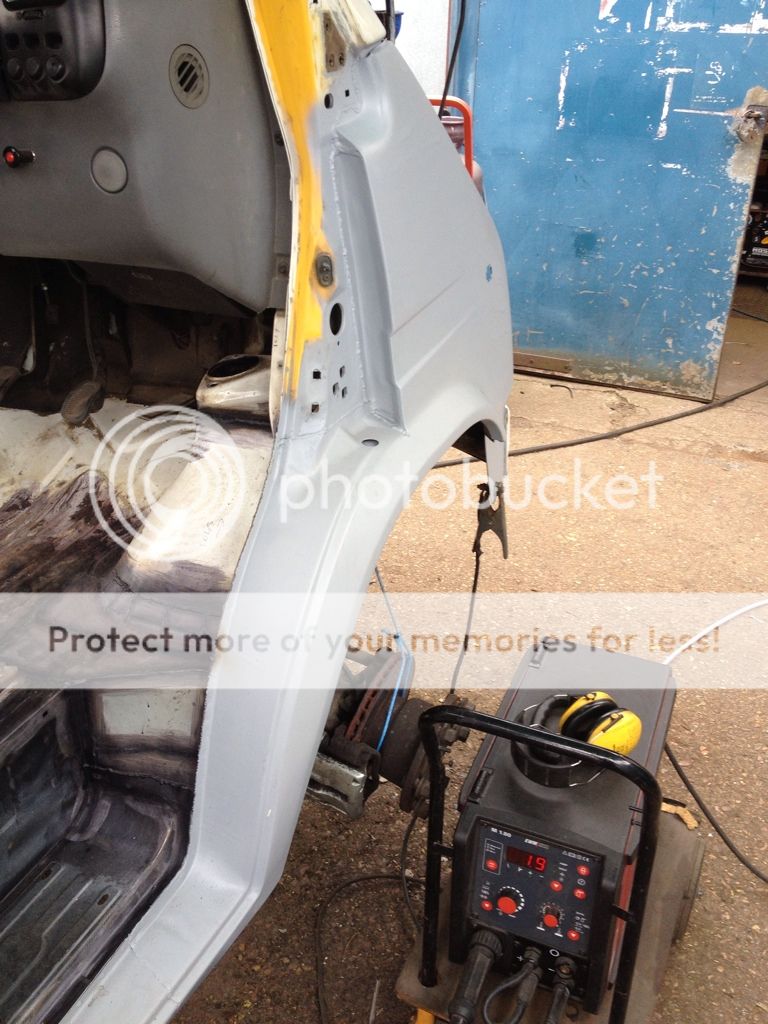
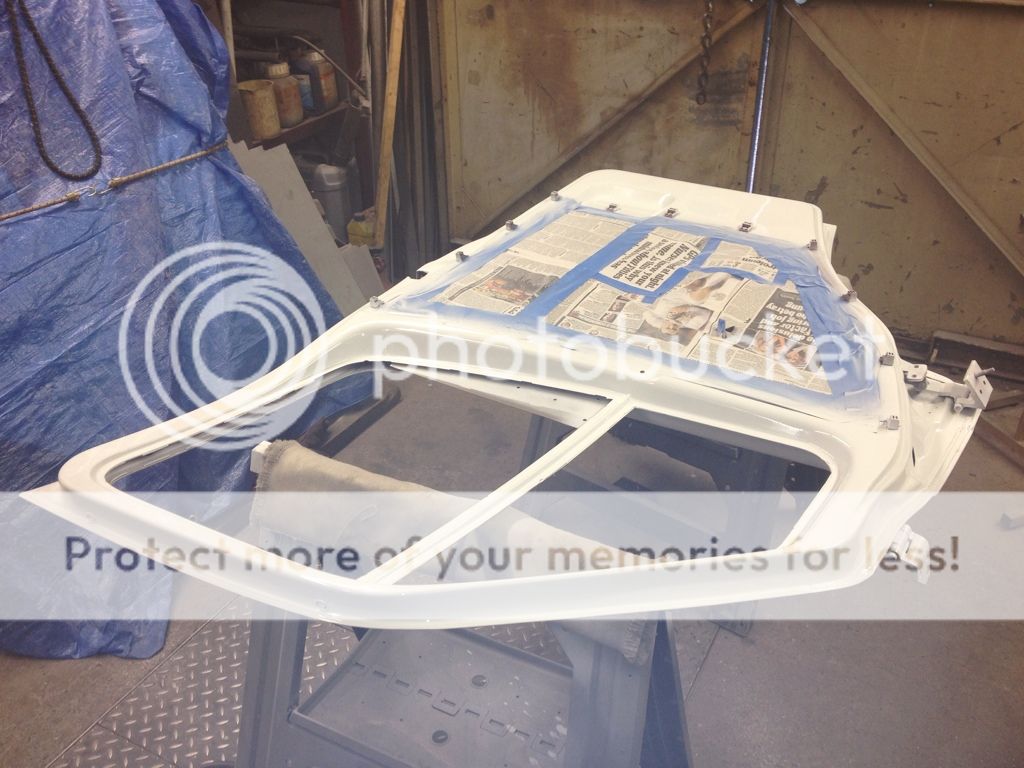
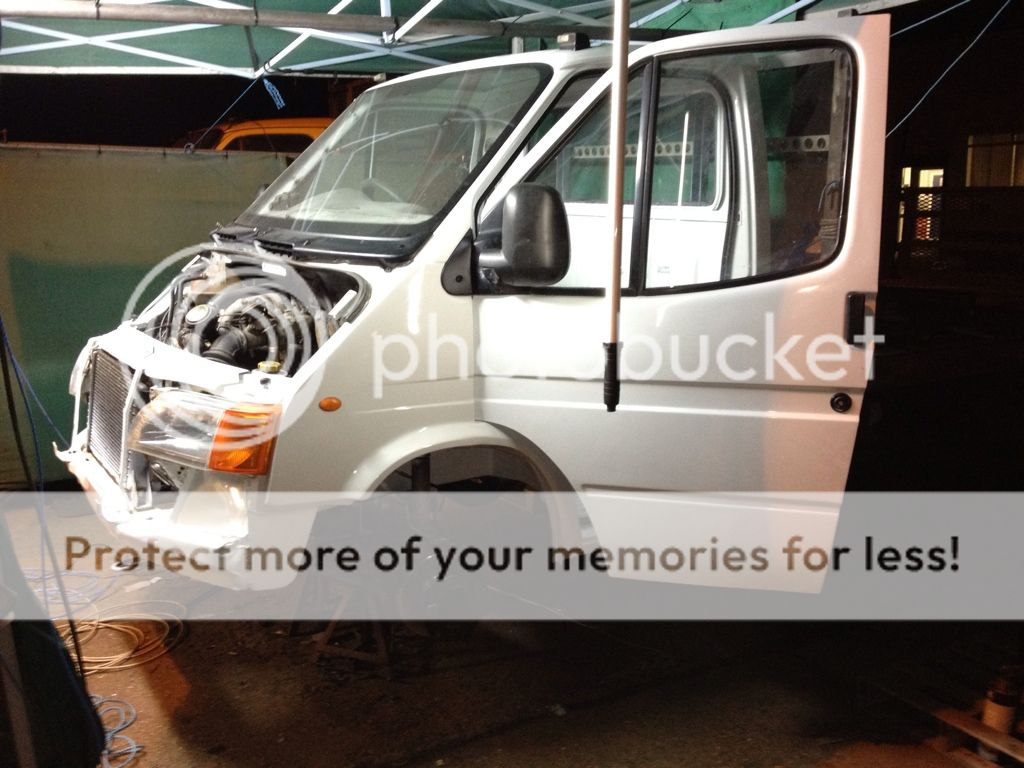
Skipped a few stages and cab is in paint, this was done in November in a tent, no heated booth for me :/


Things always seem a little better once you get to the point paint goes back on.

Had to put some strength back into the rear of the cab...
The nearside arch and step were even worse, accident damage and some really ropey repairs had allowed rust to really go to town...
Nice when you can get bits off the shelf to go straight in without much messing...
Inner wing was rotted all the way round...
Floor of the cab around the chassis rails was pretty far gone from wet ratchet straps left in the cab each winter...
Got one of my customers to fold me up some channel to make this repair a little easier...
Skipped a few stages and cab is in paint, this was done in November in a tent, no heated booth for me :/
Things always seem a little better once you get to the point paint goes back on.
Shedendman
Member
- Messages
- 5,652
Looking good,i'm surprised there wasn't much rot around the top of the suspension strut
Jim Davey
R H Davey Welding Supplies Ltd
- Messages
- 5,653
- Location
- Southampton
There was a fair bit of patching around the strut tops, I didn't take many pictures for some reason, but there is a big overlap of thick and thin metal there and water gets trapped in between and just dissolves the steel.
Jim Davey
R H Davey Welding Supplies Ltd
- Messages
- 5,653
- Location
- Southampton
Might have a few more but mist if the rot was repaired from underneath...


That's probably the smallest patch I put into the old girl")
Next job was to sort the doors, both had some rot and a few big dents so we found some less battered one up the scrappy and set to work, they still had the usuall fatigue crack where the quarterlight pillar meets the door that needed fixing and a few car park dings but nothing major.
Rust had got into the crack so a fair bit needed cutting out in the end...


No picture of it welded but I got a fair bit if shrinkage repairing it like that (this is pretty much my first propper stab at bodywork so I'm learning as I go)
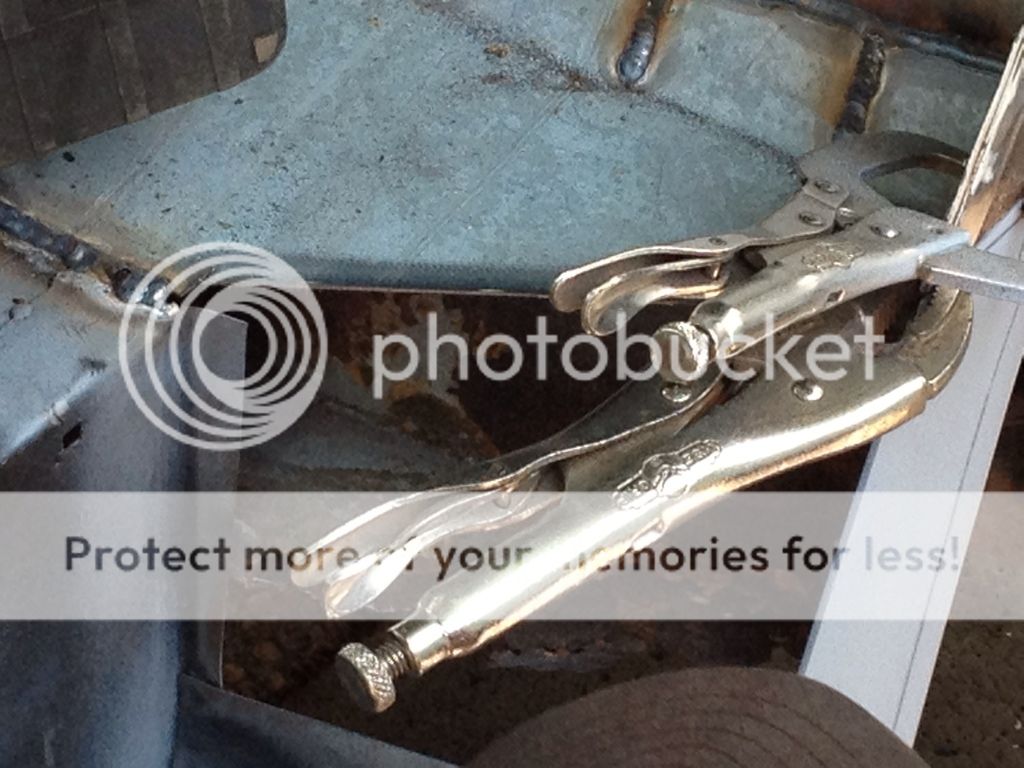
On the second door I decided to plug weld in a repair patch from behind to reduce the amount of weld and limit the distortion.

Sawed out the rust in the crack and cleaned it all up both sides as best as I could, formed a patch.

And used a Cleco clip to hold it while I got the patch caught in all four corners.


Then welded the ****** up, in hindsight I'd wait a little longer and aloe it to cool as I still got a bit of shrinkage which puts a little wrinkle in the door skin requiring laborious filling (which I hate) but at least the crack shouldn't come back.

Door in primer after filling and sanding, primer is a barrier coat as I wasn't sure of the origin of the old paint and didn't want any reactions.

Next some high build...

Then on with the 2K...


Got a little reaction here from some panel wipe that soaked into the filler but it was easy enough to flat down and cover with another coat later.

Will post up some more for those of you with rust fetishes later
That's probably the smallest patch I put into the old girl
Next job was to sort the doors, both had some rot and a few big dents so we found some less battered one up the scrappy and set to work, they still had the usuall fatigue crack where the quarterlight pillar meets the door that needed fixing and a few car park dings but nothing major.
Rust had got into the crack so a fair bit needed cutting out in the end...
No picture of it welded but I got a fair bit if shrinkage repairing it like that (this is pretty much my first propper stab at bodywork so I'm learning as I go)
On the second door I decided to plug weld in a repair patch from behind to reduce the amount of weld and limit the distortion.
Sawed out the rust in the crack and cleaned it all up both sides as best as I could, formed a patch.
And used a Cleco clip to hold it while I got the patch caught in all four corners.
Then welded the ****** up, in hindsight I'd wait a little longer and aloe it to cool as I still got a bit of shrinkage which puts a little wrinkle in the door skin requiring laborious filling (which I hate) but at least the crack shouldn't come back.
Door in primer after filling and sanding, primer is a barrier coat as I wasn't sure of the origin of the old paint and didn't want any reactions.
Next some high build...
Then on with the 2K...
Got a little reaction here from some panel wipe that soaked into the filler but it was easy enough to flat down and cover with another coat later.
Will post up some more for those of you with rust fetishes later
Jim Davey
R H Davey Welding Supplies Ltd
- Messages
- 5,653
- Location
- Southampton
More reassembly


Getting it all to line up after so much welding and a few previous shunts was interesting but the fit ended up ok.

Bonnet hinges still aren't right but they were way out before we got anywhere near it.


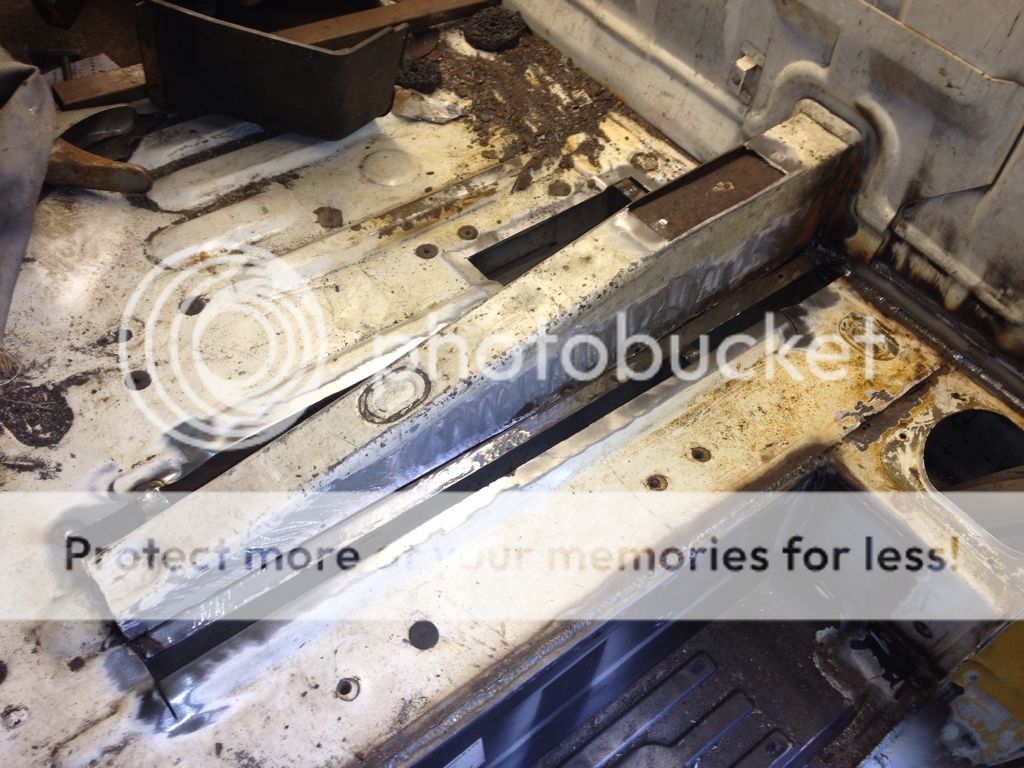
Then came the chassis, the legs were rotten all along the bottom both sides. The fix we settled upon involved cutting out the rust and folding up some new channel section to weld in. I did not enjoy this part but at least chassis welding allows you to get the amps up and travel a bit instead of the maddeningly slow spot spot spot pace dictated by thin panel work.


Some of repair section...


Pipe stands make really excellent axle stands

More surgery, you can see the double thickness in the bottom of the rails, this along with all the regularly spaced holes in the chassis legs formed a perfect place to trap moisture. We blocked off all unnecessary holes this time around bit swaged down a few drain holes in the newly repaired legs to allow any water that gets in to get out too.


Wire wheel on a grinder and a dousing with bilt hamber rust treatment.

Getting it all to line up after so much welding and a few previous shunts was interesting but the fit ended up ok.
Bonnet hinges still aren't right but they were way out before we got anywhere near it.
Then came the chassis, the legs were rotten all along the bottom both sides. The fix we settled upon involved cutting out the rust and folding up some new channel section to weld in. I did not enjoy this part but at least chassis welding allows you to get the amps up and travel a bit instead of the maddeningly slow spot spot spot pace dictated by thin panel work.
Some of repair section...
Pipe stands make really excellent axle stands
More surgery, you can see the double thickness in the bottom of the rails, this along with all the regularly spaced holes in the chassis legs formed a perfect place to trap moisture. We blocked off all unnecessary holes this time around bit swaged down a few drain holes in the newly repaired legs to allow any water that gets in to get out too.
Wire wheel on a grinder and a dousing with bilt hamber rust treatment.
AndyStobbs
Member
- Messages
- 2,475
- Location
- North West England
Nice work there Jim. Only just spotted this thread. Suprised at how far gone it is, I look after an early 80's Bedford CF2 for its owner (as in I do the work on it) and only in the last 3 years have I shown it the welder. Just a few patches on chassis rails. The cab is still together but suspect when the rust finally breaks through it will be a big job.
Shedendman
Member
- Messages
- 5,652
Very nice work Jim,would you mind if i post the link to this on another forum i'm with,might show the "that'll do" or the "yer i can weld"people how it should be done


