


You are using an out of date browser. It may not display this or other websites correctly.
You should upgrade or use an alternative browser.
You should upgrade or use an alternative browser.
Thanks Everyone,
- Thread starter redwine300
- Start date
Chickenjohn
Morris Minor and Porsche 944 fan
- Messages
- 1,283
- Location
- East Kent
Sorry to say ytre that I do not have a plasma cutter, All my panels are cut by hand from flat sheet.As for the final paint job, I will attempt some of it my self and see how I get on.
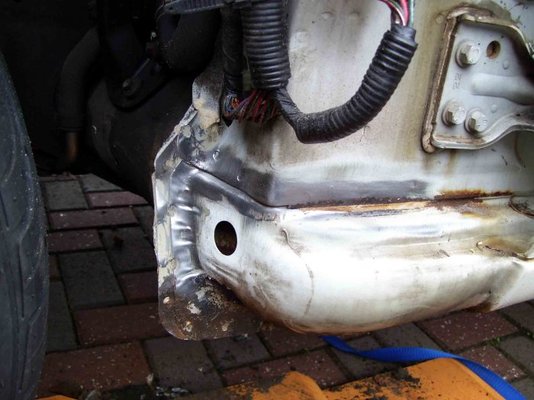
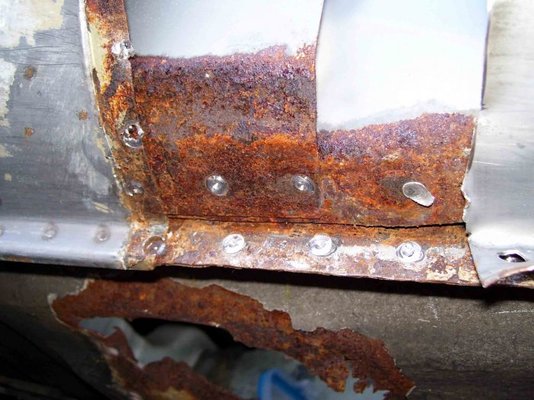
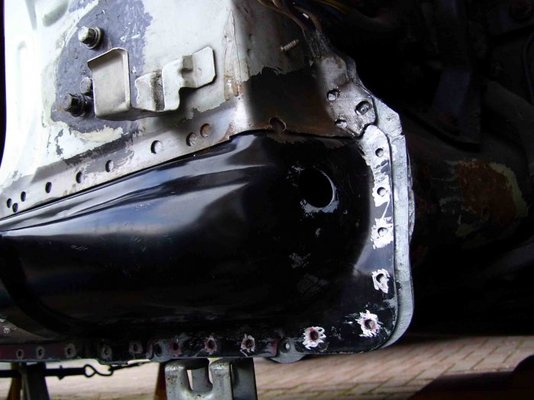
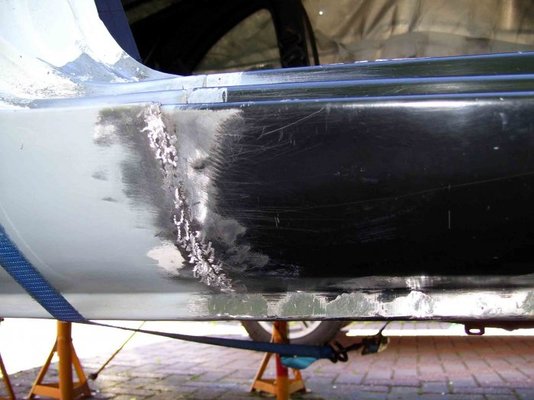
I managed to get the plug welding finished off today without starting a fire,
the first 2 went OK but the third was a little poor. the sound of the weld just went from sizzle to a buzzzzz and formed a large blob.
Any thoughts anyone? By the way chickenjohn thanks for the tip regarding the jack idea, worked a treat.

Glad the tip worked well!

No need to use a plasma cutter to cut repair sections, tin snips are the preferred tool- more accurate and neater!
As for the plug welds going wrong at the last one- well at least you got the top and bottom sheets welded- at that point despite the glitch- so no worries. Upside down welding lying on your back under the car is very difficult and uncomfortable, so it will go wrong sometimes- good welding is about seeing the job and feeling comfortable and relaxed- both difficult under a car!
All I can suggest looking at the pics is that the two sheets might have moved apart slightly around the plug weld. Next time, move the jacked rod close to the plug weld hole each time you make a new plug weld to ensure the top and bottom pieces are firmly clamped close around the hole. This will help the plug go better. If there is a gap, the weld can tend to pool on one piece rather than join both, especially when plug welding underneath the car. Maybe, also turn the wire speed and amps up a little when welding upside down as gravity is against you during upside down welding. You also need to keep cleaning the inside of the welding nozzle when welding upside down as splatter falls back into the nozzle. If not cleared, this can cause problems.
I think the job is looking great! Keep up the good work- keep the posts and pics coming, really enjoy reading this stuff. And do have a go at painting the repairs and ask questions here, as some of us have a bit of paint experience too.
redwine300
Silly Rabbit
- Messages
- 308
Thanks Chickenjohn for your comments and advice, I agree with being comfortable and relaxed when welding upside down. I was cramped and uncomfortable and should have made more of an effort in positioning myself, Another lesson learnt.
 I should have as you say, taken the time to re-position the jack as I went from plug weld to plug weld. I will have remember to take more time in preparation as I only get one first chance at the weld itself. Just impatience i think. I am about ready to plug weld the outer front sill in to position, so all of your advice will come in very useful as there are many plugs to weld and i really want to get them right. Thanks again for taking an interest guy's and if there are any more pointers before i start welding, hopefully at the weekend, please let me know. i would hate to mess up at this stage.
I agree with being comfortable and relaxed when welding upside down. I was cramped and uncomfortable and should have made more of an effort in positioning myself, Another lesson learnt. I should have as you say, taken the time to re-position the jack as I went from plug weld to plug weld. I will have remember to take more time in preparation as I only get one first chance at the weld itself. Just impatience i think. I am about ready to plug weld the outer front sill in to position, so all of your advice will come in very useful as there are many plugs to weld and i really want to get them right. Thanks again for taking an interest guy's and if there are any more pointers before i start welding, hopefully at the weekend, please let me know. i would hate to mess up at this stage.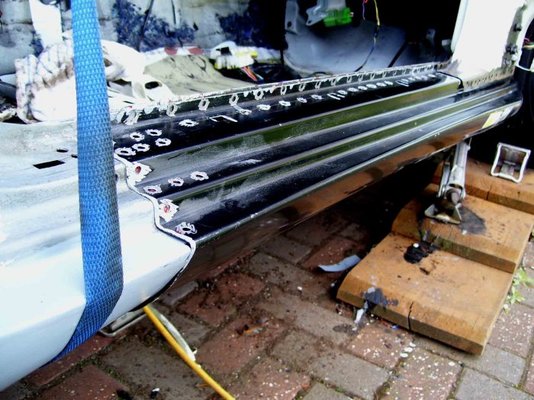
Chickenjohn
Morris Minor and Porsche 944 fan
- Messages
- 1,283
- Location
- East Kent
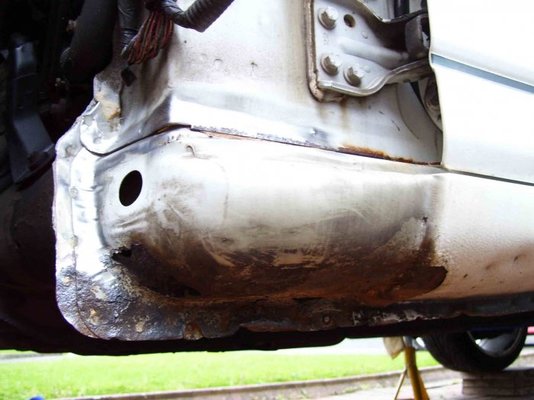
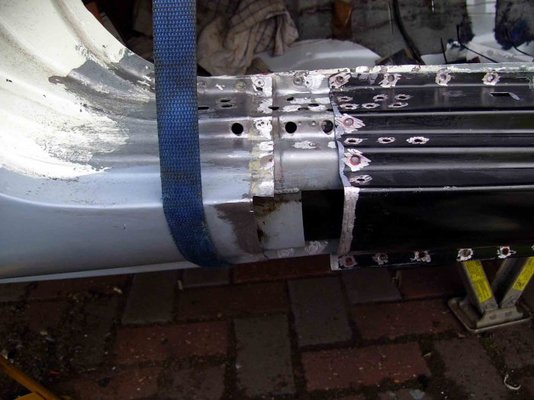
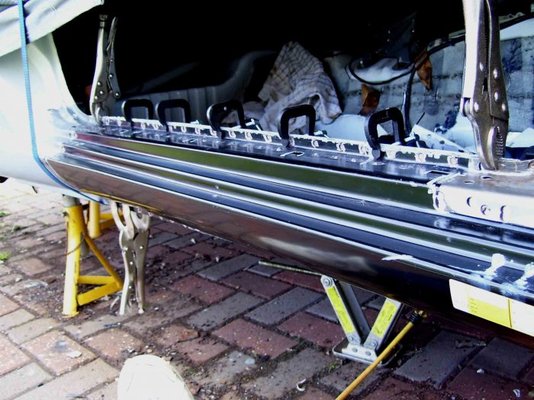
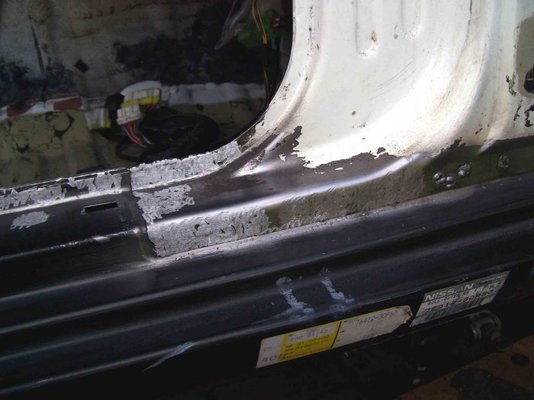
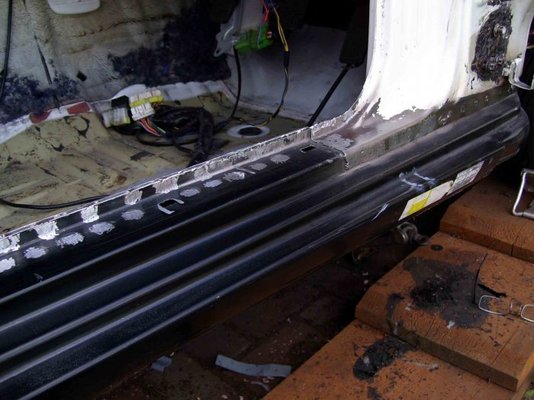
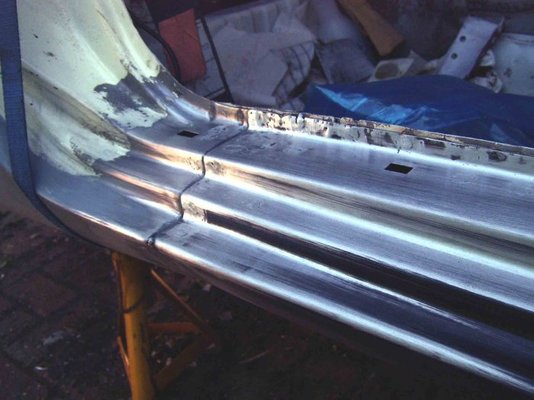
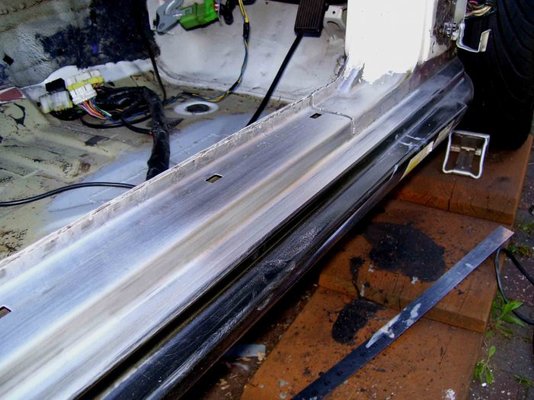
OK, just a couple of comments looking at that pic- has the sill gone as far forward as it needs to go? Just looking at the front edge of it- or maybe it is meant to go on like that.
Before welding the sill fully on, I would test fit the door and wing- to make sure you can still get decent even panel gaps. Other than that it is looking like a good fit, maybe this is where you can use self tapping screws to hold the sill down tight, where you cannot get clamps in there. There is also some brown there- I would wire brush off all the rust , treat with rust remover and zinc weld thru prime before plug welding the sill on.
Before welding the sill fully on, I would test fit the door and wing- to make sure you can still get decent even panel gaps. Other than that it is looking like a good fit, maybe this is where you can use self tapping screws to hold the sill down tight, where you cannot get clamps in there. There is also some brown there- I would wire brush off all the rust , treat with rust remover and zinc weld thru prime before plug welding the sill on.
redwine300
Silly Rabbit
- Messages
- 308
As you say chickenjohn, on the face of it, it does appear that way but it is by design, I have attached some photo's of original sill for interest. Very good point about fitting the wing and door, I will do as you suggest before final welding. After my experience with panels not being pulled together, If I can not clamp I will screw together as you say, every other plug weld? or is that excessive? I suppose it depends on how the faces come together. I will make sure all the mating faces are free from rust etc' and as for weld through primer, will 90% zinc do and not affect the weld?
Chickenjohn
Morris Minor and Porsche 944 fan
- Messages
- 1,283
- Location
- East Kent
Hi Redwine, a self tapper or self drill screw every other plug weld is fine- should hold the panel tight to the car. 90% zinc primer is fine, although to avoid it intefering with the weld, once the panel is clamped on tight, scratch/scrape the paint out of the plug weld holes. This will avoid spitting and most of the zinc will still be in place in the overlap between the plug weld holes.
pedrobedro
Man at Matalan
- Messages
- 13,141
- Location
- CX near Chesterfield
redwine300
Silly Rabbit
- Messages
- 308
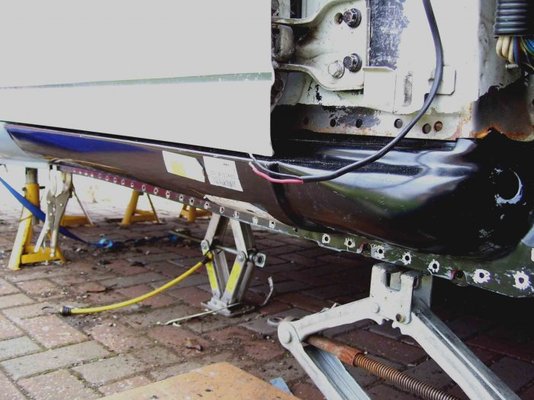
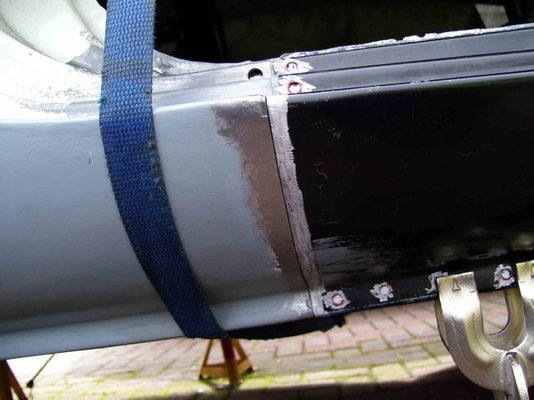
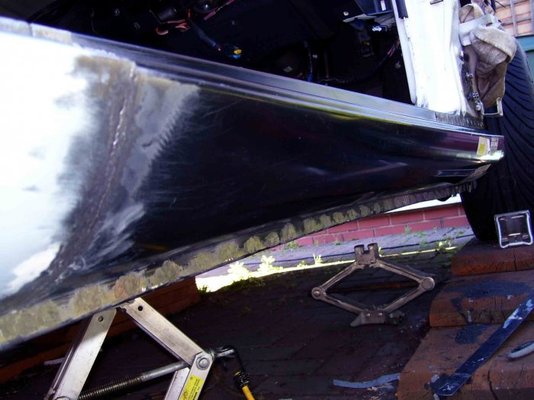
Thanks again Chickenjohn, Wrestled with door today and managed to get it mounted so as to obtain a reasonable gap, not quite as good as original but good enough I think. (may look better with some white on the black?) I pre fitted the sill as well and managed to get clamps to all areas.( by the way,thanks for the link Pedrbedro ) Hope to fully prime with 90% zinc tomorrow and as Chickenjohn said, grind back at the welded areas for good contact.
Wrestled with door today and managed to get it mounted so as to obtain a reasonable gap, not quite as good as original but good enough I think. (may look better with some white on the black?) I pre fitted the sill as well and managed to get clamps to all areas.( by the way,thanks for the link Pedrbedro ) Hope to fully prime with 90% zinc tomorrow and as Chickenjohn said, grind back at the welded areas for good contact.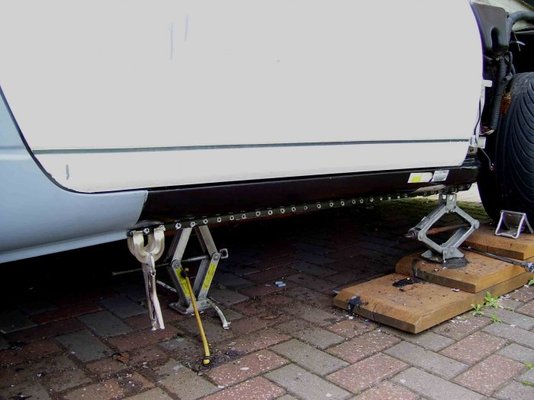
redwine300
Silly Rabbit
- Messages
- 308
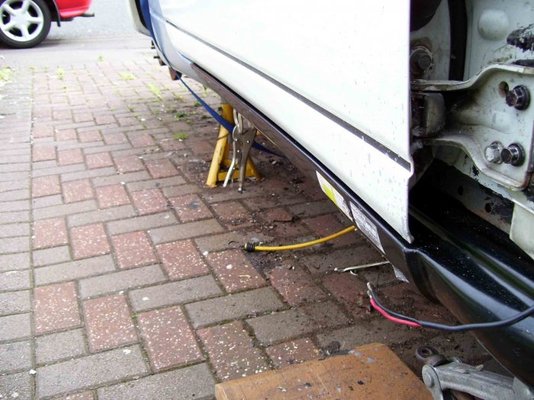
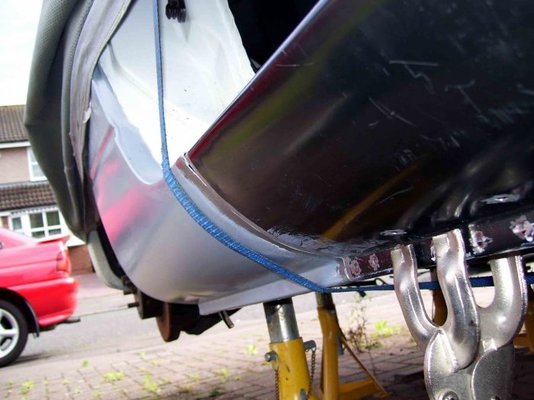
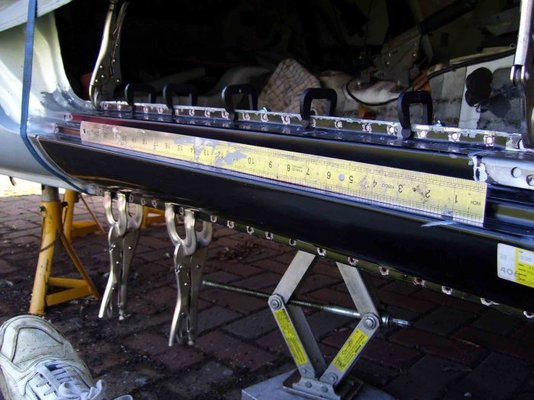
Weather beat me to it today, Just about ready to start tacking on the outer sill and the heavens opened up. Still, has given me time to consider the options as regards to how to approach the pattern of tack welds. So guy's, will you please take a look and suggest the best approach so as to minimise movement and distortion etc' Also, I have varying thickness' of panels (multiple layers) and I want to be sure I get a strong weld as well as a neat looking one, Should I work on the premise that for each millimetre of panel I use, the higher the power setting? IE 1mm=1A 2mm=1B etc' (Clarke te135 by the way)
Just about ready to start tacking on the outer sill and the heavens opened up. Still, has given me time to consider the options as regards to how to approach the pattern of tack welds. So guy's, will you please take a look and suggest the best approach so as to minimise movement and distortion etc' Also, I have varying thickness' of panels (multiple layers) and I want to be sure I get a strong weld as well as a neat looking one, Should I work on the premise that for each millimetre of panel I use, the higher the power setting? IE 1mm=1A 2mm=1B etc' (Clarke te135 by the way)-
 03052010 A.jpg86.2 KB · Views: 1,111
 -
 03052010 B.jpg60.5 KB · Views: 1,103
 -
 03052010 C.jpg70.9 KB · Views: 1,111
 -
 03052010 D.jpg59.8 KB · Views: 1,108
 -
 03052010 E.jpg65.3 KB · Views: 1,092
 -
 03052010 F.jpg93.4 KB · Views: 1,094
 -
 03052010 G.jpg80.6 KB · Views: 1,133
 -
 03052010 H.jpg64.5 KB · Views: 1,117
redwine300
Silly Rabbit
- Messages
- 308
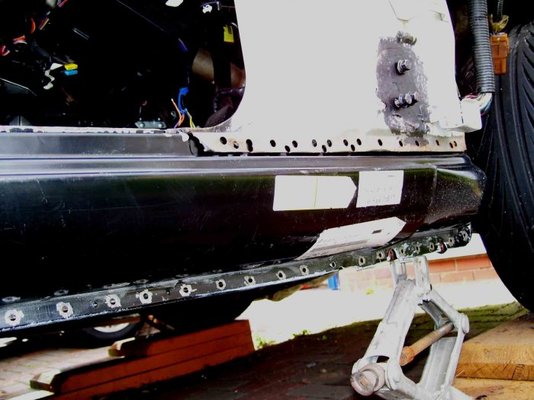
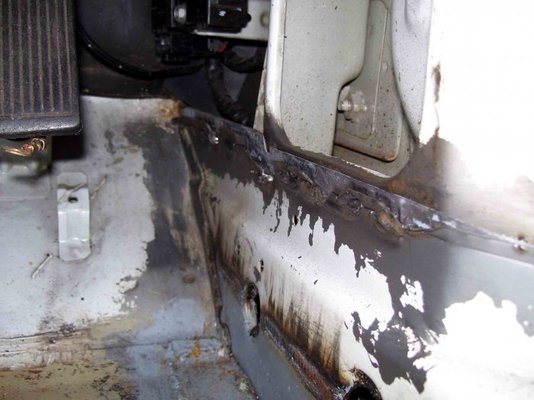
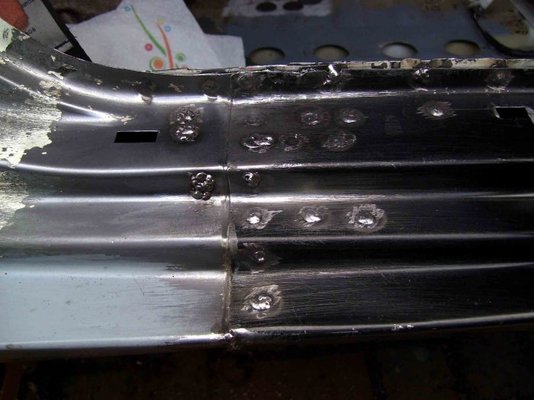
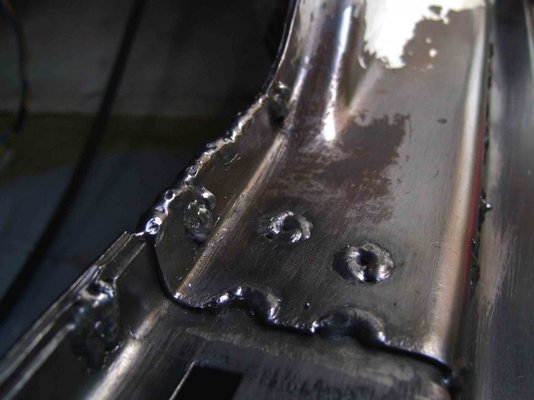
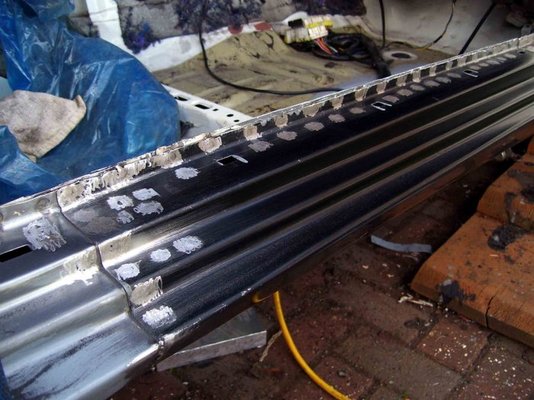
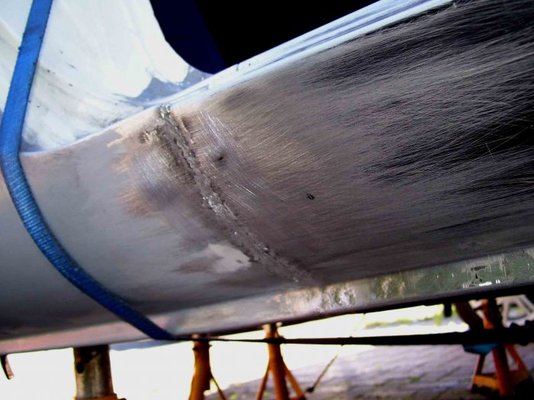
Made some good progress today, Managed to weld 2 thirds of the outer front sill, A combination of settings due to the varying thicknesses of metal tested me a bit but managed to get what I think are strong welds, What do you guy's think? Suffered again with this strange phenomenon when welding upside down and came up with the conclusion, that gravity affects the molten wire from coming into contact with the object panel, Therefore builds up a blob in mid air. I may be wrong though. Added a few photo's of todays efforts for interest, feel free to comment.
")
Managed to weld 2 thirds of the outer front sill, A combination of settings due to the varying thicknesses of metal tested me a bit but managed to get what I think are strong welds, What do you guy's think? Suffered again with this strange phenomenon when welding upside down and came up with the conclusion, that gravity affects the molten wire from coming into contact with the object panel, Therefore builds up a blob in mid air. I may be wrong though. Added a few photo's of todays efforts for interest, feel free to comment.
redwine300
Silly Rabbit
- Messages
- 308
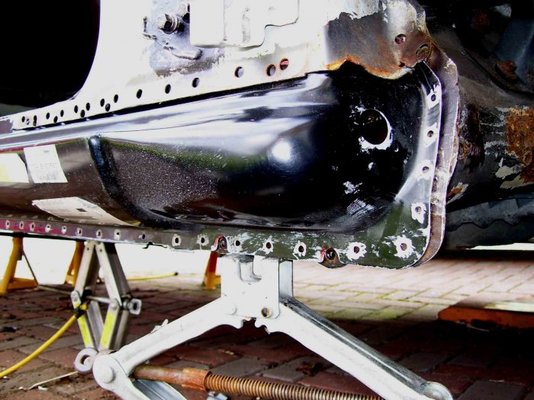
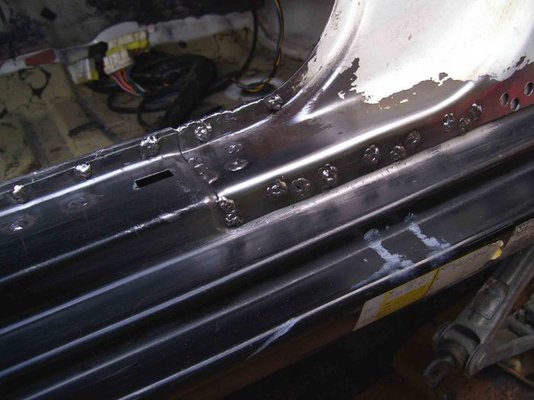
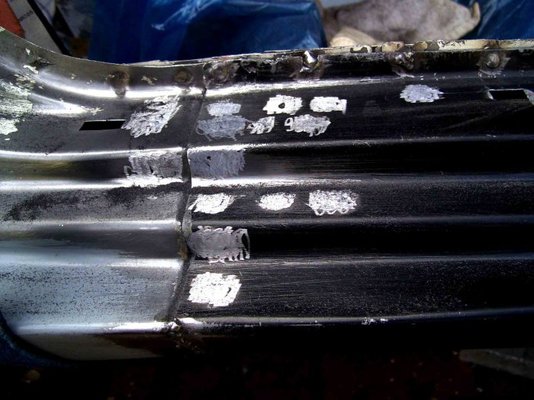
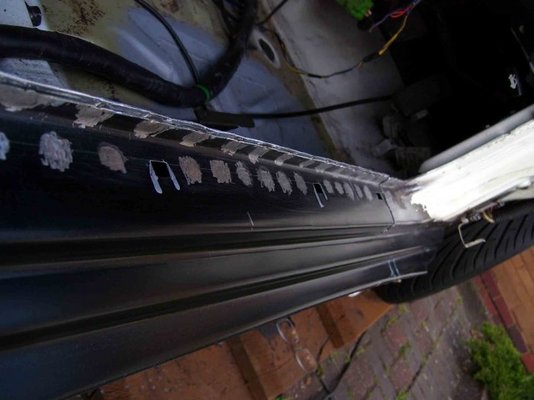
Well at the risk of being boring, I managed to finish off welding the front outer sill today. Then set about the thankless task of grinding back the welds ready to prep with filler and primer. Got fed up after a while though, so will have to finish off next weekend. Thought you might like to see some photos of my progress, (for a change )
)
I managed to finish off welding the front outer sill today. Then set about the thankless task of grinding back the welds ready to prep with filler and primer. Got fed up after a while though, so will have to finish off next weekend. Thought you might like to see some photos of my progress, (for a change)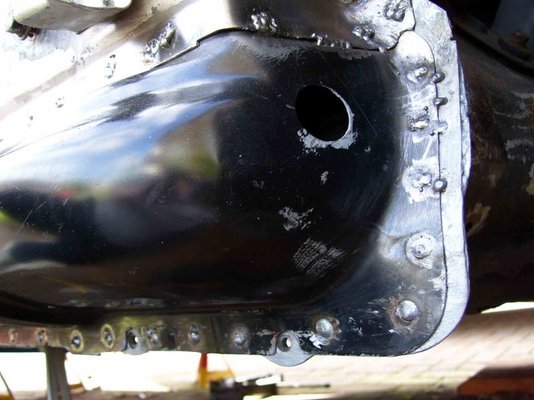
Spot the welders dog
Member
- Messages
- 580
- Location
- smoggy town
Hi Redwine300
I've been popping in to your thread since the start and am duly impressed with what you have acceived to date.
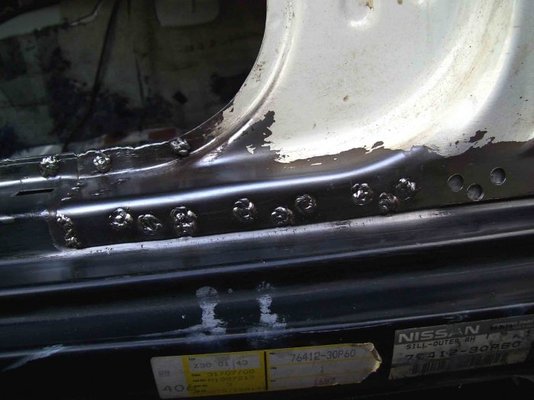
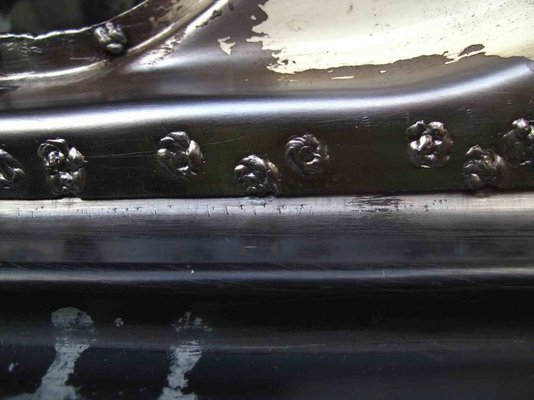
I do have one suggestion however about the spot-welds: Do you bump the power/wire up on your rig when 'spotting'?
Have you tried starting the spot from the center of the lower panel, holding the torch momentarily untlil you see a weld pool, then draw the weld out in a spiral motion toward the top panel.
Appologises if I'm reading the pictures wrong, but it does seem that you are starting the welds on the top panel and walking the weld around this.
Also - just looking back at the pics reminded me of something else
Have you considered seam welding the closing ends of the sills. Closing these areas that are hidden could improve on the factory finish and preserve your hard work for longer...
Interesting project - well done
I've been popping in to your thread since the start and am duly impressed with what you have acceived to date.
I do have one suggestion however about the spot-welds: Do you bump the power/wire up on your rig when 'spotting'?
Have you tried starting the spot from the center of the lower panel, holding the torch momentarily untlil you see a weld pool, then draw the weld out in a spiral motion toward the top panel.
Appologises if I'm reading the pictures wrong, but it does seem that you are starting the welds on the top panel and walking the weld around this.
Also - just looking back at the pics reminded me of something else
Have you considered seam welding the closing ends of the sills. Closing these areas that are hidden could improve on the factory finish and preserve your hard work for longer...
Interesting project - well done
Chickenjohn
Morris Minor and Porsche 944 fan
- Messages
- 1,283
- Location
- East Kent
Hi Redwine300
I've been popping in to your thread since the start and am duly impressed with what you have acceived to date.
I do have one suggestion however about the spot-welds: Do you bump the power/wire up on your rig when 'spotting'?
Have you tried starting the spot from the center of the lower panel, holding the torch momentarily untlil you see a weld pool, then draw the weld out in a spiral motion toward the top panel.
-snip-
I agree, this is the best way to make a plug weld- start in the middle on the lower panel and spiral out.
And I agree- the work is going very well, looks great! Keep us updated.
redwine300
Silly Rabbit
- Messages
- 308
Hi Spot the welders dog, Firstly, many thanks for taking an interest and taking the time to add you much valued advice and comments, I do bump up the power and feed when spotting, but as yet have not been able to master the spiralling out from the middle, everything happens so damn fast. My technique, (if you can call it that) is more of firing the weld dead centre and letting it fill out wards naturally, not the best i know.
As you said, some of my plug welds have been done more in the way of an overlap method, this has mainly been down to my poor technique and that the lower panel has sometimes been considerably thinner than the one above, especially at the A pillar to sill area where the sill goes behind the thicker steel. I am not saying this is the correct way, just something i was able to manage so as to hopefully achieve some strength in the weld.
Also, I like you idea of seam welding at the closing areas of the sills etc' I will put that into place soon. Any additional comments you guy's would add to mine above would be most welcome. good or bad
I do bump up the power and feed when spotting, but as yet have not been able to master the spiralling out from the middle, everything happens so damn fast. My technique, (if you can call it that) is more of firing the weld dead centre and letting it fill out wards naturally, not the best i know. As you said, some of my plug welds have been done more in the way of an overlap method,
this has mainly been down to my poor technique and that the lower panel has sometimes been considerably thinner than the one above, especially at the A pillar to sill area where the sill goes behind the thicker steel. I am not saying this is the correct way, just something i was able to manage so as to hopefully achieve some strength in the weld.Also, I like you idea of seam welding at the closing areas of the sills etc' I will put that into place soon.
Any additional comments you guy's would add to mine above would be most welcome. good or badredwine300
Silly Rabbit
- Messages
- 308
Took your advice Spot the welders dog, and welded the leading edge of the outer sill today. I wish my welding was as good as the advice though. I have a feeling that i am over compensating for my limited ability with too higher wire speed. Probably making everything happen to quickly and preventing a more flatter weld. looks like a bit more grinding. now that i have more of a feel for MIG welding I think I will do some test pieces over the next few days with different speeds.
I wish my welding was as good as the advice though. I have a feeling that i am over compensating for my limited ability with too higher wire speed. Probably making everything happen to quickly and preventing a more flatter weld. looks like a bit more grinding. now that i have more of a feel for MIG welding I think I will do some test pieces over the next few days with different speeds.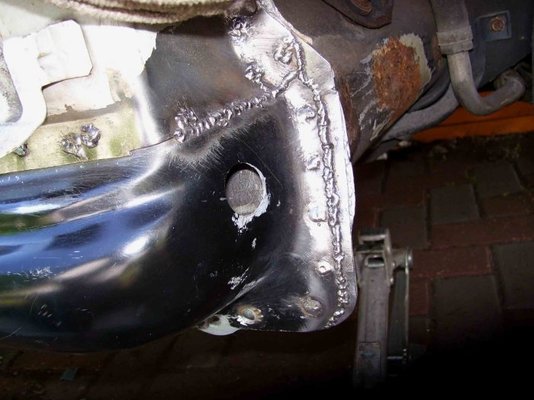
redwine300
Silly Rabbit
- Messages
- 308
Hi Moggy, Appreciate the interest and compliments. As for the rust treatment. I sware by hydrate 80 by Bilt Hamber, super stuff!! They also do a very good acid etch primer and an excellent 90% zinc primer also. As for wax-oyl I again turn to, you guessed it, Bilt Hamber dynax s-50. realy is the best in my opinion. I will be using it throughout.
As for the rust treatment. I sware by hydrate 80 by Bilt Hamber, super stuff!! They also do a very good acid etch primer and an excellent 90% zinc primer also. As for wax-oyl I again turn to, you guessed it, Bilt Hamber dynax s-50. realy is the best in my opinion. I will be using it throughout.redwine300
Silly Rabbit
- Messages
- 308
Hi Moggy, The majority of the main welding is almost done. However, there are some areas around the rear arches and some more on the inner front arches. My aim at the moment is to get her back on her wheels and re fit the interior so I can run the engine up. Once that is done I will tackle the arches. The end goal is to go for a total re spray and chip the engine a little. (400 bhp should do.)
However, there are some areas around the rear arches and some more on the inner front arches. My aim at the moment is to get her back on her wheels and re fit the interior so I can run the engine up. Once that is done I will tackle the arches. The end goal is to go for a total re spray and chip the engine a little. (400 bhp should do.)Sphinx
Member
- Messages
- 198
I've just read through every page of this (when I say read I mean looked at the pictures and absorbed some of the words)
It's really impressive what you've done here! You've no need to get down at all with any of your work! it's all a learning curve and you've done bloody well so far in my opinion.
I read your comments about upside down welding causing the molten weld not to reach the surface properly, did you ever overcome this? becuase I've had that problem.


