
You are using an out of date browser. It may not display this or other websites correctly.
You should upgrade or use an alternative browser.
You should upgrade or use an alternative browser.
New Tig.. Lorch HT200
- Thread starter Brad93
- Start date
Brad93
Member
- Messages
- 19,430
- Location
- Essex, United Kingdom
Still working fine on AC.
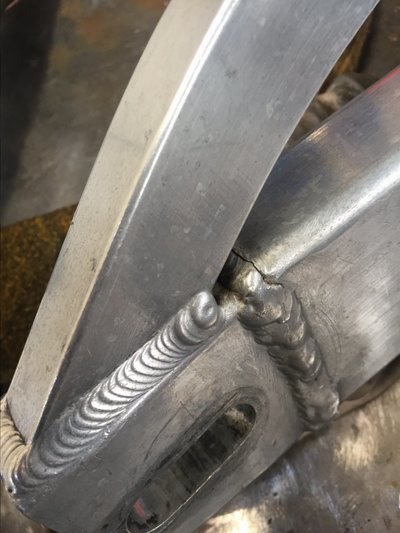
Honda RS Two Stoke Swingarm Repair
7020 Alloy. Constructors manual recommends 5356.
First photo shows the damage previously repaired. Not sure what happened but bike has taken a proper knock at some point. Done with a MIG.
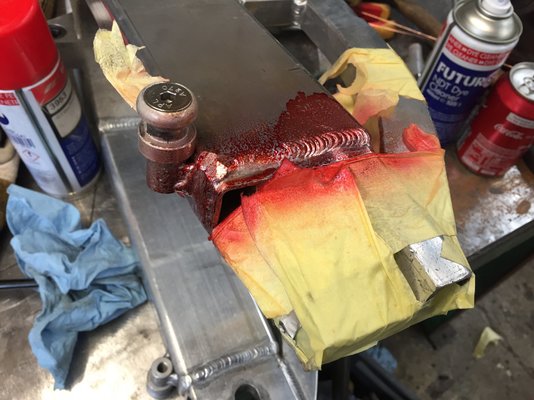
Second photo I ground the mig weld off and dye penetrant tested.
Front weld was fine and found how far the cracks went so got the carbide burr out and got to work.
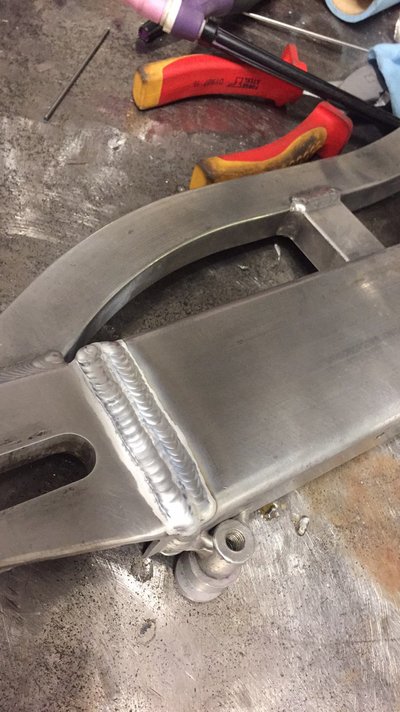
Last photo is end result in the back.
Honda RS Two Stoke Swingarm Repair
7020 Alloy. Constructors manual recommends 5356.
First photo shows the damage previously repaired. Not sure what happened but bike has taken a proper knock at some point. Done with a MIG.
Second photo I ground the mig weld off and dye penetrant tested.
Front weld was fine and found how far the cracks went so got the carbide burr out and got to work.
Last photo is end result in the back.
Richard.
Member
- Messages
- 18,335
- Location
- Cambridgeshire
Nice job Brad. I get plenty of those to do in the summer months from my mental track matesStill working fine on AC.
Honda RS Two Stoke Swingarm Repair
7020 Alloy. Constructors manual recommends 5356.
First photo shows the damage previously repaired. Not sure what happened but bike has taken a proper knock at some point. Done with a MIG.
Second photo I ground the mig weld off and dye penetrant tested.
Front weld was fine and found how far the cracks went so got the carbide burr out and got to work.
Last photo is end result in the back.
Brad93
Member
- Messages
- 19,430
- Location
- Essex, United Kingdom
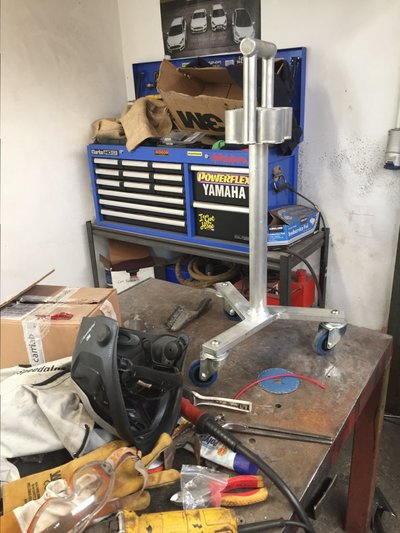
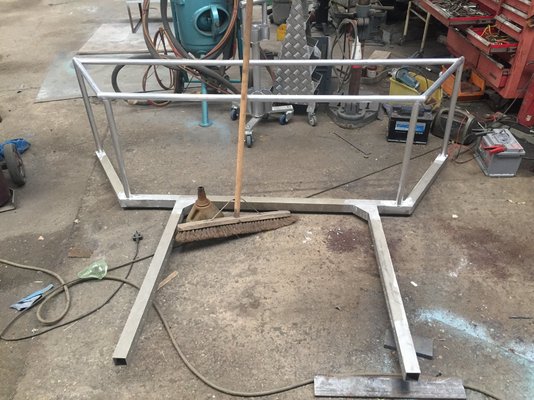
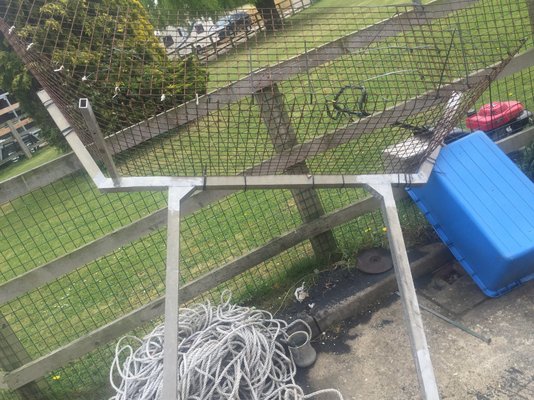
Finished the new shiny part on this frame late last night, it's a weed collector that my angling club had me knock up out of some scrap some years ago. Needed some support for the mesh that goes on it. The whole thing mounts on a fibreglass boat with a 5hp motor.
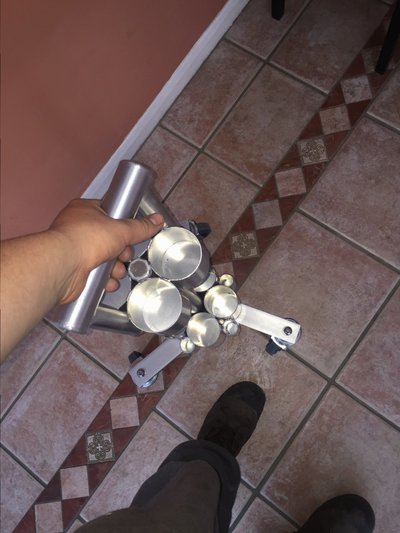
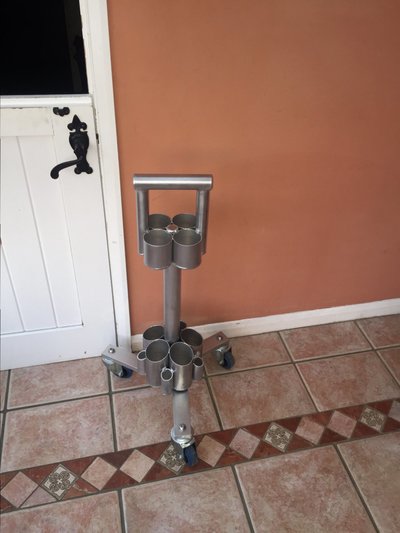
Went to survey/price up a job this morning then cracked on finishing this toolbox and giving it a polish with various grades of scotchbrite.
Went to survey/price up a job this morning then cracked on finishing this toolbox and giving it a polish with various grades of scotchbrite.
@Xup sorry this is the thread with all the bits done with the Handytig the other thread was aimed more at the Micorstick
Ha! NP there are bikes in this thread
")
You have made some nice stuff Brad.
I've PM'd you Brad, but I'll ask here as well, On the Lorch torch socket 5 pin plug, I need to know which are pin 4 and pin 5 to bridge them in the front panel socket to stop the E05 error code.
Using a pedal with no torch switch connected to the front panel gives me E05 code and shuts off welding.
Using a pedal with no torch switch connected to the front panel gives me E05 code and shuts off welding.
Cheers Brad, Sorted it,....took the supplied Lorch torch plug to bits, for others it might be of help so.....from the locating tab on the socket on the front panel, it goes clockwise 1 to 5, 4-5 are the last 2 before the location tab.
I jumped/bridged 4/5 on the front panel socket problem gone... been welding Alu for the first time ever, well pleased. weld puddle is so much easier to see, but it also runs away from you very quick.
I jumped/bridged 4/5 on the front panel socket problem gone... been welding Alu for the first time ever, well pleased. weld puddle is so much easier to see, but it also runs away from you very quick.
Richard.
Member
- Messages
- 18,335
- Location
- Cambridgeshire
Unless it's specified in the manual I would not be bridging any pins together in the machine or torch.Cheers Brad, Sorted it,....took the supplied Lorch torch plug to bits, for others it might be of help so.....from the locating tab on the socket on the front panel, it goes clockwise 1 to 5, 4-5 are the last 2 before the location tab.
I jumped/bridged 4/5 on the front panel socket problem gone... been welding Alu for the first time ever, well pleased. weld puddle is so much easier to see, but it also runs away from you very quick.
It's a new machine and if you balls it up you could void your warranty.

So as I see it if I wanted to go water cooled I'd have to do the same by bridging the pins, if using a foot pedal as there will be nothing connected to the front panel torch socket.
Pins 4 and 5 are connected together in the supplied Lorch torch plug.
Richard.
Member
- Messages
- 18,335
- Location
- Cambridgeshire
That's good mate. So long as it's in the manual you have no problems.Its in the manual Richard, error E05, " torch monitor in gas cooled operation/ incorrect torch connected(water cooled)/Use gas cooled torch(recognised by bridging between the contacts 4 and 5 on the torch plug) "
So as I see it if I wanted to go water cooled I'd have to do the same by bridging the pins, if using a foot pedal as there will be nothing connected to the front panel torch socket.
Pins 4 and 5 are connected together in the supplied Lorch torch plug.
Richard.
Member
- Messages
- 18,335
- Location
- Cambridgeshire
I must admit I don't like that.
Bad area of design to have to faff about like that if you want to change the torch and run a pedal. My machine the torch and pedal use the same plug so if I want a switch I plug the torch in if I want pedal I plug the pedal in.
Bad area of design to have to faff about like that if you want to change the torch and run a pedal. My machine the torch and pedal use the same plug so if I want a switch I plug the torch in if I want pedal I plug the pedal in.
matt1978
www.lorch.eu
- Messages
- 3,966
- Location
- UK, Cannock
You can access the back ground menu and make it so you don't need to Bridge the pins 4&5.
In days past, before background menus and smart machines etc we set the machines to think they were watercooled in order to look for the return flow and protect the torch.
With gas cooled machines, The machine knew it was gas-cooled because pins 4&5 were always bridged on the 5 pin amphonel on our torches as a standard
However the default setting (to maintain compatibility with all of our older torches on newer machines and new torches on older machines) we kept the default as it was but it can easily be changed
