So, €250 lighter....a guy nearby who breaks these cars had an ad on fbook for this: 
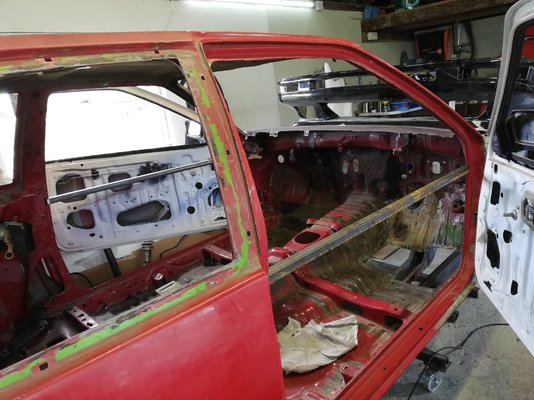
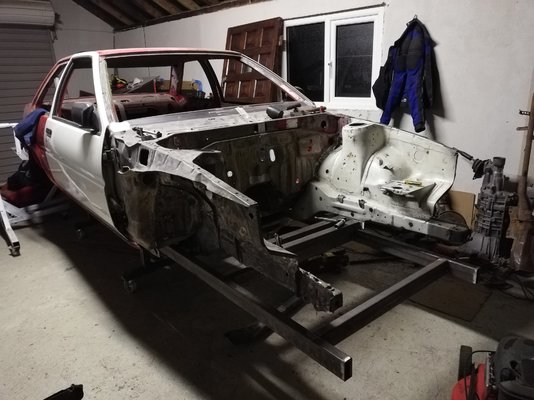
Straight and rust free, no signs of any repairs. 
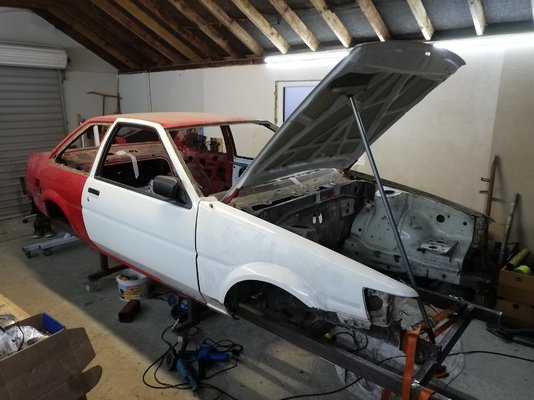
Test fitted the doors after measuring the openings which were slightly out. The passenger door is 100%, a combination of worn hinge and possible movement on the driver's side means it bangs off the striker but can be lifted closed. 
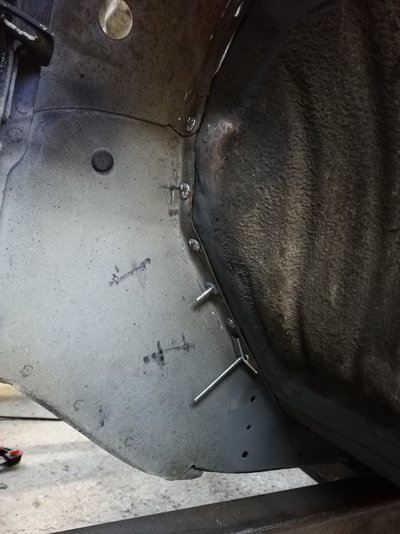
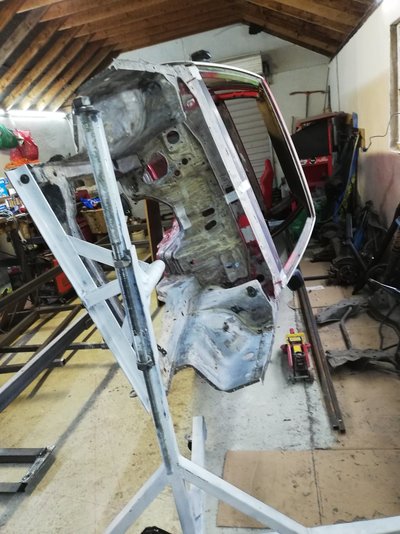
Worth noting that there is still a large hole in the driver's footwell and outrigger not fitted. 
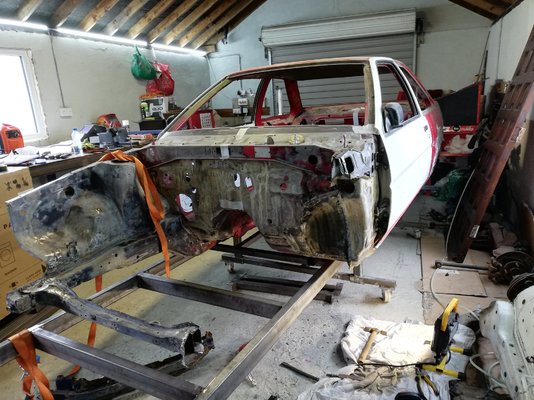
When closed the roof is slightly proud of the door (I'll have to recheck that it's the roof that's proud ) 
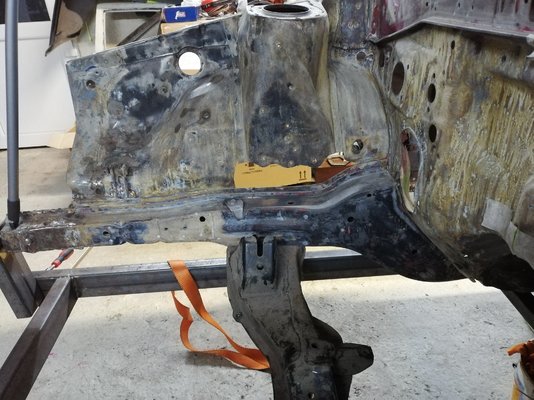
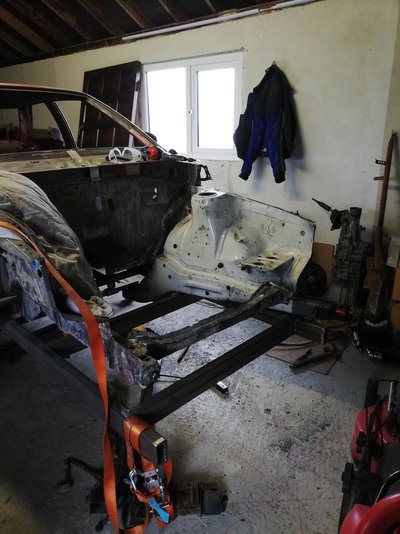
Conclusion: the shell needs to be fixed down straight and true so that my repairs from here on don't leave it twisted Set the wing on for inspiration lol
Found this: And this: After previous financial outlay, the chassis frame with have to wait a week or two, ho-hum!
Great stuff. You are doing a proper job there. It's better to let things stew for a while and be sure, than tear on and regret at leisure. It supposed to be fun but the hard bits give a lot more satisfaction when you've cracked it. Thats my excuse anyway.
Remember this is a project. And possible investment. Well done on finding a leg though. Now with measurements would want to drop check the shell.
... won't be back on this for a while... Very basic braces for door openings, offside door closes better with this one fitted...
Well, I'm still here ... ... A panel beater friend of mine reckoned I should trial fit the chassis leg/apron with a few tek screws and trial fit wings and bonnet before welding anything. A wing is as good as any jig.... maybe on a shell that hasn't suffered at least one collision, but further investigation has revealed that the osf chassis leg has been off some time in the past too, tho it hasn't been subjected to the same amount of butchery is the nsf. I'm becoming increasingly jealous of anyone who has taken on this kind of work on a 'virgin' car as plug welds are horrible when it comes to removing them compared to factory spot welds...
Put some pressure on the offside a-pillar to get the sag out of the driver's door... ... purchased an frp bonnet. Weight saving, rustproof and less than half the price of a good used one swung it for me: Made up a diy tram-guage:
Still making additions to the jig as I go along. It's true to factory specs from rear suspension mounts to points Q and q from the manual, which are the last fixed points before the front chassis legs sleeve over at the bottom of the firewall. I'd considered removing the osf chassis leg and refitting both sides in tandem using my subframe sub-jig and refitting the rad support/light panel/slam panel, but I'm not sure there'd be any benefit.... ...so the above is how it stands now. I've marked the bulkhead where the new chassis leg should meet it; checked that using laser levels with lower corners of the windshield as a datum ....it's fairly close now to where it should be but there's still a gap between it and the firewall. I'm wondering will a few thoughtfully inserted temp tek screws pull it in for welding? Does anyone else use them in this fashion?
a very good and technical job going on here. most is above my vocabulistic apex. nice to know that things will be lined up and set correctly. unique in the diy realm, I would imagine..... JP
So I got the chassis leg/apron temporarily fastened on, ran out of nuts and bolts but just one or two more are required Pulled of the subframe jig and tried a reasonably straight subframe and the bolts dropped right in: result! I have 3 rad supports, all are poor but they're very light anyway. I was going to fab a cross member from some round tube with plates at either end - I could transfer any flanges that are required across... Maybe add gussets. Has anyone any ideas that might help? I was also thinking about a tubular front end bash bar to give added support to the frp bumper/spoiler... though I've no tube bender (maybe that's a job for further on down the road lol)
Cracking job so far. So glad you decided to carry on and do it this way with the jig and bits because this is going to be a ae86 to be super proud of at the end. Rather than the bodged together tat that some are. Be proud of your work
never seen a booted AE86, some excellent work there keep us posted on it love an in depth restoration
As a slight deviation, I decided to take on this little problem. I've known it's been there for a while, but I had no idea how bad it was: ...a couple of evenings after work ... A light coat of weld-thru primer (it's rainy season here dontcha know)... A job for the next day: make some of them
One piece ready with some help from 10mm belt sander to aid fit-up. Good enough for mig I think. The other piece is 1.0mm which I've ordered from buy metal online, so it should be here in a few days
Yes, I use the 4mm countersunk head as you can put a 6mm washer under the head and have movement in them, you can also fill 4mm threaded holes quickly and easily. Don't put yourself down for a lack of experience, where do you suppose experience comes from? actually doing the job, you will know far more then you did before beginning this project.
Just found this thread....great work so far . I think your panel beater friend was spot on with his advice...if the panel gaps look right (without cheating) then you're mostly there. The MR2 front end I did I used a laser measure for checking the measurements and the symmetry. You did well to spot there was an alignment issue...Jap chassis are usually very straight with low tolerances. On the last Figaro I did the door gaps would change when a corner was jacked up....but they were spot on when on all 4 wheels so I did the bracing before jacking it up.