


Anti-Stonechip Primer
Not much is said about anti-stone chip primer on the internet. But I'm a big fan of the stuff. This page covers application, tricks to avoid disasters with the stuff, and techniques for using it on bodywork.
Many of the same techniques also apply to "Underbody Schultz" (underseal) which is sprayed from the same type of gun, though Schultz is not overpaintable.
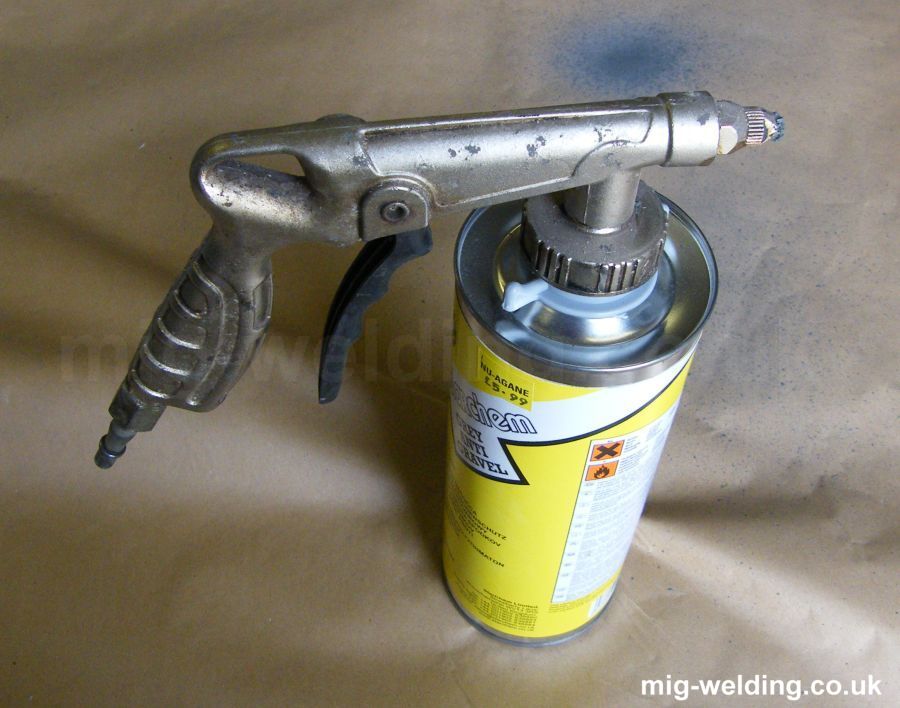
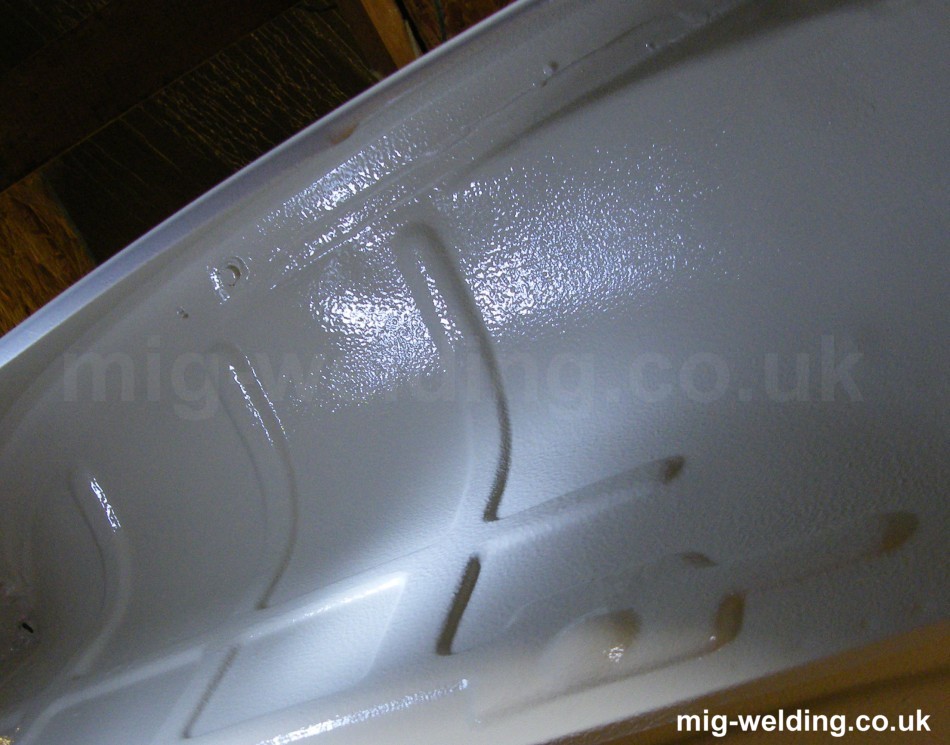
Anti-Stone Chip primer is very effective for under wheelarches and the underside of the car. It's a plasticised coating that remains flexible so stones tend to bounce off rather than chip the paint coating. It's sprayed using a schultz gun (photo) and should go on with a thick rounded orange peel finish.
Even with a cellulose paint overcoat the stuff is effective. I used it in the wheelarches of my MGA over 15 years ago overpainted in cellulose body colour and it's still working fine. Underseal used on later projects has already worn away in exposed areas.
Repairability is better for anti-stone chip than bitumen based underseals - it will overpaint, so no need to remove every last bit when carrying out a repair.
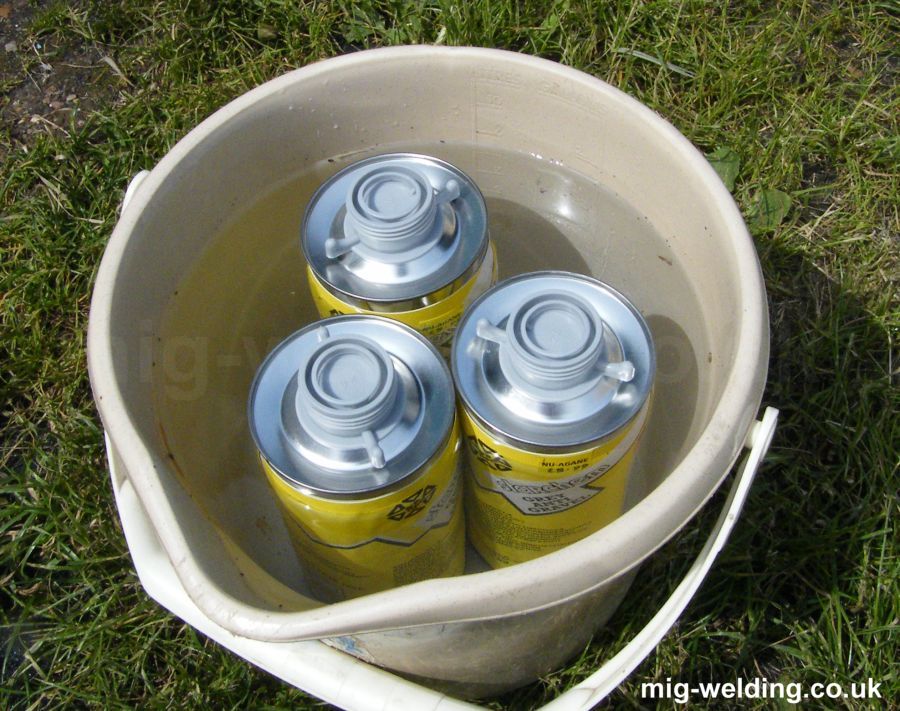
Heating stonechip primer in a bucket of hot water makes it much easier to mix together to an even consistency. The heat also thins the paint so if it goes on too thickly or too dry at the first attempt then heating some more might improve the finish. If the paint ends up too thin then you can correct by reducing the regulator pressure, though I've never managed to get it too thin.
The coverage tends to be around 1 square metre per 1L tin. I used about 4.5 tins to coat the insides of the four wings, the boot floor, and the exposed parts of the sill on my little Renault.
Spray pressures tend to be about 80psi. It'll say on the tin. There's not a big safety margin in the tins. Get the pressure too high (normally above 100psi) and the tin can explode. Failure will normally be in the seam so the pop is more messy than dangerous.
Preparation is important - if it is applied to rusty metal it can lift allowing water behind. Sandblasting is probably the most effective preparation, followed by an effective primer and seam sealing.
I've used 90% zinc primer on this car. It has poor bonding and poor mechanical strength so requires a shot blasted surface and overcoating with anti-stonechip primer to make up for these deficiencies.

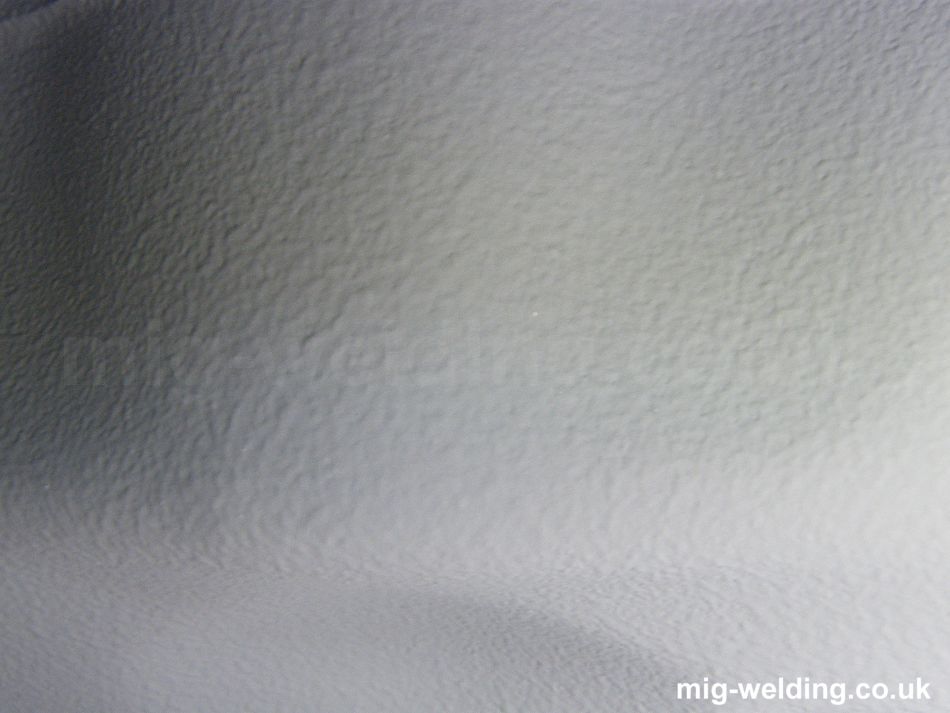
Stonechip should end up roughly like the photo to the left, but there's a major problem with the stuff that has caught me out more than once - you can't stir it in the tins. Anti-stonechip primer has a fairly short shelf life (6 months or so) and it tends to settle to a gloopy mess at the bottom of the tin. No amount of shaking will mix the gloop back in.
90% of the time the paint supplier will sell stonechip primer in good condition and ready to use - just heat it up, shake it a lot, then fit it to the schultz gun and spray.
But it's sensible to check the contents of the first tin in the batch . Heat it, shake it, then decant it into a clean jar. If there's more than 10mm of gloop in the bottom then clean the can out and then refill with the good contents you removed earlier.
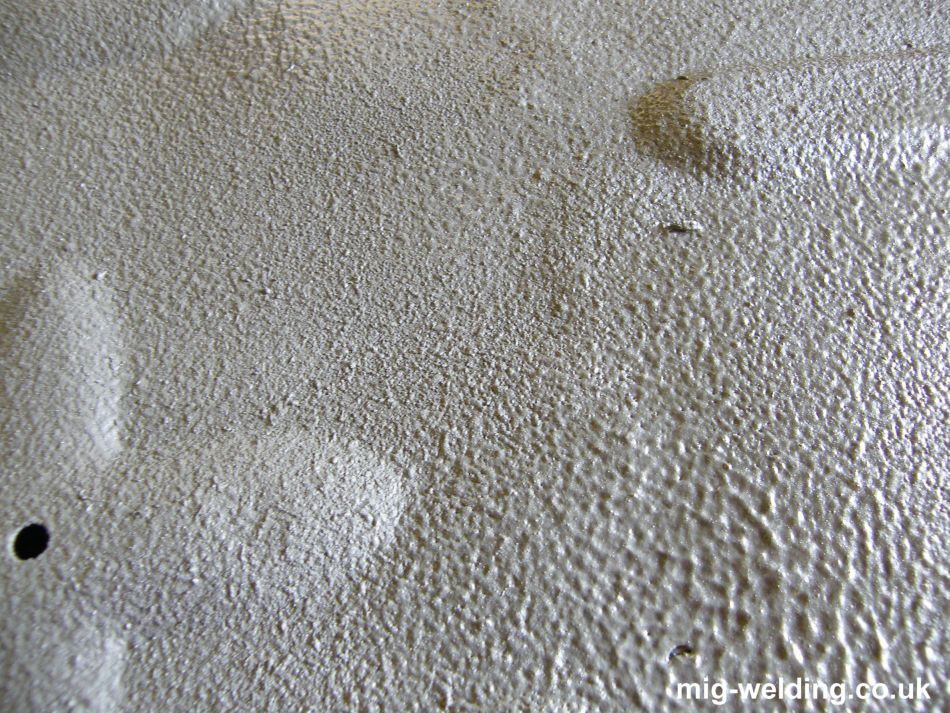
Trying to spray when there's gloop in the bottom leads to disaster as in the photo. The schultz gun sucks from the bottom of the tin and will try to spray the gloop first.
The characteristic things to watch for are dryness and overspray as opposed to the finish in the photo above which went on without any obvious overspray. If you see something like the photo to the right then stop and figure out why. Ask on the forum. Don't just plough on as this stuff is a pain to get off again or put right. I spent a day wet flatting the mess in the photo and the result still annoys me.
Spraying on body panels
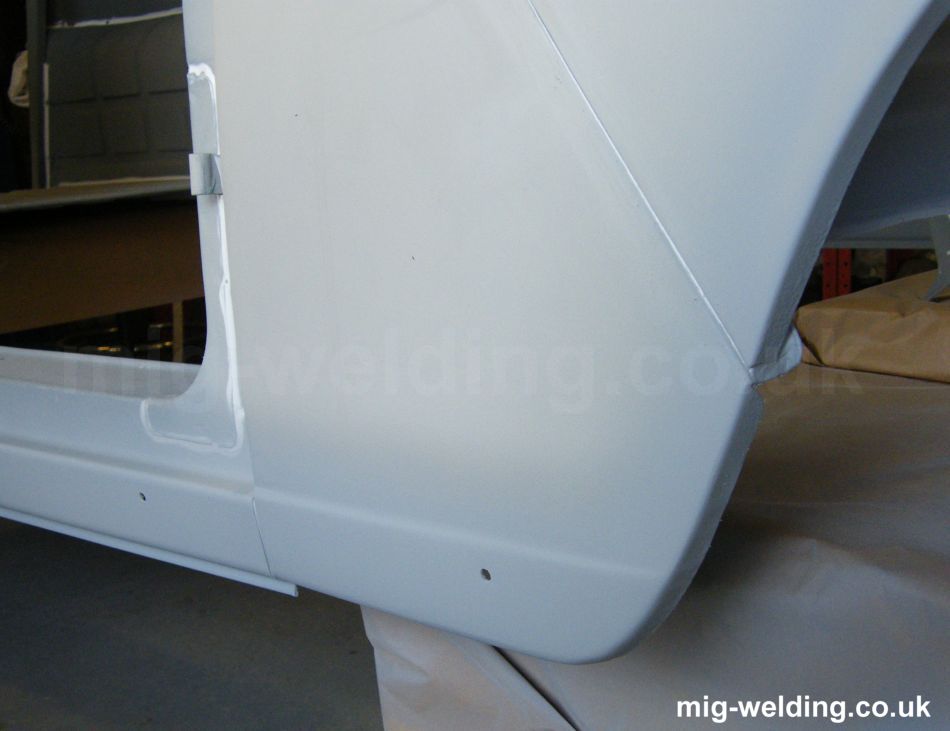
It's a good idea to protect sills and the edges of wheelarches with stonechip primer, but the orange peel finish from a schultz gun is inappropriate for external body parts.
The stonechip primer can be thinned with approximately 1 part paint to 0.7 parts cellulose thinners, then sprayed with a conventional spray gun. I've coated the edges of the wheelarch, the front, and the sills on this car.
This technique can cause trouble with solvent popping if the primer is sprayed too thickly. The finish is quite thick and fairly flat, and the stonechip primer and overspray can be sanded to a smooth finish prior to overcoating.
Overpainting
For the underside it's best to spray top coat colour directly over the stonechip primer. At £30 per litre (2008 prices) it's an expensive way of finishing the underneath, but dirt falls off the gloss finish very easily making the underside very easy to keep clean, and the covering will last for years.
A high gloss finish on top of highly orange peel primer can look nasty in the wrong light. There's not a lot of light underneath a car, and anyone unfortunate enough to get a good look will probably have other things on their mind at the time.
For outer sills that weren't originally finished in stonechip I would flat sand the stonechip or thin it down as above and flat sand before colour.
Downsides of anti-stonechip paint
The main downside is (like other underbody coatings) if water finds it's way behind the coating it will be trapped and cause rust - stonechip can stay in place and look great while rust works it's way behind it. Generally this will happen when the panel has rusted through from the other side at a seam, though over time (20years or so) the primer can harden and crack allowing water behind. Thorough seam sealing is the best protection against this sort of problem, and any lifting around seams should be investigated and corrected before it causes a problem.


