


Spray Painting Technique
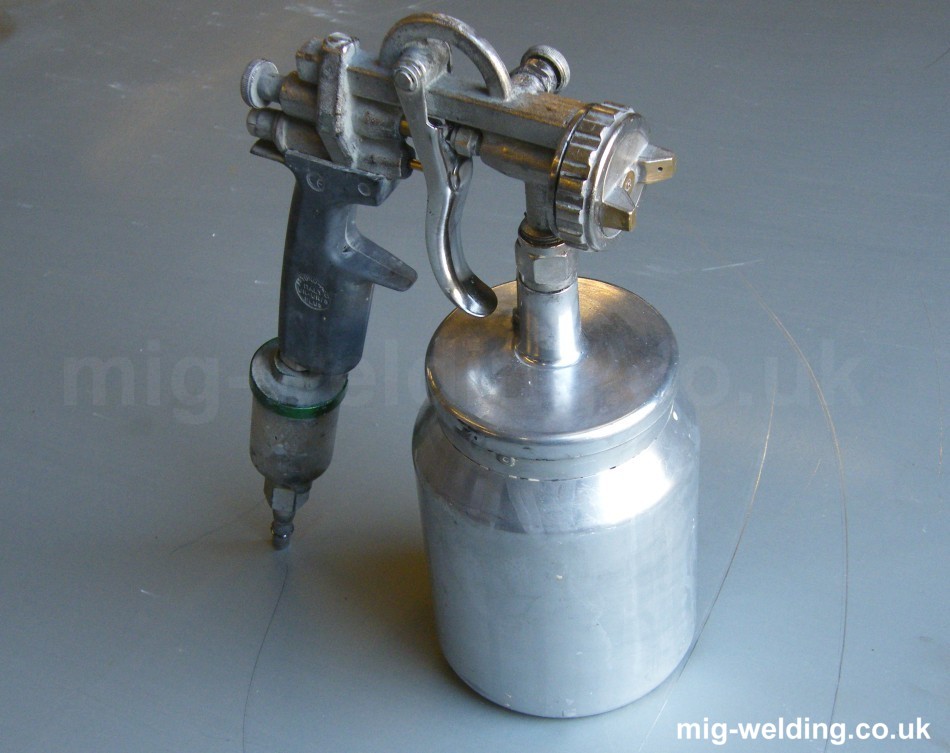
Spray gun
A reasonable quality spray gun makes it much easier to achieve a flat finish without drips.
I started spraying with a spray gun that came in a pack of air tools for £20. It didn't seem to atomise very well so paint tended to go on thickly with orange peel. That was my first spray gun and it was years before I realised that others could be so much better.
I'd avoid second hand guns completely - there is too much that can go wrong with them. A good paint shop should be able to supply a reasonable gun for around £60, and will be able to match the nozzle size to the type of paint you want to spray. I'm naughty and use a 1.4mm nozzle for everything.
Others on the forum have upgraded from my level of gun to something like a Devilbiss JGA, and report that it becomes even easier to achieve a excellent straight from the gun. Buy the best spray gun you can afford.
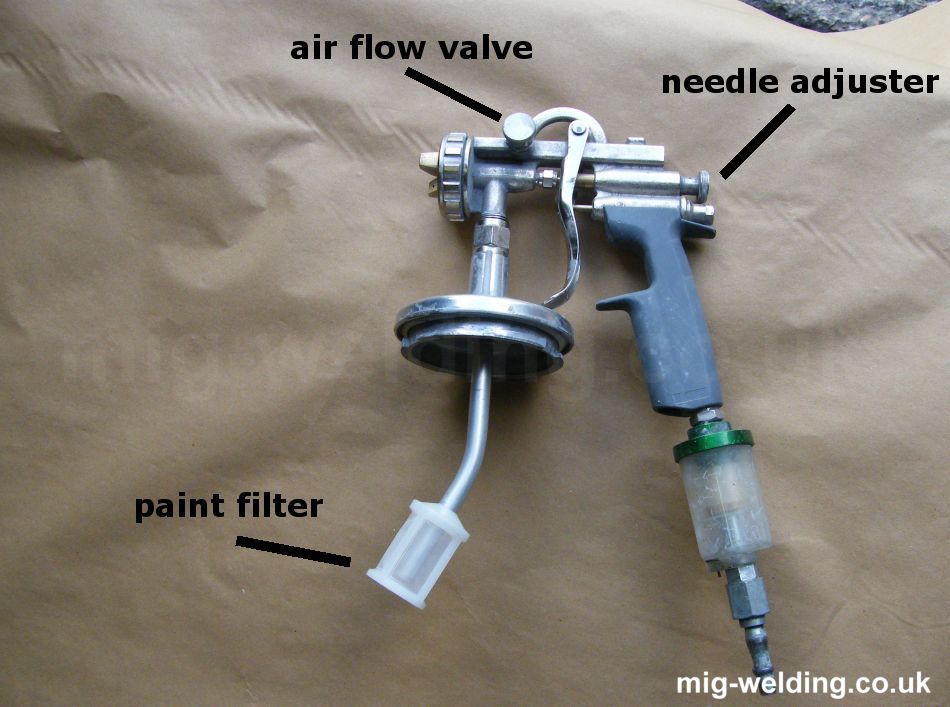
Always use a paint filter on the pick up tube. You'll have bits of hard paint from the edge of the tin fall into the pot, and these would end up as splats on the panel if they were not filtered out. The paint filter can be left in place and is washed in the gun washing process. It lasts for a long time.
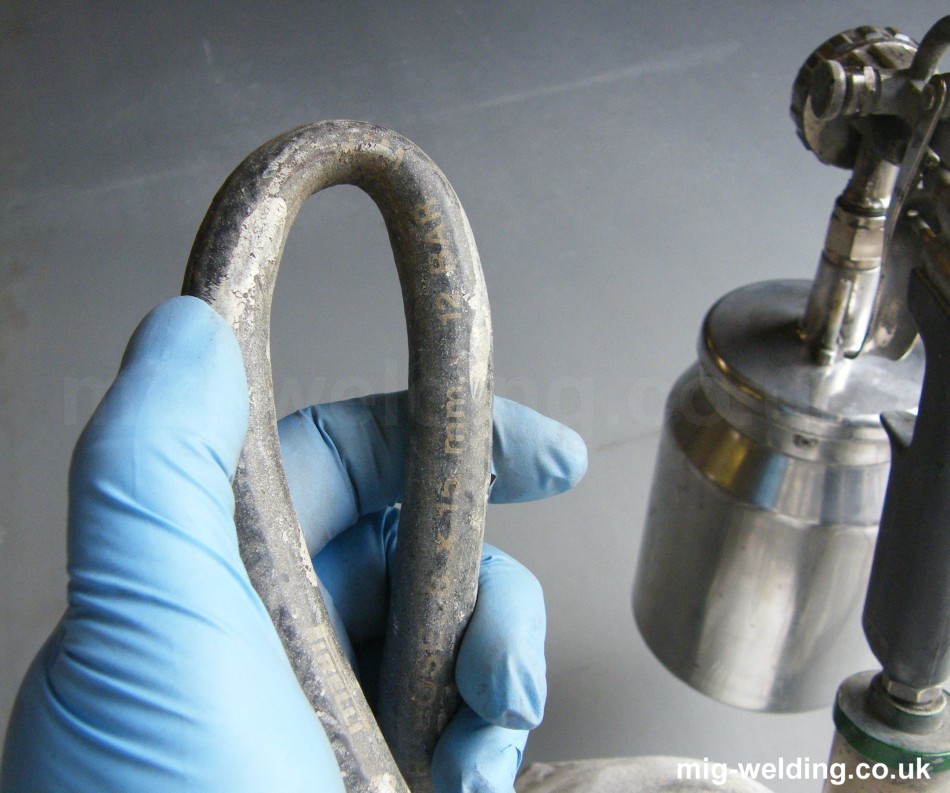
The angle of the pickup tube can be altered by loosening the nut at the top. Here it's set forwards to pick up the last of the paint when painting the top surface of a panel. For painting underneath a vehicle I'd turn it the other way around so save having to refill the pot while it's still half full. It can only sensibly be adjusted on a clean gun rather than in mid paint.
Mixing techniques
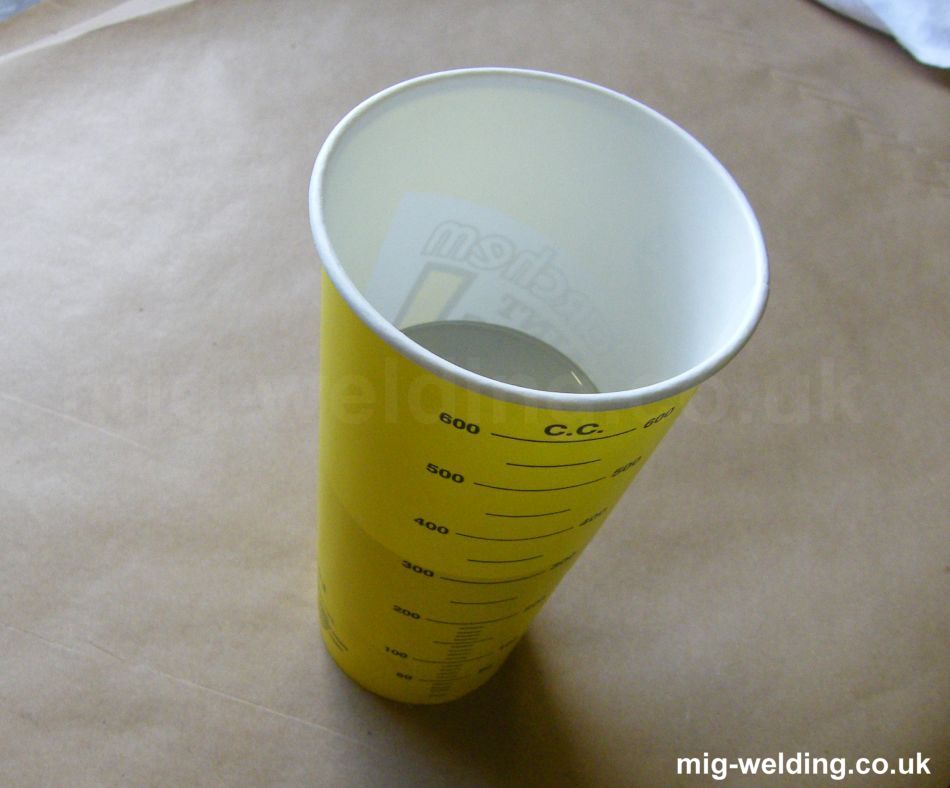
Accurately mixing paint is critical to success. A dip stick is surprisingly inaccurate, but disposable mixing cups work well.
Most DIY sprayers will simply mix the paint to the manufacturer's recommended ratio. The paint shop will be able to advise the appropriate ratios for the paint. Disposable mixing cups can help maintain a reasonable level of accuracy.
The exact mix can depend on the spray gun. I found my first (cheap and nasty) spray gun was much happier when I added extra thinners as that got around some of the atomisation problems, but any decent spray gun ought to be happy at the recommended mix.
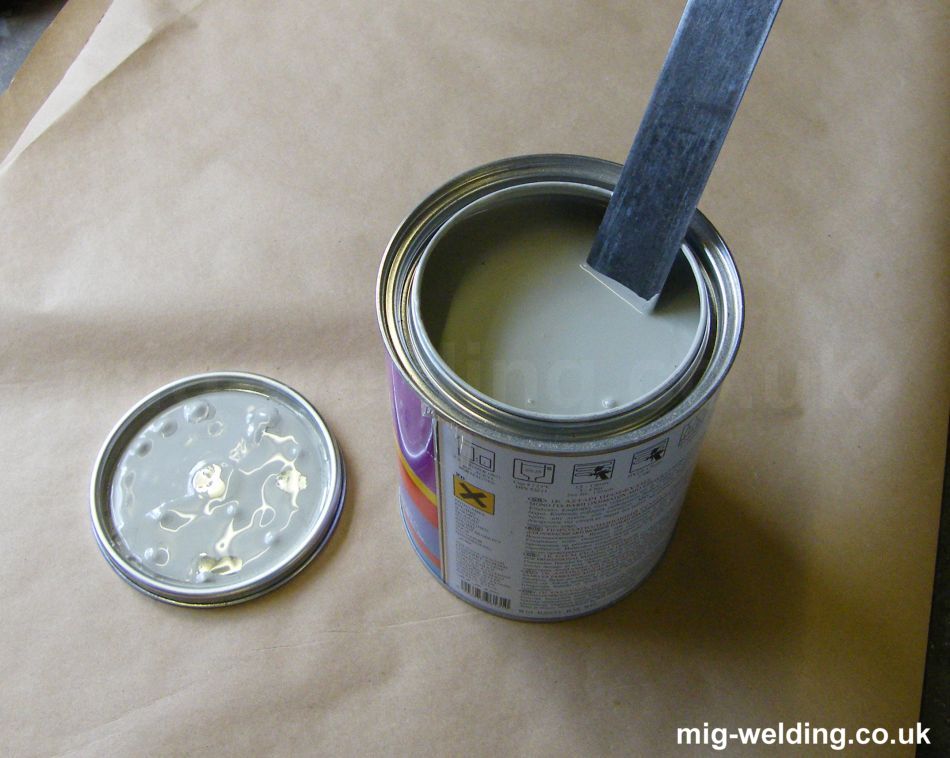
A screwdriver is not an effective tool for paint stirring. Professional paint shops will shake the paint or use a whisk. My preference is to use a 12 inch steel rule.
Paint tends to sit around for a long time on the paint suppliers shelves so has plenty of time to settle. The steel rule can be used to drag the sludge from the bottom and mix it with the paint at the top to give the paint the composition the manufacturers intended.
Mixing the paint in a separate container (such as a mixing cup) then pouring it into the spray gun cup (and then mixing again) will tend to result in a reasonable mix. Mixing directly in the spray gun cup could cause problems with thick poorly mixed paint remaining at the bottom.
Spray gun setup
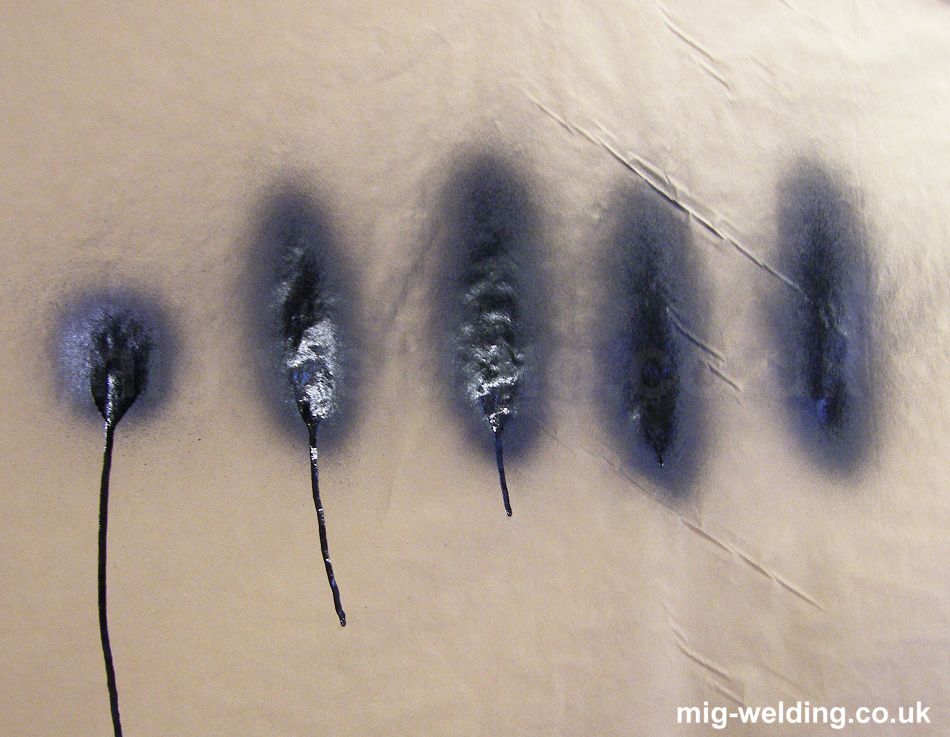
The photo shows spray pattern tests with the air valve being gradually opened from closed (left) gradually increasing towards the right of the photo. Notice the fan height doesn't change significantly after the air valve is first opened - it's the distribution of paint inside the fan that changes.
The ideal is to distribute paint evenly throughout the height of the fan. The first three have heavy paint build up in the centre of the fan which has resulted in drips. With this low atomising pressure the paint distribution is elliptical, with the majority of paint concentrated in the centre of the fan. High overlap would be required during painting and the job would be streaky and prone to runs.
The one to the far right is probably closest to the mark with an even distribution of paint through the fan. Any additional opening of the air valve would cause the fan to be paint heavy top and bottom.
The needle adjuster (trigger stop) can normally be left at full trigger travel for normal panel work, but if the paint application is too heavy (perhaps when spraying small parts) the paint flow can be reduced with the needle adjuster. This will need to be balanced by further adjustment of the air flow valve.
A very fast sweep on paper before painting is a good test of spray quality. The best pressure is the lowest that will give a reasonable rate of application with good atomisation (fine spray). Too much pressure will cause overspray and too little pressure will result in orange peel and sags.
For a conventional syphon gun try setting the pressure to 50psi and spraying quickly across some masking paper. Then try the same at 45psi - is there noticeable difference in droplet size and is the rate of coverage still enough? If you are happy with 45psi it's a better pressure to use as there will be less overspray. Try 40psi and so on. Most of my spraying seems to be at about 40psi, but it's gun and paint dependant. Lower pressures are best as they the reduce overspray that can mess up other parts of the car before you even paint them.
Check the gun on a test panel after setting the pressure - the important thing is to achieve a balance that you will be happy spraying with.
Gun technique
The basics to spraying technique are to keep the gun a constant 6 to 8 inches from the panel, maintain the gun at right angles to the panel (so you don't have heavy spray on one end of the fan and overspray at the other end), and move the gun at a constant speed in a straight line from side to side. Overlap between strokes should be about 50% (the centre of the spray pattern should be aimed at the edge of the previous stroke). If you find you need to overlap more than that the chances are you have too much paint in the centre of the fan.
In the video I'm spraying the edges of the panel first then finishing the surface of the panel. Many do it the other way around as it's easier to polish out overspray on a flat panel than on the edges, and it helps avoid drips - you'd hold off painting an edge if the panel was already heavy with paint.
There are two points on the trigger of a spray gun. A light squeeze will feed air but no paint. Paint is fed in as the trigger is depressed further. When the spray gun approaches the edge of the panel release the trigger to the point where the paint flow is stopped but the air flow is maintained, then re-introduce the paint as you pass back onto the panel. This avoids a rush of paint as the paint is reintroduced.
A painting trick from the forum is to reduce air pressure for fiddly areas such as the window frame in the video by kinking the air line to the gun with your spare hand. Kinking reduces the air pressure making it possible to save paint by directing the fan along the panel rather than at right angles.
Finish from the gun
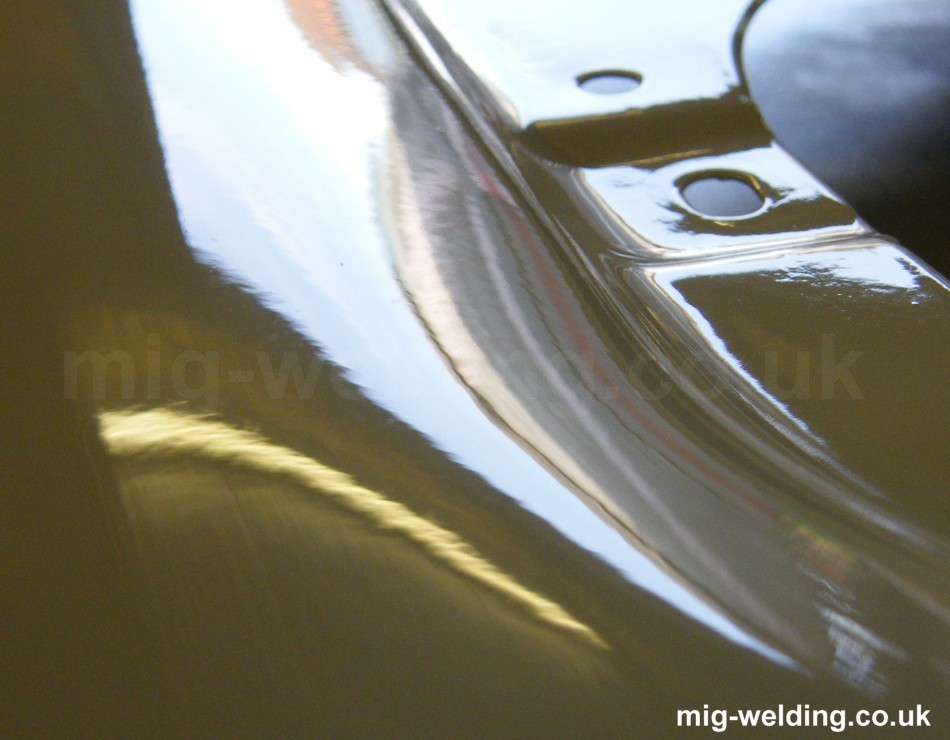
The photo is a close up of what the finish straight from the gun might look like. The paint goes on with a slight orange peel (photo) before flowing and settling over a few seconds.
If the paint is sprayed too thinly the orange peel finish to remain. Too high a build of paint would look nice and flat, but be prone to sagging and drips. Practicing on an old body panel before spraying the car is a useful way to develop technique, the target being to achieve a flat finish without drips.
Lighting is very important during painting, and side lighting is as important as overhead lighting. With plenty of reflected light it's possible to see the texture of the paint as it is applied so overlap, travel speed, or distance to the panel can be modified during painting. When working underneath a vehicle (inside a wheel arch) a hand held light can be a great help.

Practice and experiment
Experimentation on an old panel mounted vertically is the best way to fine tune the texture of the paint to balance between orange peel and sags. Orange peel can be sanded out more easily than sags or drips.
Primer is much more forgiving to spray than colour, and mistakes are less important anyway as primer is generally sanded before colour coats. The primer stage is a good time to develop a consistent and accurate technique, but don't be lazy and take advantage of the forgiving nature of primer as you'll need the technique for the colour coats.
Application does depend on the paint. Two pack paints tend to go on thicker than cellulose paints, they take longer to dry, and orange peels tend to float to a flat finish during drying. Cellulose paints dry much faster and the texture straight out of the gun is much closer to the dry finish. Experimentation on a scrap panel is the way to get the hang of either paint.
Panel preparation
Fibres from a cloth in paint are real trouble - the paint is attracted to the fibres and they show up as little blobs in the paint surface which are difficult to sand out neatly.
Generally a panel would be wiped with panel wipe (solvent) to clean off any finger prints or other contamination prior to spraying. Panel wipe should be wiped off with another rag rather than left to dry on the panel otherwise it can leave a film on the panel. This will leave fibres on the panel which will show in the paint.
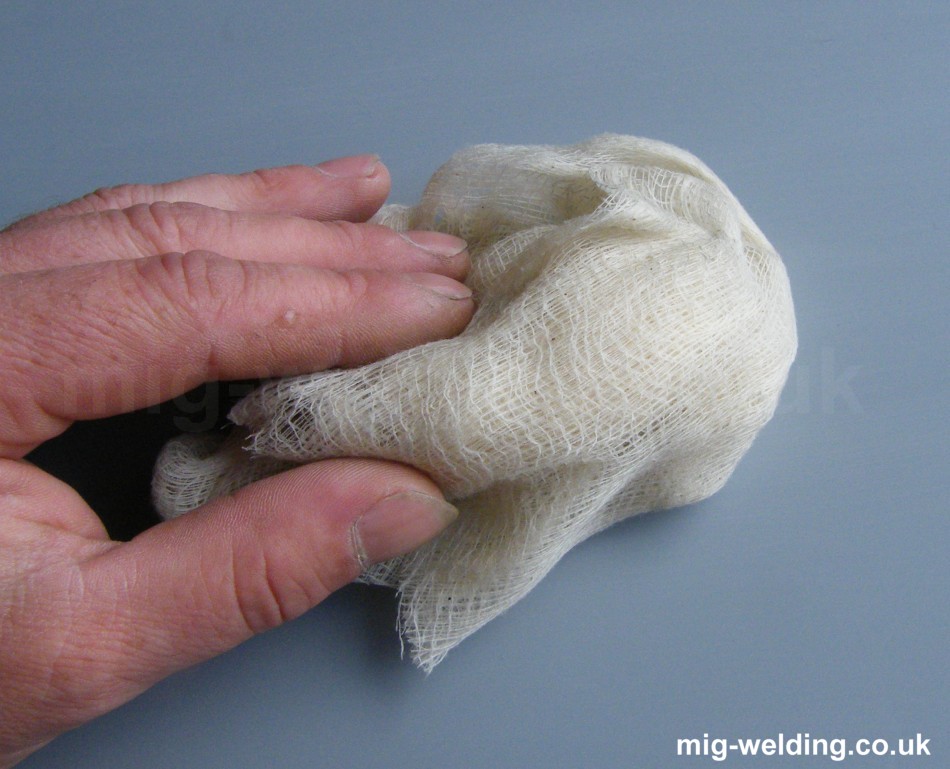
Any dust or fibres can be removed using tack rags. These are cloths with an adhesive coating, and any fibres on the panel will stuck to the tack rag. Use only light pressure or the glue on the tack cloth will be transferred to the panel and cause fish eye problems. Also wear gloves - bare hands can contaminate the surface, and the tack rags leave a sticky residue on bare hands.
Don't panel wipe a panel with overspray sticking to it - any fibres in the cloth will be caught by the overspray and can be quite tricky to remove. Allow the overspray to dry then lightly sand it off.
Spraying technique and avoiding faults.
Further tips on paint technique can be found on the colour coat page where technique is most important. Good technique is partly about avoiding paint faults. The page about rectifying paint faults offers some ideas of what to expect and how to avoid faults.


