


Seam Sealing
Good seam sealing will prolong the life of a vehicle after restoration. Virtually all rust problems on a car will start in the seams.
This page will look at the problems old sealant can cause, how to remove it, some types of sealant available, and tricks that might be helpful in applying it.
Sealant failure
Sealant failure can be disastrous. Here's a car that's been stored in damp conditions for the last 41 years. The sealant has lifted allowing water to enter the spot welded seam with capillary action. Rust has ruined the seam and panels would need to be replaced to correct the problem.
Some more exposed areas on that car were not seam sealed at all. They have fared worse with capillary action ensuring the joint was wet from the first time the car went out in the rain up to when it needed new sills.
I'll routinely replace old sealant (more than 20 years old) or any sealant showing signs of lifting. Old sealant can be removed using a scraper and a hot air gun.

Applying PU sealant neatly
My approach is to seal every seam on the car. Any small gaps in the sealant can let water in to rot the joint behind, so neatness in applying sealer is important.
Manufacturers over the last 30 years will normally have applied sealant over an e-coat primer rather than bare metal. I'll tend to apply it over either self etch primer or (better) 90% zinc primer.
My preference is for a polyurethane (PU) sealant from an automotive paint shop. It isn't sandable so needs to be applied neatly, but it is over-paintable. Polyurethane sealer is available in tubes designed to be applied using a sealant (or calking) gun.

It's a terrible photo, but this is the same part with the sealer smoothed out.
Dip your finger (wear disposable gloves), or a rag or brush into paint thinners before using it to smooth the sealant. That stops the sealant from sticking. I've used cellulose thinners on the part in the photo as the primer is synthetic based, but synthetic thinners will work if your primer happens to be cellulose based.
The particular brand of self etch primer used elsewhere on the car was melted by both cellulose and synthetic thinners which made the technique slightly more fiddly.
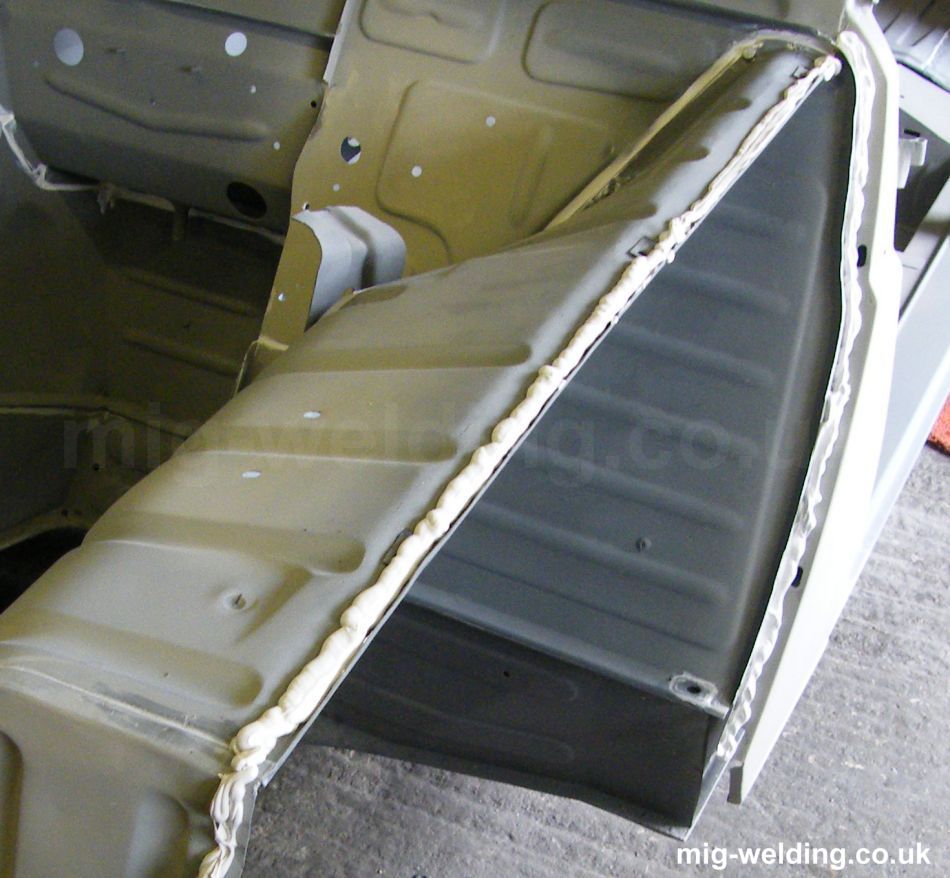
Joining wings
Some older cars have separate wings. Any gap will attract water even if the wing is reasonably well sealed from both sides, so the joint should be completely filled with sealant.
This technique is a messy one, and properly done there will be excess sealant either side of the joint to remove. This can be quickly achieved using a finger soaked in thinners as before.
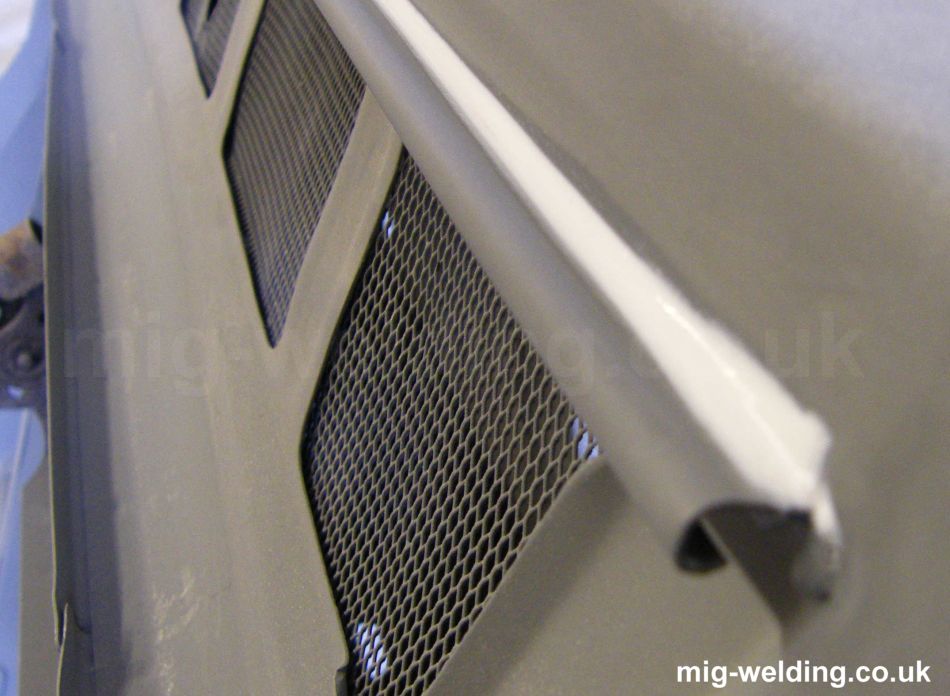
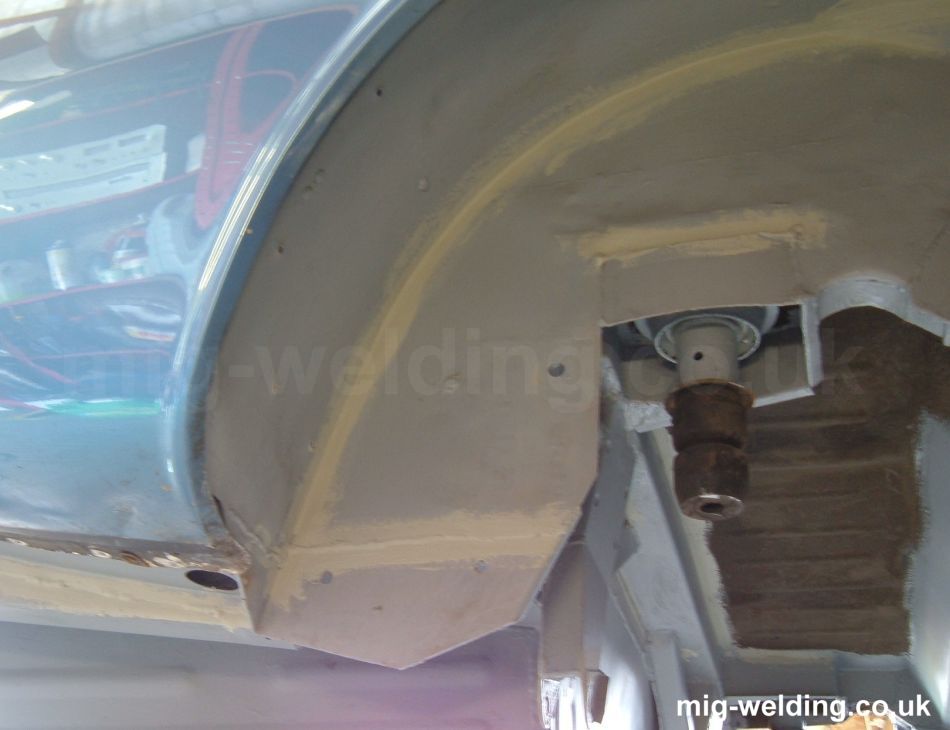
Underneath
This is the underneath of a front wheel arch prior to painting. Much of the sealant visible in the photo is applied over seam welded repairs (the triangle at the top right and the wiggly line to the top left). There is bound to be the odd pinhole in the weld, and sealing the reverse will prevent water getting through to the paint on the other side of the panel.
The sealant from the top left to bottom right was applied in a big bead like the photo above when fitting the inner wing. The excess smoothed out quite nicely and I hopefully can be confident there is no place for water in that seam.
Any seam or panel joint on the underside of a car will require sealing.

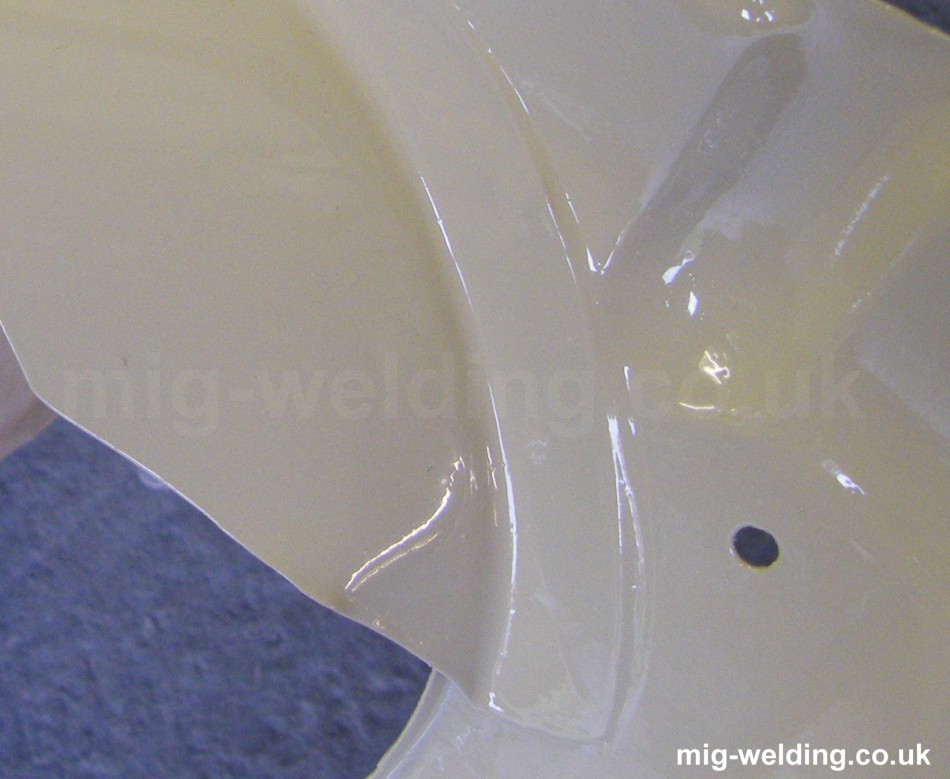
Overpainting
If the sealant has been smoothed using a solvent it should over-paint well. Here's a detail of an inner wing that has been coated with a single coat of primer and two coats of colour.
The sealant (applied as a bead then smoothed out) is only noticeable as an absence of a gap at the end of the spot welded flange.
Brushable Sealers
Brushable seam sealer is a cost effective alternative to polyurethane sealant (about a third of the price) and is quicker to apply. Also it is sandable to some extent. While I prefer polyurethane sealant for the neatness I'll use brushable seam sealant for less fiddly joints underneath the car.
It's sticky stuff and doesn't have a long shelf life after the first opening. I've found that using a shortened paint brush (bristles cut off about half way down) can help with the neatness of application.
Other Seam Sealers:
Silicone
Never use silicone sealant on a car. Silicone sealer is not over-paintable and worse the silicone can get into the air and contaminate every other panel on the car ensuring they will not be over-paintable either. (See the fish eyes section at the bottom of the paint faults page.)
Ribbon Sealant
Ribbon sealant comes as a thick sealant on a roll with paper backing. It comes in various materials and might be used for sealing a body shell to a chassis or sealing door liners to door frames. It is very useful for areas that cannot be cleaned up after the sealant has been applied.
Sprayable Seam Sealer
Sprayable seam sealer is often used by automotive manufacturers. It is quicker to apply than brushable seam sealant but requires an applicator gun that would be prohibitively expensive for DIY restorers.


