


You are using an out of date browser. It may not display this or other websites correctly.
You should upgrade or use an alternative browser.
You should upgrade or use an alternative browser.
Fiat Strada 130TC
- Thread starter Mr_Caine
- Start date
fiat-fix it again tony!
NOOOOOO someone had to say it didn't they. Or in this case, Fix It Again Trevor.
2nd November 2007
Today I started on the rear arch, starting with the leg which supports the boot.
This section had already had 2 repairs carried out so I cut them out and started again. Also I cut out the end of the leg which supports the bumper, this was looking a little crusty.
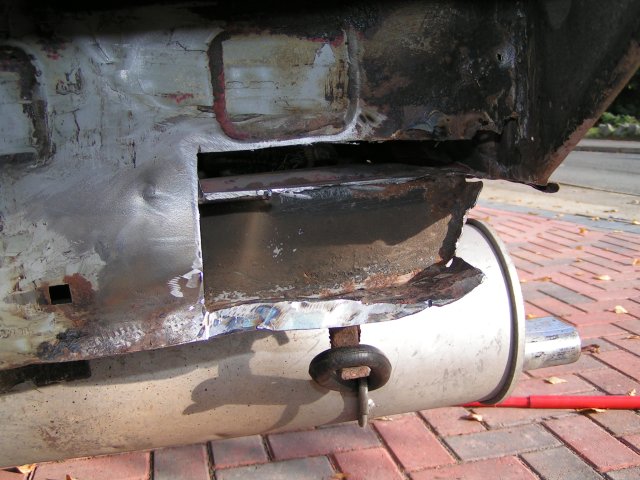
Next up I made a template out of card, this was easy since it was just a flat section. I then transferred this to the steel to make the repair section. Again 1mm used. I had a good look down the leg with a torch to see if there was any other rust and it looked pretty sound.
Here we have the plate held in place ready for welding. Note the holes in the back panel which will be filled with weld, no major rust just some very small spots.
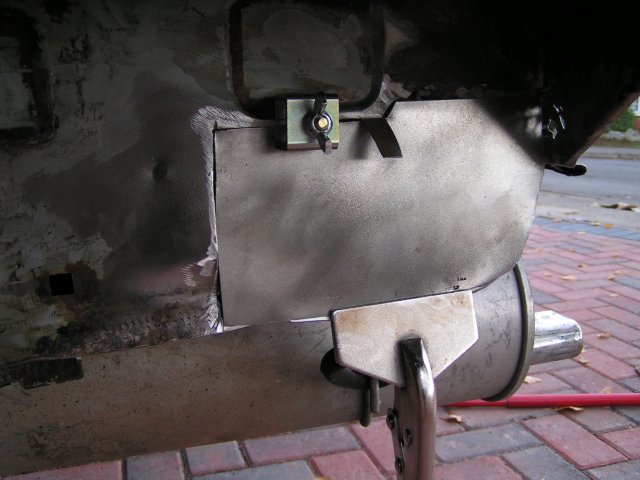
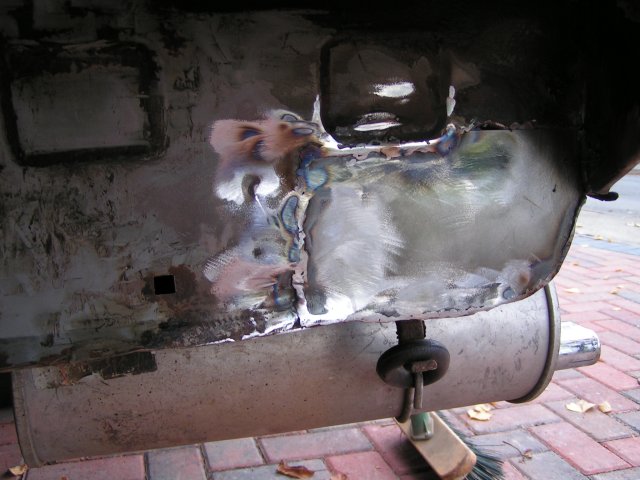
Welding complete and ground down.
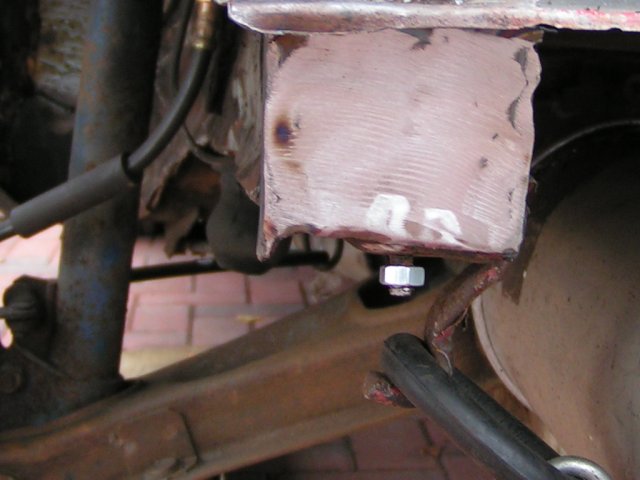
Here we have the end of the leg welded back on, now to drill a new hole for the new bolt to support the bumper, M6.
These chassis legs will also be pumped full of waxoyl to prevent further corrosion, hopefully this will keep the tin worm at bay for years to come. Whole car will be done, sills, inside panels etc.
I've also made start on the arch. The section marked in red has been cutout, the back panel cleaned up to remove the spot welds and new metal welded in. Would have been nice to make the repair out of a single section but to difficult with my limited skills. If I was using thinner material it might have been easier because I'd have more flexibility to bend the material. I would really like to undertake some tuition in metal fabrication at some points. Pictures to follow, there is one more section to make and weld and the rear arch is mostly complete.

That's all for now, the next update won't be for atleast a week as I'm starting a new job on Monday so my free time has come to an end. I dunno 5 weeks off work and only managed to spend 3 days on the car in that time Still a fair bit of work to do, some external work on the rear nearside arch, small but will be visible, a couple of very small sections in the nearside sill and possibly on both rear windows ledges where they always go. The car will pass an MOT without these but would like to get them done. Once the car is on the road I'm going to get the sill sorted professionally via my local bodyshop then I can start thinking about resprays
 ") .
.
Today I started on the rear arch, starting with the leg which supports the boot.
This section had already had 2 repairs carried out so I cut them out and started again. Also I cut out the end of the leg which supports the bumper, this was looking a little crusty.
Next up I made a template out of card, this was easy since it was just a flat section. I then transferred this to the steel to make the repair section. Again 1mm used. I had a good look down the leg with a torch to see if there was any other rust and it looked pretty sound.
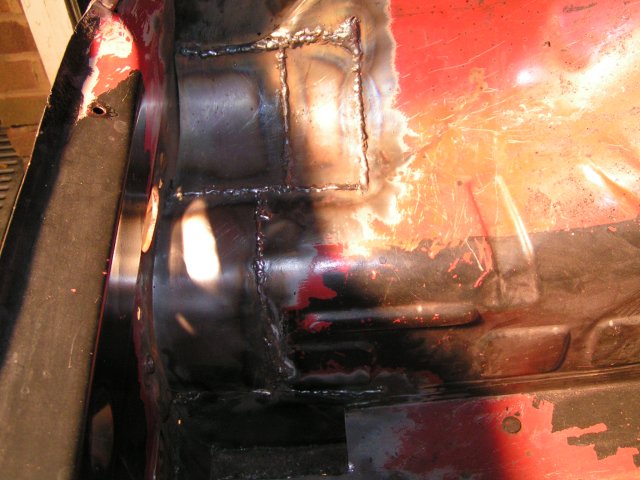
Here we have the plate held in place ready for welding. Note the holes in the back panel which will be filled with weld, no major rust just some very small spots.
Welding complete and ground down.
Here we have the end of the leg welded back on, now to drill a new hole for the new bolt to support the bumper, M6.
These chassis legs will also be pumped full of waxoyl to prevent further corrosion, hopefully this will keep the tin worm at bay for years to come. Whole car will be done, sills, inside panels etc.
I've also made start on the arch. The section marked in red has been cutout, the back panel cleaned up to remove the spot welds and new metal welded in. Would have been nice to make the repair out of a single section but to difficult with my limited skills. If I was using thinner material it might have been easier because I'd have more flexibility to bend the material. I would really like to undertake some tuition in metal fabrication at some points. Pictures to follow, there is one more section to make and weld and the rear arch is mostly complete.
That's all for now, the next update won't be for atleast a week as I'm starting a new job on Monday so my free time has come to an end. I dunno 5 weeks off work and only managed to spend 3 days on the car in that time
Still a fair bit of work to do, some external work on the rear nearside arch, small but will be visible, a couple of very small sections in the nearside sill and possibly on both rear windows ledges where they always go. The car will pass an MOT without these but would like to get them done. Once the car is on the road I'm going to get the sill sorted professionally via my local bodyshop then I can start thinking about resprays .
Last edited:
Nice work, looks a good project.
Is there much more welding to do??
Quite a good project because there isn't huge amounts of welding required. The car was restored 10 years ago so has remained relatively rust free for one of these and the panels aren't full of filler. With use of waxoyl this should remain the case for some years to come.
Further welding - both rear window ledges may need some work, they always go here. Also there is some work required to the nearside quarter where the panel meets the bumper, some of this is visible and the metal is thin thin thin. Also a little on the opposing side. Maybe a couple of spots on the nearside sill.
There is still a load of work I want to do on the car. The target is to get all the welding done, shot blast the inside and repaint then refit the interior, waxoyl the whole car then get the car to the MOT test centre. This target is now to be completed by / over Christmas.
After that I'm going to get the dented sill sorted professionally.
Next year I'm thinking of getting the doors, bonnet and tailgate dipped and galvanised, and think about repainting the whole car in 639f - Grigio Quartzo Met which is an original Strada Abarth colour (Grey Metallic).
Last edited:
- Messages
- 24,276
- Location
- Birmingham
Galvanising
Be careful galvanising thin sheet panels as the heat can distort them as Land Rover owners have found out when getting bulkheads done.
Be careful galvanising thin sheet panels as the heat can distort them as Land Rover owners have found out when getting bulkheads done.
daviddb
Member
- Messages
- 38
snipping ...Be careful galvanising thin sheet panels ....snipped.
Yup, Front and rear wings and boot lid were a doddle on my DS but the doors were pants. Plus getting the stuff to drain out quickly after the dip was a bit problematic - or so I was told. But the firm I used, Medway Galvanising of, er, Medway were v. helpful even though I was a very small job for them.
regards
David

Tuesday 6th November 2007
Well I managed to grab a sly couple of hours tonight to carry on with welding the car up. Was working on the rear turret.
Before a quick poke with a screwdriver revealed this and generally the whole section was riddled with rust so cut the whole lot out.

After - I know some of you may be think why 3 small patches rather than 1 big one. I did try but just couldn't get it to line up and get the curves right, so resorted to breaking it into more manageable sections. Maybe with some fabrication tuition repairing sections like this will become much cleaner and easier.
Still needs to be tacked onto the back panel, the beads ground down esp in the top right where I had to use the mig to fill quite a bit.
That's all for now folks - next I'll repair the small cut-out in the floor you can see. Generally I'm pretty happy, ok it's not perfect but generally going well, once the floor in done onto a couple of more cosmetic areas
Well I managed to grab a sly couple of hours tonight to carry on with welding the car up. Was working on the rear turret.
Before a quick poke with a screwdriver revealed this and generally the whole section was riddled with rust so cut the whole lot out.
After - I know some of you may be think why 3 small patches rather than 1 big one. I did try but just couldn't get it to line up and get the curves right, so resorted to breaking it into more manageable sections. Maybe with some fabrication tuition repairing sections like this will become much cleaner and easier.
Still needs to be tacked onto the back panel, the beads ground down esp in the top right where I had to use the mig to fill quite a bit.
That's all for now folks - next I'll repair the small cut-out in the floor you can see. Generally I'm pretty happy, ok it's not perfect but generally going well, once the floor in done onto a couple of more cosmetic areas
Sunday 11th November 2007
Small update today.
Finished joining the rear arch repairs to the back panel. I'm back on CO2 after my small bottle of CO2/Argon mix ran out, hardly lasted at all! Weld time was much shorter than the bottle of CO2. I'm still considering buying a big bottle regulator (from weldequip) for the SIP or just blowing the budget and getting a new machine.

Also yesterday evening I cleaned up the rust in the nearside rear turret just above the shock, treated the area with Hammerite Kurust and then painted with Hammerite. The skin had gone but the reinforcing section was pretty much intact. I prepared a lap plate to size and painted with hammerite.
This morning I dived out in the rain and welded the plate into place.
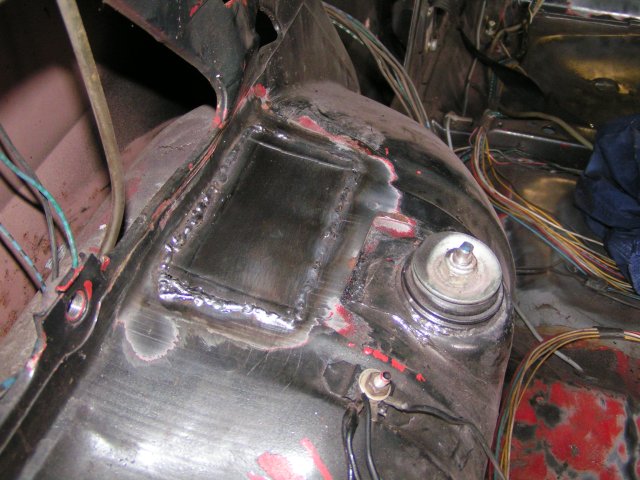
Now this is most of the internal welding complete. The next stage is to grind all the weld beads down, shot blast the interior, seam seal the repairs and repaint the interior.
That's all until the next instalment
Small update today.
Finished joining the rear arch repairs to the back panel. I'm back on CO2 after my small bottle of CO2/Argon mix ran out, hardly lasted at all! Weld time was much shorter than the bottle of CO2. I'm still considering buying a big bottle regulator (from weldequip) for the SIP or just blowing the budget and getting a new machine.
Also yesterday evening I cleaned up the rust in the nearside rear turret just above the shock, treated the area with Hammerite Kurust and then painted with Hammerite. The skin had gone but the reinforcing section was pretty much intact. I prepared a lap plate to size and painted with hammerite.
This morning I dived out in the rain and welded the plate into place.
Now this is most of the internal welding complete. The next stage is to grind all the weld beads down, shot blast the interior, seam seal the repairs and repaint the interior.
That's all until the next instalment
Last edited:
It's been a while since I updated this thread. I started a new job a couple of months ago so progress has slowed but over Xmas shall be kicking up a gear. Here are some of the updates
SATURDAY 24th NOVEMBER 2007
Small update today, grabbed a couple of hours and finished welding in the boot. Started by making a plate to weld into the floor, before closing up the chassis leg I welded a new bumper support bolt into the rear of the chassis leg, used a M6x12 bolt. Once that was welded in welded the plate over to seal the chassis leg.
Now need to start grinding welds if I can be bothered <_< or maybe I'll just tart the welds up a bit seal and start painting the interior. Target is still to get the car back on the road over Xmas.
SUNDAY 25th November 2007
Spent a shortwhile on the car today, mostly starting to sort the rear outside wheel arch, mainly scratching my head working out the best way to fix. Not alot else to say.
Sunday 23rd December 2007.
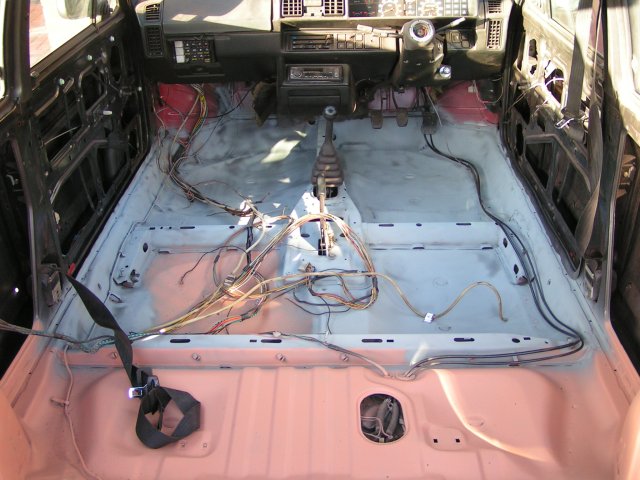
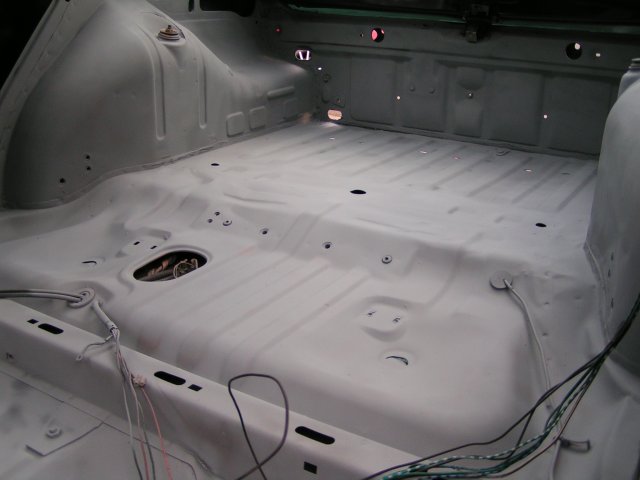
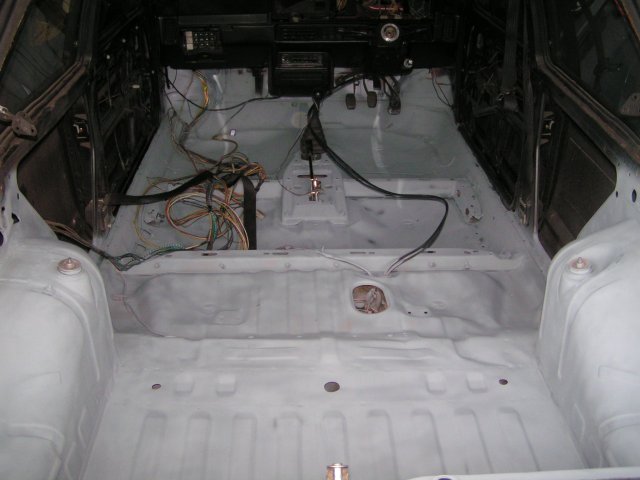
After a months break some more progress has been made. I rolled the car out onto the drive today and carried on preparing the inside. The inside has been badly painted in the past, looks like the met grey was sprayed straight onto the read without any prep and flakes off easily, all old tar sound installation was removed earlier in the year and the old paint is being removed with a wirebrush attached to the trusty grinder. This continued today and now have 70% complete. I reckon another 1/2 day and it'll be ready for repainting. This work shall cotinue on the 27th December, don't think the wife would be too keen on me spending Xmas day with the car. Once this is complete the inside will be painted in zinc primer and then a couple of top coats in black hammerite, followed by some new tar soundproofing. I've also got all the gear to waxoyl the old beast. I shall be spraying box sections with hammerite kurust, followed by waxoyl before reassembing the inside. Hopefully this'll keep the rust at bay for a good few years.
The weather today wasn't great a light fog meaning the air was very damp. A nice heater will be popped into the garage to ensure the old girl is bone dry again.
Photos to follow.
Merry Xmas Everybody
SATURDAY 24th NOVEMBER 2007
Small update today, grabbed a couple of hours and finished welding in the boot. Started by making a plate to weld into the floor, before closing up the chassis leg I welded a new bumper support bolt into the rear of the chassis leg, used a M6x12 bolt. Once that was welded in welded the plate over to seal the chassis leg.
Now need to start grinding welds if I can be bothered <_< or maybe I'll just tart the welds up a bit seal and start painting the interior. Target is still to get the car back on the road over Xmas.
SUNDAY 25th November 2007
Spent a shortwhile on the car today, mostly starting to sort the rear outside wheel arch, mainly scratching my head working out the best way to fix. Not alot else to say.
Sunday 23rd December 2007.
After a months break some more progress has been made. I rolled the car out onto the drive today and carried on preparing the inside. The inside has been badly painted in the past, looks like the met grey was sprayed straight onto the read without any prep and flakes off easily, all old tar sound installation was removed earlier in the year and the old paint is being removed with a wirebrush attached to the trusty grinder. This continued today and now have 70% complete. I reckon another 1/2 day and it'll be ready for repainting. This work shall cotinue on the 27th December, don't think the wife would be too keen on me spending Xmas day with the car. Once this is complete the inside will be painted in zinc primer and then a couple of top coats in black hammerite, followed by some new tar soundproofing. I've also got all the gear to waxoyl the old beast. I shall be spraying box sections with hammerite kurust, followed by waxoyl before reassembing the inside. Hopefully this'll keep the rust at bay for a good few years.
The weather today wasn't great a light fog meaning the air was very damp. A nice heater will be popped into the garage to ensure the old girl is bone dry again.
Photos to follow.
Merry Xmas Everybody
UPDATE Thur/Fri 28/29th December 2007
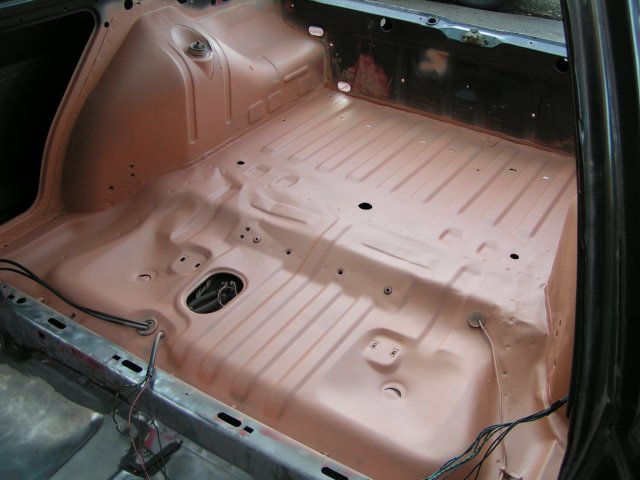
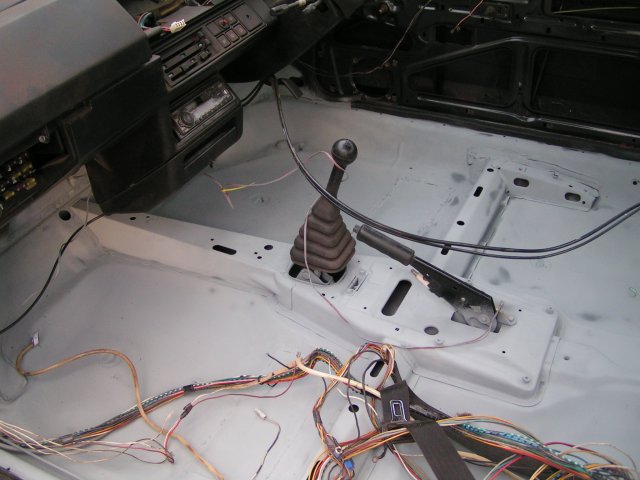
Interior repair/preparation continues. I have been removing most of the poor quality spraying and have now started to spray the interior in Zinc primer. Interior priming should be complete by tomorrow afternoon, ready for topcoat. Topcoat will just be a black hammerite finish, since most/all of its going to be covered in the interior trim/carpets I'm not concerned with getting a colour match to the existing paint. I'm more concerned with getting the car well protected. Stopped at 2pm today, cold and wind setting in. Was fun having a go on the spray gun, it's my first go with a proper spraygun - a metabo gravity fed jobbie. After a little while experimenting I finally got a good setting, thinned down the zinc primer and away we went
UPDATE 29th December 2007
Well continued spraying the interior today, had to switch to the Galvafroid paint after the Kurust ran out, hence the change in colour tomorrow, may well brush paint the next coat on, Galvafroid is a very heavy zinc paint and the tin suggests brushing, no mention of spraying.
After spraying the interior that's been left to dry for 24hrs I started on some more welding
Here is the repair on the rear nearside quarter. Now needs a skim of filler, primer and some paint.
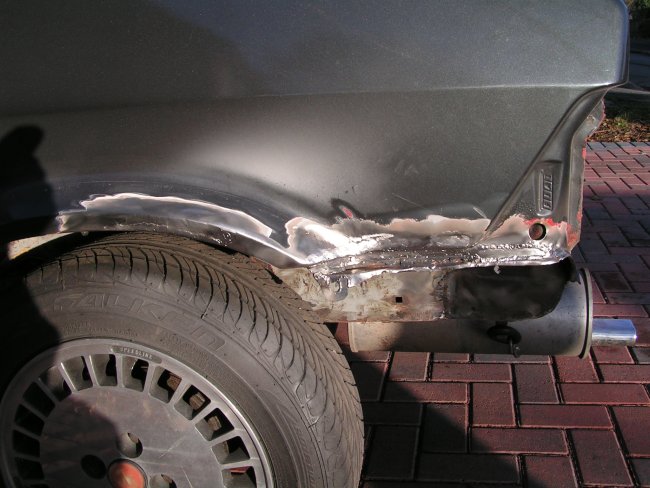
Enjoy.
Interior repair/preparation continues. I have been removing most of the poor quality spraying and have now started to spray the interior in Zinc primer. Interior priming should be complete by tomorrow afternoon, ready for topcoat. Topcoat will just be a black hammerite finish, since most/all of its going to be covered in the interior trim/carpets I'm not concerned with getting a colour match to the existing paint. I'm more concerned with getting the car well protected. Stopped at 2pm today, cold and wind setting in. Was fun having a go on the spray gun, it's my first go with a proper spraygun - a metabo gravity fed jobbie. After a little while experimenting I finally got a good setting, thinned down the zinc primer and away we went
UPDATE 29th December 2007
Well continued spraying the interior today, had to switch to the Galvafroid paint after the Kurust ran out, hence the change in colour tomorrow, may well brush paint the next coat on, Galvafroid is a very heavy zinc paint and the tin suggests brushing, no mention of spraying.
After spraying the interior that's been left to dry for 24hrs I started on some more welding
Here is the repair on the rear nearside quarter. Now needs a skim of filler, primer and some paint.
Enjoy.
ian of fev
DIESEL POWER
- Messages
- 228


