


You are using an out of date browser. It may not display this or other websites correctly.
You should upgrade or use an alternative browser.
You should upgrade or use an alternative browser.
Eisle cold saw restoration
- Thread starter Theblackbox
- Start date
Theblackbox
Member
- Messages
- 424
- Location
- Somerset uk
serious case of tool envy going on hear, i have a warco bandsaw but for what i do... almost all 25xx25 box -50x50 box that would be ideal! the iron worker takes care of all the soild bars stock but hmm i need to get facebooking!
yep I’m moving from a bandsaw looking forward to less deburring I also have an iron worker so really only need a saw for hollow stock.
Theblackbox
Member
- Messages
- 424
- Location
- Somerset uk
Since it’s a Friday I decided to spend the afternoon on the saw. Tackled the main lump split apart fairly easily the fit on everything is superb so took a bit of drifting out various parts.

made up a quick plate so I can lift the gearbox lump up. I’ll put a bit of sheet underneath so nothing goes inside during painting as I don’t want to take the gearbox apart as it’s in great condition. Gave it a quick degrease prior to painting I’ll take the stickers off so I can maybe replicate at a later date

main column also got a degrease

Quick peek inside the gearbox I’ll get a better pic but it’s all rather beautifully made.

main spring to return the head similar to a drill quill spring glad this isn’t broken not looking forward to retensioning this!

Nearly everything on the saw requires no work just needs a clean and putting back together apart from this assembly! In effect the black pieces at the top pull a pin at the base so the handle can change positions it’s currently seized solid so that’s the next task Penetrating oil has had zero effect so I guess I’ll get the blow torch out or it can go in some citric acid.
made up a quick plate so I can lift the gearbox lump up. I’ll put a bit of sheet underneath so nothing goes inside during painting as I don’t want to take the gearbox apart as it’s in great condition. Gave it a quick degrease prior to painting I’ll take the stickers off so I can maybe replicate at a later date
main column also got a degrease
Quick peek inside the gearbox I’ll get a better pic but it’s all rather beautifully made.
main spring to return the head similar to a drill quill spring glad this isn’t broken not looking forward to retensioning this!
Nearly everything on the saw requires no work just needs a clean and putting back together apart from this assembly! In effect the black pieces at the top pull a pin at the base so the handle can change positions it’s currently seized solid so that’s the next task Penetrating oil has had zero effect so I guess I’ll get the blow torch out or it can go in some citric acid.
Theblackbox
Member
- Messages
- 424
- Location
- Somerset uk
Quick update finally had chance to get the main bulk of it wirebrushed where necessary and get a coat of primer on it I’ll get a second coat on in the morning. Waiting for the parts to come back from the blasters hopefully can crack on a bit more once they are back.
slim_boy_fat
Member
- Messages
- 29,186
- Location
- Scottish Highlands
my plan was to cut inch wide strips out of it and make parting blades for the lathe, never got round to it though.
I had that very same idea, and it worked until Dopey here got greedy with the feed rate........ I never did find the carbide tip.

Theblackbox
Member
- Messages
- 424
- Location
- Somerset uk
Got all the bits painted in top coat was really nice and warm Yesterday so the enamel flowed nicely the aqua/turquoise (colour I use in my business brand) is graffiti paint from a can also got a bit of metallic black in places mostly what I had/looked good together
Theblackbox
Member
- Messages
- 424
- Location
- Somerset uk
I’ll do a proper update soon but base is painted and started to reassemble
Theblackbox
Member
- Messages
- 424
- Location
- Somerset uk
So to rewind a bit this is how the base came back don’t think I was particularly popular at the blasters! Apparently was a bit of pain to get it all off so glad I didn’t do it!
once it came back one side had loads of grinder cuts so filled these in with the mig, flatted back gave it several coats of primer and top coat.
don’t have any pictures but drawer also got a similar treatment except it had quite a few holes so filled these in with the mig
Theblackbox
Member
- Messages
- 424
- Location
- Somerset uk
to bring it upto date this is how it currently sits.
Motor has been degreased (it was a mess), removed the paint with stripper and given several spray coats. I’ve got to make a piece for the front electrics think I might 3D print this
assembled the rest, added a gear knob I had to the end of the handle as this fitted perfectly.
The handle release mechanism has been remade as it was siezed solid have had to cut it apart and re-weld back together hence the sleeve
I’ve added some castors to it so I can move it about. However I’ve made a bit of an error by attaching them to the side thought this would be strong enough but really does flex and not happy with it so will mount them another way!
Theblackbox
Member
- Messages
- 424
- Location
- Somerset uk
Had the pressbrake and guillotine on for a job so made up the new coolant drawer, pump housing (I’ll use an external pump).

Couldn’t quite get the handle part of the drawer to match the top as I didn’t want to change the top tooling on the pressbrake so just added an extra bend

also the housing for the electrics which will pivot on a piece of box section bolted to the saw top.

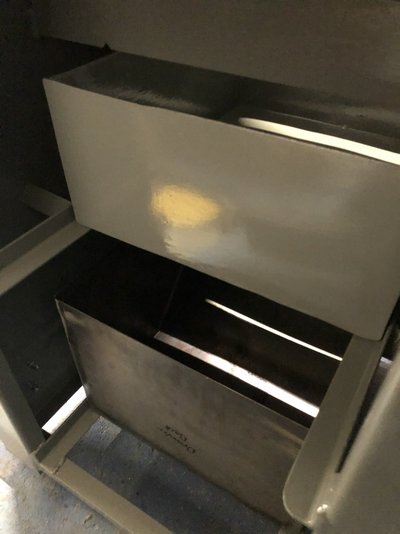
Think I’ve made the drawer a bit big! Calculated it and it could hold around 50ltrs! Don’t have to fully fill it anyway. Still got to finish fully welding all the seams and do some faceplates etc.

got to move this build forward quite rapidly as my bandsaw has broken so without a proper saw at present
this is how it currently sits some parts are just lightly bolts on


Couldn’t quite get the handle part of the drawer to match the top as I didn’t want to change the top tooling on the pressbrake so just added an extra bend
also the housing for the electrics which will pivot on a piece of box section bolted to the saw top.
Think I’ve made the drawer a bit big! Calculated it and it could hold around 50ltrs! Don’t have to fully fill it anyway. Still got to finish fully welding all the seams and do some faceplates etc.
got to move this build forward quite rapidly as my bandsaw has broken so without a proper saw at present
this is how it currently sits some parts are just lightly bolts on
Jacktegla
Member
- Messages
- 735
- Location
- Denbighshire
Really nice saw, got lots of skill making all of those bits and piecesHad the pressbrake and guillotine on for a job so made up the new coolant drawer, pump housing (I’ll use an external pump).
View attachment 255621
Couldn’t quite get the handle part of the drawer to match the top as I didn’t want to change the top tooling on the pressbrake so just added an extra bend
View attachment 255618
also the housing for the electrics which will pivot on a piece of box section bolted to the saw top.
View attachment 255616
Think I’ve made the drawer a bit big! Calculated it and it could hold around 50ltrs! Don’t have to fully fill it anyway. Still got to finish fully welding all the seams and do some faceplates etc.
View attachment 255620
got to move this build forward quite rapidly as my bandsaw has broken so without a proper saw at present
this is how it currently sits some parts are just lightly bolts on
View attachment 255617
View attachment 255619
Theblackbox
Member
- Messages
- 424
- Location
- Somerset uk
Thanks. I’m pretty lucky to do this daily so I’ve got some various bits of kit that makes it nice and easy.
Got the various bits painted in primer they’ll stay like this for a bit whilst I cut holes for hoses and electrics etc. Mounted it up temporarily just so it’s out the way waiting for a couple of components to arrive from wds


added this to the inside of the bottom drawer on top will bolt a stainless plate that has 3mm holes to act as a filter panel the feed to the pump will be below it.

Pump has arrived only a cheap Chinese one so will see what it does! Just got to cut a faceplate out which will bolt onto the front.

This is how the electric box will sit also done a plate to cover the saw top
ive also redone the mounting for the castors I’ve now made a very heavy duty dolly that the saw will sit in with some better and bigger castors just got to finish painting it. It has brought the saw higher shouldn’t be an issue.
Got the various bits painted in primer they’ll stay like this for a bit whilst I cut holes for hoses and electrics etc. Mounted it up temporarily just so it’s out the way waiting for a couple of components to arrive from wds
added this to the inside of the bottom drawer on top will bolt a stainless plate that has 3mm holes to act as a filter panel the feed to the pump will be below it.
Pump has arrived only a cheap Chinese one so will see what it does! Just got to cut a faceplate out which will bolt onto the front.
This is how the electric box will sit also done a plate to cover the saw top
ive also redone the mounting for the castors I’ve now made a very heavy duty dolly that the saw will sit in with some better and bigger castors just got to finish painting it. It has brought the saw higher shouldn’t be an issue.
Jacktegla
Member
- Messages
- 735
- Location
- Denbighshire
Looks really good again, are you making all new electrics for it or do you still have tge origonal? For the filter are you just having a 3mm screen ? As I would recommend having something finer aswell somewhere before your coolant gets back to the tank and pump, im only saying this as mine has a fine steel gause on top of the drainage hole on the saw. And because the chips seem to be a lot smaller than 3mm.Thanks. I’m pretty lucky to do this daily so I’ve got some various bits of kit that makes it nice and easy.
Got the various bits painted in primer they’ll stay like this for a bit whilst I cut holes for hoses and electrics etc. Mounted it up temporarily just so it’s out the way waiting for a couple of components to arrive from wds
View attachment 256851 View attachment 256852 View attachment 256853
added this to the inside of the bottom drawer on top will bolt a stainless plate that has 3mm holes to act as a filter panel the feed to the pump will be below it.
View attachment 256854
Pump has arrived only a cheap Chinese one so will see what it does! Just got to cut a faceplate out which will bolt onto the front.
View attachment 256855
This is how the electric box will sit also done a plate to cover the saw top
ive also redone the mounting for the castors I’ve now made a very heavy duty dolly that the saw will sit in with some better and bigger castors just got to finish painting it. It has brought the saw higher shouldn’t be an issue.
Agroshield
Member
- Messages
- 6,444
..As I would recommend having something finer as well somewhere before your coolant gets back to the tank and pump...
The secret with coolant is retention time and speed of flow. On returning from the machine, it needs time for the dross to settle out: being metal, you already have an advantage in this respect. Put plenty of under and over baffles in your tank between the return and the suction so it is a tortuous path between them. Have a look at settlement tanks used for pumping water on a building site (Andrews Sykes, for example) or grease traps for commercial kitchens to see the idea.
Theblackbox
Member
- Messages
- 424
- Location
- Somerset uk
Looks really good again, are you making all new electrics for it or do you still have tge origonal? For the filter are you just having a 3mm screen ? As I would recommend having something finer aswell somewhere before your coolant gets back to the tank and pump, im only saying this as mine has a fine steel gause on top of the drainage hole on the saw. And because the chips seem to be a lot smaller than 3mm.
thanks. Retaining some of the electrics but also need to add an emergency stop (incase I ever decide to employ anyone it’s compliant) and also an switch for the coolant pump. The new coolant pump is single phase the old was 3 phase electrics isn’t my strong point so will do some research
I’m hoping with the coolant to do as said above. It’ll drop into the top drawer the outlet for this will be about 2” from the bottom also with a mesh panel to allow for settlement then will drop into the bottom draw then through the panel again with the outlet/pump inlet above the floor of the tank.
hoping this will be enough I could also add an inline filter but didn’t want something that needs constant emptying as I know how nasty coolant tanks can get!


