
TIG Welding Technique
Complete beginners to TIG should begin on 2mm or 3mm steel. The weld pool is larger and easier to control on thicker steel which makes it easier to develop technique - trying to learn on thinner material will be more frustrating. We've used 2mm steel for this tutorial. The welder was set to 50 amps, and the tungsten and filler rod were both 1.6mm.
Setting up the machine and tungsten grinding and stickout are covered on the TIG set up page. Advice on power settings for different steel thicknesses can be found on the TIG Amp chart.
Find a Steady Position
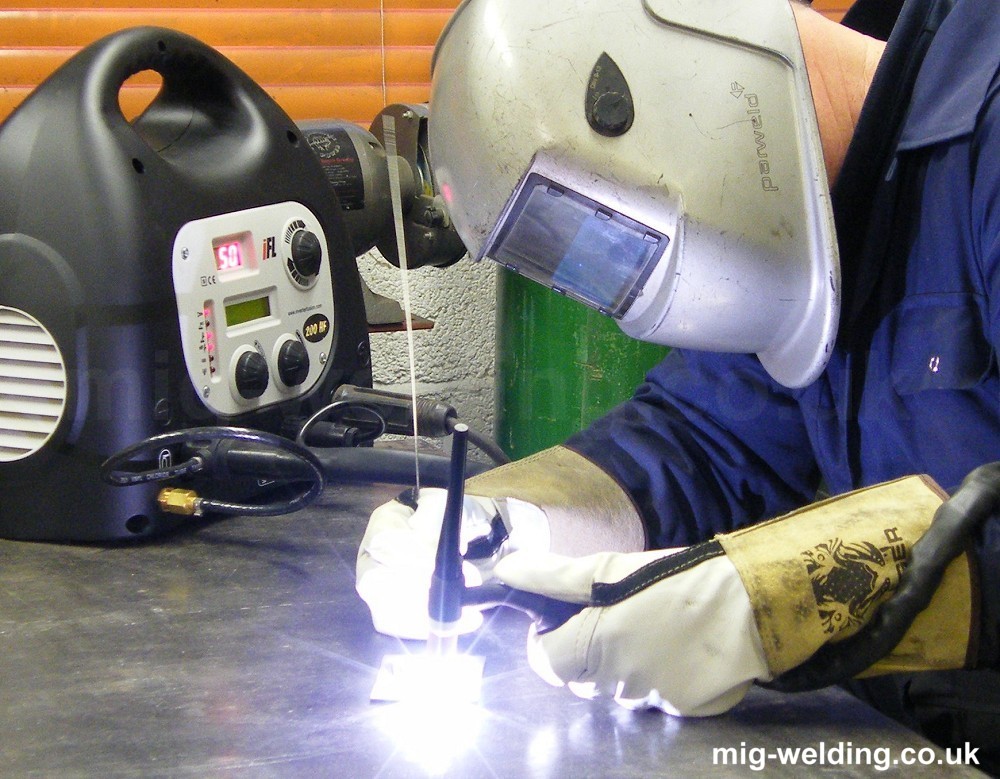
When TIG welding you need to be able to control the distance between the tungsten and the work to within about 1mm. This is only possible with a good welding position. In the photos the welder has used a few tricks:
- Just to confuse you we've photographed a left handed welder. If you are right handed hold the torch in your right hand.
- The welder is sitting down and working on a bench. His upper body weight is not supported by the bench - the bench is only used for positioning.
- In the photo a flexible torch head (very handy) is being used to maintain the angle of the torch with the hand resting lightly on the bench. The hand would need to rest on a piece of wood for the correct angle with a standard torch.
- The torch lead is wrapped around his arm. This takes the weight of the lead away from the torch and reduces the chance of the lead snagging as the weld progresses.
- The head is positioned to the side for a good view of the weld pool. It is very common for beginners to hide the weld behind the gas shroud.
- The lighting is from the side as well as overhead - it allows the welder to see the tungsten position before starting the weld.
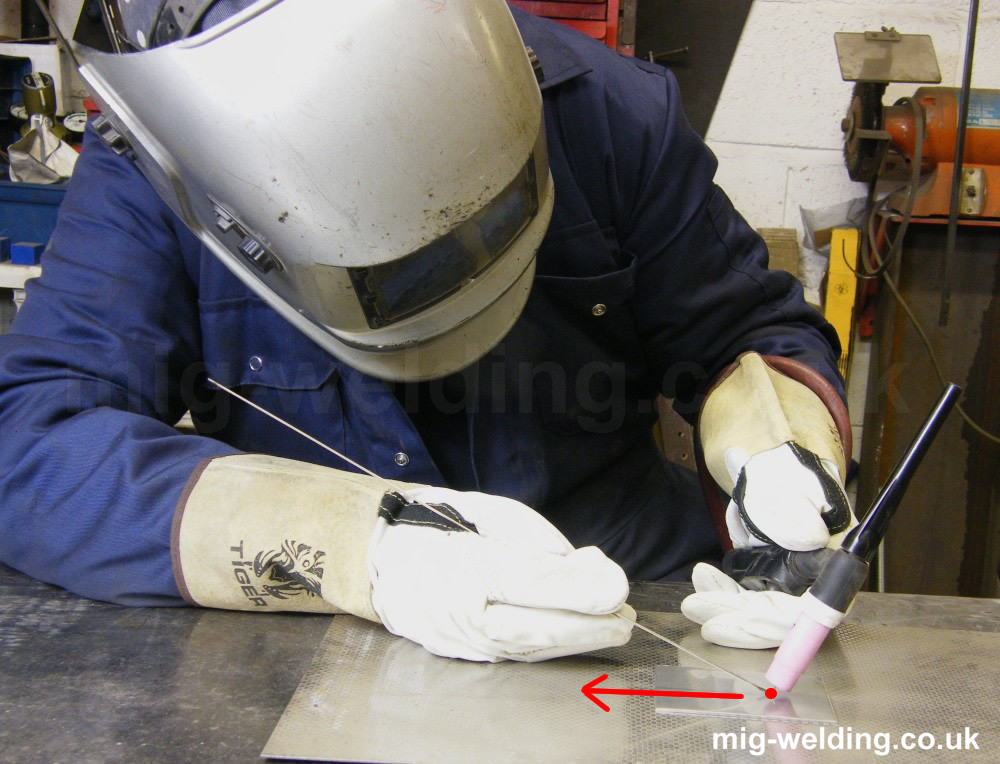
- The torch would move in the direction of the red arrow in the photograph (that one isn't really a trick but is worth a mention while the photo is there).
Relaxed muscles will aid control of the torch - try not to TIG weld directly after hammering or other physical activity, and ensure the workshop is at a comfortable temperature.
The red dot in the photograph just below the torch shows the area the welder will be looking at while welding. It's a tiny area, so for a good view his eyes need to be close to the weld. It's very common for people to discover they need glasses when they first take up TIG welding.
Torch Angle and Movement
The video demonstrates torch angle, position and movement. Above all it shows what a delicate process TIG is. The torch movement is steady in the video and briefly stops while the filler material is added.
The torch is held at about 20 degrees from vertical, tilted so the tungsten points in the direction of the weld. The tilt encourages the weld pool to form ahead of the torch making it easier to add filler rod.
The gap between the tungsten and the work should be maintained at between 1x and 1.5x the diameter of the tungsten. We're using a 1.6mm tungsten so the gap is about 2mm.
It is good practice to move the torch across the work as a dry run before welding to make sure the torch angle and distance to the work can be maintained naturally, and that there isn't anything that will impede movement.
Learning to TIG Weld
Begin by starting the arc on steel. Get a feel of the arc and the weld puddle.
Next try welding on the surface of some sheet without using filler rod. This will help you get a feel for how the puddle moves, and practice in maintaining a tight arc length. Finally move on to adding filler wire as in the video below.
We've used 1.6mm filler rod, but it would have been much easier to feed 1.0mm filler rod into the pool.
Things to watch for in the video:
The tungsten is positioned about 2mm from the steel. the position can be checked by tapping the tungsten against the work before starting the weld. There is a short pre-flow of gas and then the arc starts using HF (high frequency start).
The torch is kept stationary for a few seconds to allow a weld pool to form. The size of the initial weld pool sets up the width of the weld. A large pool will tend to result in a wide weld with a lot of penetration, and a small pool in a narrower weld with less penetration.
You can see the tip of the tungsten reflected in the weld pool. The arc length can be judged by the distance between the end of the tungsten and the reflection in the pool. As you become more familiar with TIG it becomes easier to judge the arc length by the width and height of the arc itself.
The filler rod is added to the very front of the weld pool - it is the weld pool that melts the filler rod not the arc. Adding filler rod will cool the weld pool.
The filler rod is kept low - too high and the arc would ball it back. If the arc length is too long the filler wire will tend to melt back before it reaches the puddle.
The filler rod is kept under the gas shroud at all times. This keeps it close to the arc to keep it warm and make it easier to melt, and also prevents it from oxidising.
At the end of the weld the torch is brought back a little and switched off. The torch is held in position until the post flow gas has stopped. The post flow protects the tungsten and the end of the weld pool.
It's not going to go well at the first attempt - there are so many things going on at the same time that you'll tend to focus on one while the others go astray. It's best to start with getting the arc gap right. After some practice it will become natural and you can focus on the weld pool and adding the filler rod. Once that's there look at how wide the weld pool is and adjust speed of travel to control penetration. Only when all of that is in place will you start to achieve the neat welds that TIG is capable of.
Arc Length
Arc length controls the amount of heat in the weld. TIG is a constant current process (the amps you set on the machine are the amps you get), but increasing the arc length will increase the voltage which in turn puts more heat into the weld.
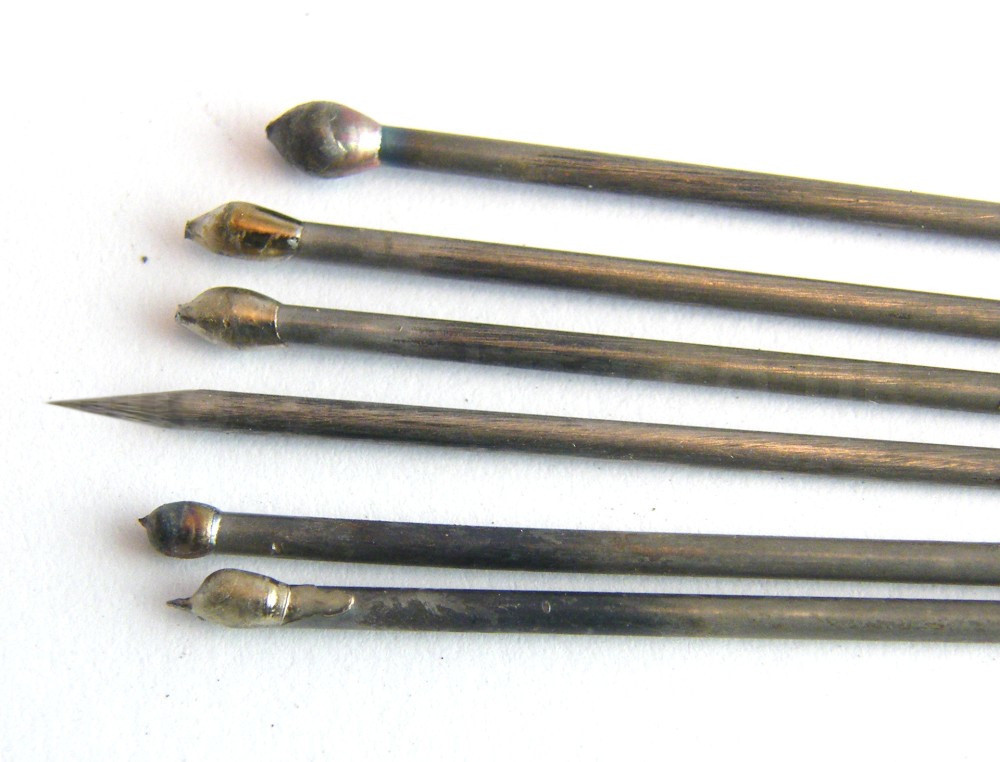
Beginners will tend to have their arc length too long for fear of contaminating the tungsten. It should be maintained at between 1 and 1.5 times the diameter of the tungsten (that's between 1.6mm and 2.4mm arc length for the 1.6mm tungsten we are using).
Excessive arc length will make the arc difficult to control, and it will also make the tungsten very hot so if you do touch down into the weld pool the tungsten will suck up a fair bit of steel. That's what happened to the tungstens in the photo and it's a major frustration for beginners. With a tight arc the tungsten stays cool and touching down hardly even takes the point off the tungsten.
Size and Speed
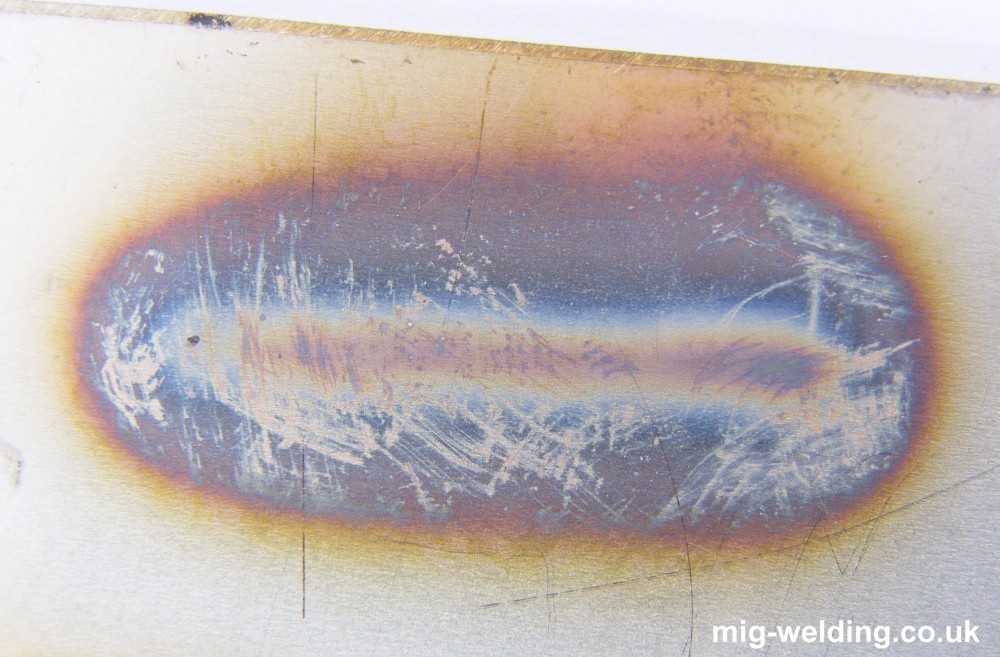
The videos and photos do not give a sense of scale. The weld in the video is only 4mm wide which is perhaps half the width of a MIG or Arc bead for the same material thickness.
The travel speed was about 1mm per second, again much slower than MIG or Arc, but faster than you might imagine while you are distracted by all the other things involved in learning to TIG weld.
The weld is quite flat - less than 0.5mm tall. An ideal for a joint would be to have the reinforcing thickness of weld above the work about 10% of the material thickness.

Our weld has not penetrated through the bottom of the 2mm sheet. We're not aiming for penetration here, just some practice in laying beads.
If your bead penetrates through the rear of the steel before you get the hang of laying a nice bead it is likely that your travel speed is too slow.
The travel speed can be judged by the width of the heat affected zone around the weld (the discoloured part). In the photograph it is quite narrow, maybe 15mm edge to edge.
If the weld had been done at lower amps and a slower travel speed to compensate the heat affected zone would have been much wider. A slow travel speed actually puts more heat into the weld as heat is conducted away from the weld pool before the weld pool is established.
Feeding TIG Filler Rods
There is so much going on with TIG welding that it's probably best not to feed the wire for the first few practice beads. Just hold onto the wire and stop adding it before your fingers burn.
Once all the other things are in order feeding the filler rod happens naturally. The wire can be fed in whichever way feels comfortable to you, but here's a video of an easy way.
You only need to feed the wire to maintain the distance between your fingers and the arc - the feed rate is much slower than shown in the video.
The filler rods are quite long. They are much easier to work with if you cut them in half.
Struggling?
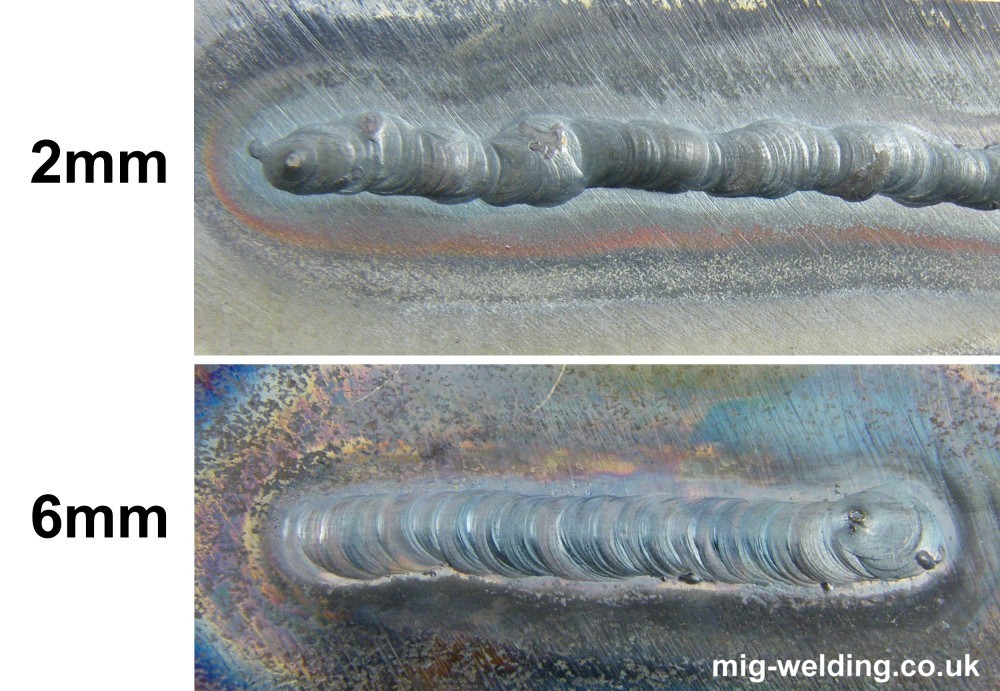
You did start off on 2 or 3mm steel didn't you? It really is a lot easier than the thin stuff.
The two welds in the photo on the right were made by a beginner TIG welder. In the first photo the welder was struggling to control the weld pool, and was having trouble adding the filler rod.
The second weld was made immediately afterwards with no further training. The only difference is the thickness of the steel (and the amps adjusted to suit). The increased thickness means the weld pool is larger and easier to control, which makes it much easier to add the filler rod.
The plate in the second photo hasn't been prepared properly - the steel needs to be completely shiny and free of rust or mill scale else the weld will spit steel back at the tungsten and contaminate it as soon as you start the weld.
The ease of welding thicker material makes it easier to understand and develop the technique. Also it provides a big confidence boost. Once you have the technique it is easily transferred to thinner material.
Next Step
It gets boring laying beads on plate. Once you have the basic technique try some butt welds. They will give much better feedback on travel speed and the amount of filler rod to add. After those try some fillet welds - it was getting those right that made me click with TIG welding.