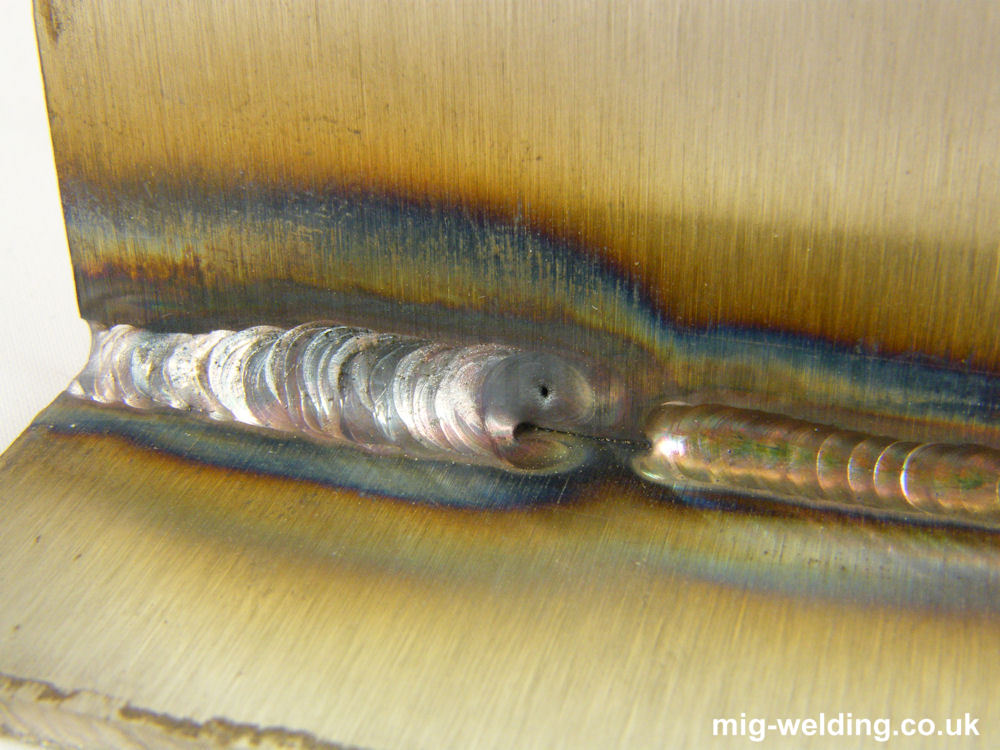
TIG Welding Tutorial - Fillet Welds
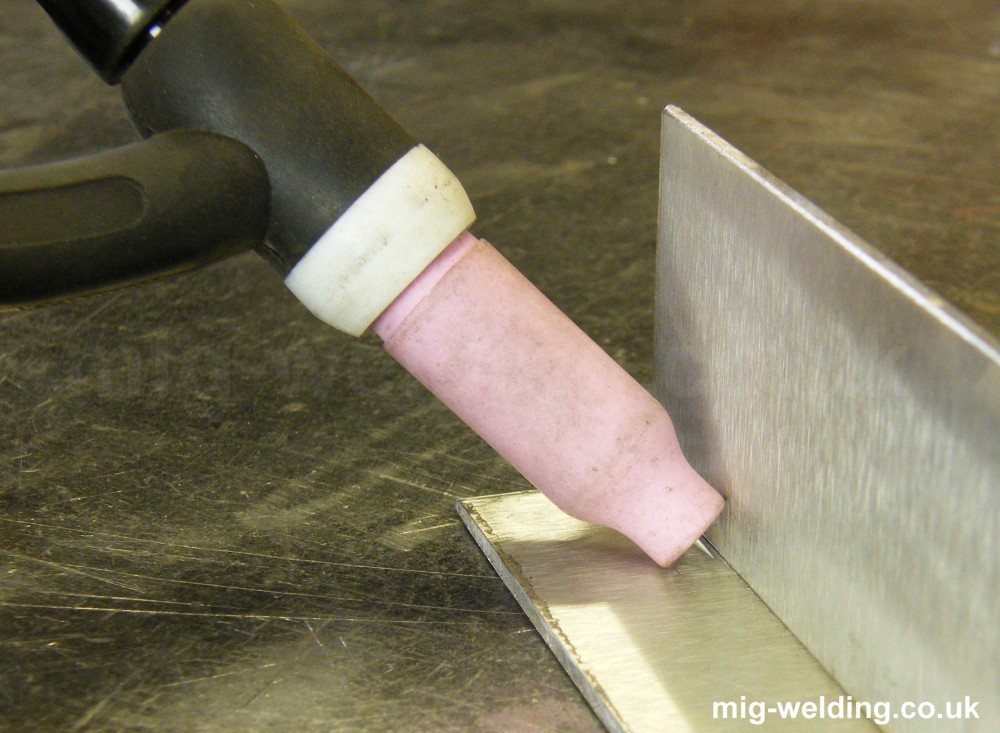
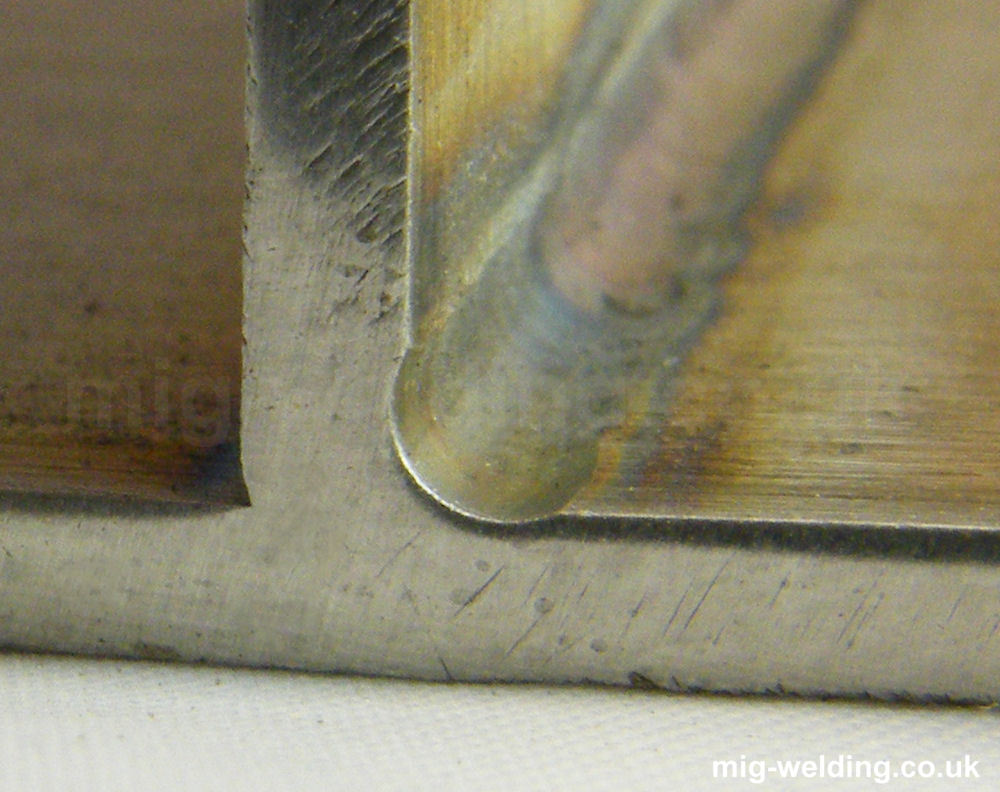
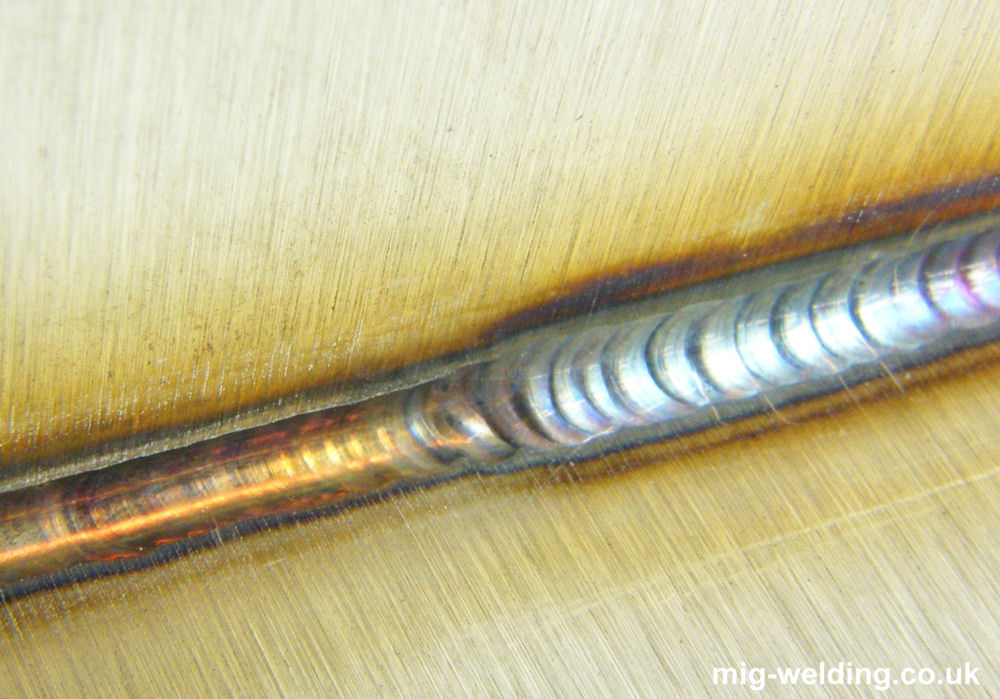
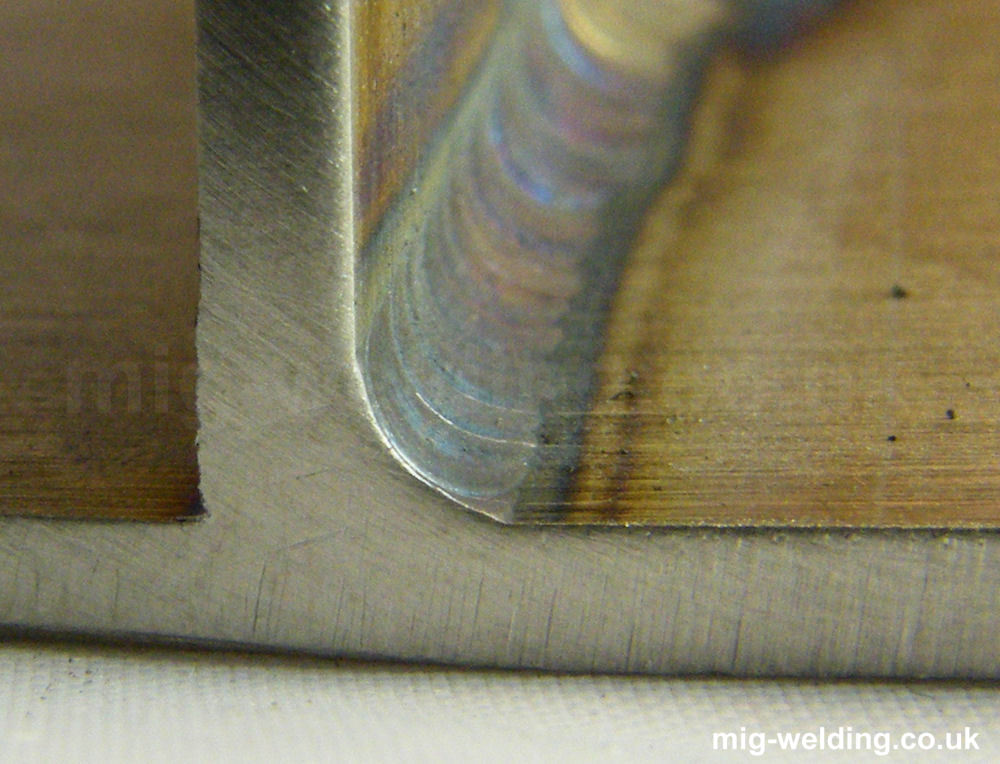
The torch is angled at 45 degrees to the corner of the fillet (tilt angle)
and also angled back about 20 degrees towards the direction of travel (slope
angle). The metal is 2mm stainless, and we set the machine to 75 amps (see
the tig amp chart).
| A smaller shroud than normal is used for fillet welds - we've used
a number 4. This allows the torch to get closer to the corner of the
joint. Gas shielding is poorer with the smaller shroud, but for fillet
joints the gas is contained in the corner, making up for the smaller
shroud.
The end of the tungsten is about 3mm from the corner of the joint when
the torch is in welding position. It's difficult to judge the distance
to the corner. A piece of 1.6mm welding rod in the corner can be used
to set the tungsten stick out much more accurately. |
|
| |
|
Autogenous Fillet Weld
Fillet welds are very good for highlighting technique faults. If the
arc gap is too large or if too much filler rod is added (building up
the weld so the tungsten is too far from the corner) then the weld pool
will tend to melt the edges of the sheet and not the corner of the joint.
This results in an untidy weld with poor penetration into the root.
Autogenous welds are the way to develop fillet technique. Autogenous
just means the welds are carried out with no filler rod. Without the
filler if the tungsten is too far from the corner it will arc against
one side of the sheet or the other and it will not be possible to maintain
a weld pool. It's well worth trying one while learning as fillets with
filler rod are performed with exactly the same technique.
Here's a video of an autogenous fillet weld. We've started on the end
of a tack so we have a bit of filler material to make into the weld
pool, then the weld pool is manipulated along the joint with no further
filler rod added.
OK so there's a touchdown in there. The tungsten is very close to the
weld pool so this does happen on occasion, but it's not the end of the
world. The tight arc gap keeps the tungsten cool so it doesn't pick
up excessive metal from the weld pool. A decent inverter TIG welder
will cut the power to the tungsten as soon as it dips which further
reduces contamination to the tungsten. We've kept going and finished
the weld.
The edge of the ceramic can be rested on one side of the fillet and
used as a guide for the torch. |
Autogenous welds are pretty, but not as strong as ordinary TIG welds.
The metal in the weld pool comes from the sides of the corner so there
is undercutting, and the reinforcement added by the weld is quite small
- normally it would be about 0.8 of the thickness of the steel.
This is the same 2mm stainless sheet we started with - it looks much
thicker in the photo! |
 |
| |
|
Fillet Weld with Filler Rod
The main reason to try autogenous first is to get a feel for how the
weld should behave. In the photo there is the autogenous weld from the
first video to the left, and the fillet from the following video to
the right.
The two welds are very similar in size. The filler just being added
to replace the metal melted into the weld pool. Too much filler rod
will build up the weld excessively and cause the heat to go to the sides
of the fillet and not the corner.
We've stayed at 75 amps and used 1.0mm filler rod for the fillet. |
 |
| |
| In the video the rod is only touched to the front of
the weld pool and not forced in to the pool. You don't need to add very
much filler.
|
| |
|
The filler rod replaces the metal used to form the weld pool, so
there is no undercutting.
|
 |
| |
|
Fault - Arc gap too long
Every TIG welder who has not had formal tuition will likely suffer
from this one. The weld on the right is normal - neat with a straw colour.
The one on the left was deliberately done with a 4mm arc gap (much too
long) which increased the heat in the weld and generally left a mess.
The arc would form against one sheet or the other, and the torch had
to be manipulated between the sheets to make the weld pool form against
both sheets. This reduced the speed of the weld and the increased heat
input can be seen in the grey colour of the weld and the distance of
the bluing on the material from the weld. |
 |