


Dieselman 63
Forklift Certified
- Messages
- 5,888
- Location
- Wellington, New Zealand
Hi,
Last night I was sorting out all my pics and I came across a heap of photos I'd forgotten I took. Not sure if it's much interest on here as a wood vice but it's all vintage ironwork and the before pictures are amazing. I'm quite certain it had never been taken apart since new, during which time somebody gave it a repaint in pale green (whyyyy) and no sawdust had been cleaned from it.

Woden vice numbers are weird. This is a 189B/1 (you can get 2 and 3 models, too), a 7" jaw width.

The seller said no QR, which was kind of true as one of the previous owners had used a hacksaw to cut the lever off. I'm as baffled as you...

I couldn't turn it through the last bit, I jammed a wrench onto the QR stub and slid it over that little grime-fest. Can anyone see where the rear face had been sitting?

The underside of this half really wasn't that bad, lots of original paint and none of that green rubbish.

The horror begins...

Not sure what's meant to be happening here? Well, the sawdust and oil and filth have congealed around the rails, creating a very hard surface that I initially thought was poor quality cast.

Compare this photo to the one above. Popped through to the metal with a screwdriver.

The whole mechanism got a full clean and repaint as there was just too much grease caked on

Much happier

I then turned to the cast, which was pretty poor in terms of flash and excess material. I chipped little bits off then used the Dremel to grind it all flush


I couldn't continue with the restoration as I needed the vice for a string of projects, so I decided to install it my favourite way, by making an apron and boring holes to fit the openings
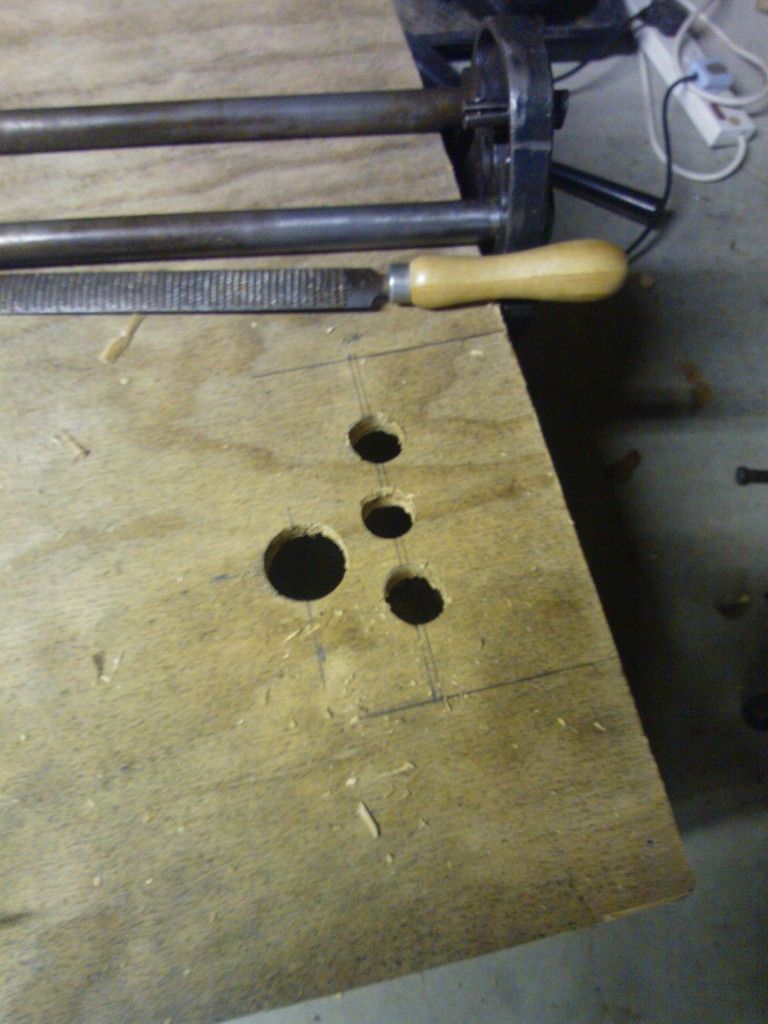
Then you fit the back face, and the holes should line up

Et voila! Slight WD40 overspray!


I like doing it this way because it stops so much iron hanging off the end of your bench, and the back plate can be screwed into the apron and up into the bench through spacer blocks; it's a lot sturdier than using bolts and counter-boring the surface.
I accidentally ran over the edge of the decal as I didn't know it was there under the green. The trophy for 'most difficult cast iron to clean' goes to Woden for this crevice-filled design. I wore out two Dremel wire attachments getting this far and I'm still miles off. A job for another day!

Thanks for reading")
Last night I was sorting out all my pics and I came across a heap of photos I'd forgotten I took. Not sure if it's much interest on here as a wood vice but it's all vintage ironwork and the before pictures are amazing. I'm quite certain it had never been taken apart since new, during which time somebody gave it a repaint in pale green (whyyyy) and no sawdust had been cleaned from it.
Woden vice numbers are weird. This is a 189B/1 (you can get 2 and 3 models, too), a 7" jaw width.
The seller said no QR, which was kind of true as one of the previous owners had used a hacksaw to cut the lever off. I'm as baffled as you...
I couldn't turn it through the last bit, I jammed a wrench onto the QR stub and slid it over that little grime-fest. Can anyone see where the rear face had been sitting?
The underside of this half really wasn't that bad, lots of original paint and none of that green rubbish.
The horror begins...
Not sure what's meant to be happening here? Well, the sawdust and oil and filth have congealed around the rails, creating a very hard surface that I initially thought was poor quality cast.
Compare this photo to the one above. Popped through to the metal with a screwdriver.
The whole mechanism got a full clean and repaint as there was just too much grease caked on
Much happier
I then turned to the cast, which was pretty poor in terms of flash and excess material. I chipped little bits off then used the Dremel to grind it all flush
I couldn't continue with the restoration as I needed the vice for a string of projects, so I decided to install it my favourite way, by making an apron and boring holes to fit the openings
Then you fit the back face, and the holes should line up
Et voila! Slight WD40 overspray!
I like doing it this way because it stops so much iron hanging off the end of your bench, and the back plate can be screwed into the apron and up into the bench through spacer blocks; it's a lot sturdier than using bolts and counter-boring the surface.
I accidentally ran over the edge of the decal as I didn't know it was there under the green. The trophy for 'most difficult cast iron to clean' goes to Woden for this crevice-filled design. I wore out two Dremel wire attachments getting this far and I'm still miles off. A job for another day!
Thanks for reading


