


You are using an out of date browser. It may not display this or other websites correctly.
You should upgrade or use an alternative browser.
You should upgrade or use an alternative browser.
trying to fit euro adapter
- Thread starter peter1
- Start date
will123thomas
Member
- Messages
- 76
it might help if you posted some pictures of it so we can understand the problem, because the euro adapters are universal you may need to alter it slighty for your welder

Luke
Member
- Messages
- 1,927
- Location
- Whitchurch, Shropshire
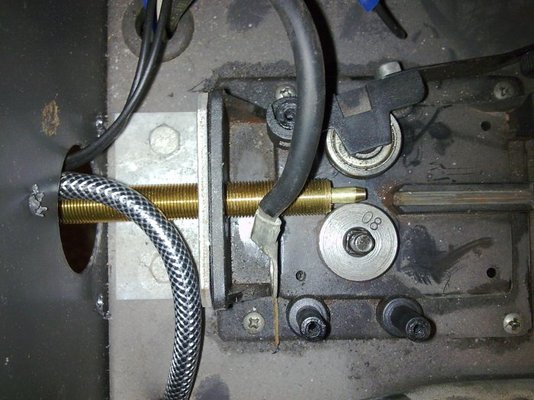
your second picture looks a bit too far out to me, drop the tensioning roller down so it's in the position it would be during use, then position the feed in to the euro connector right up close to the wheels, with maybe 2mm-or-so clearance.
The closer the feed is to the rollers, the less likely you'll have bird-nesting problems.
The closer the feed is to the rollers, the less likely you'll have bird-nesting problems.
It looks as if you are missing two nuts, one before and one after the wire feed plate. The nuts would allow you to position the euro connector in the correct position and when tightened will secure everything in place.
Alternatively I would try moving the wire feed back before resorting to the hacksaw by drilling new holes.
Best of luck.
Alternatively I would try moving the wire feed back before resorting to the hacksaw by drilling new holes.
Best of luck.
theres a pic of mine i fitted on this thread
http://www.mig-welding.co.uk/forum/showthread.php?t=13783&page=5
theres a grub screw you need to undo there the iner pipe will come out
then u need to cut down the the threaded bit to the size u need then cut down the iner bit to the size you need
http://www.mig-welding.co.uk/forum/showthread.php?t=13783&page=5
theres a grub screw you need to undo there the iner pipe will come out
then u need to cut down the the threaded bit to the size u need then cut down the iner bit to the size you need
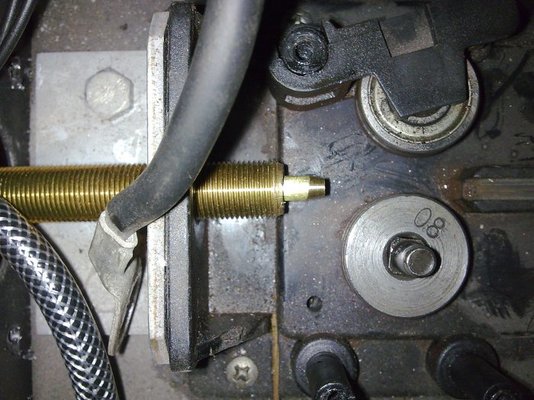
Yes the gun should be connected to the adapter first. If it is the correct euro adapter, then you push it through the plastic support/insulator until the inner guide tube butts up as close as possible to the drive wheels and make sure that it is on the same plane as the exact centre of the drive wheels.
You should only have to trim some off the inner guide tube not the threaded section "stinger", make sure that if you trim some off the guide tube that there are no internal burrs.
As stated make sure that the guide tube butts up to the liner nut on the gun.
You should only have to trim some off the inner guide tube not the threaded section "stinger", make sure that if you trim some off the guide tube that there are no internal burrs.
As stated make sure that the guide tube butts up to the liner nut on the gun.


