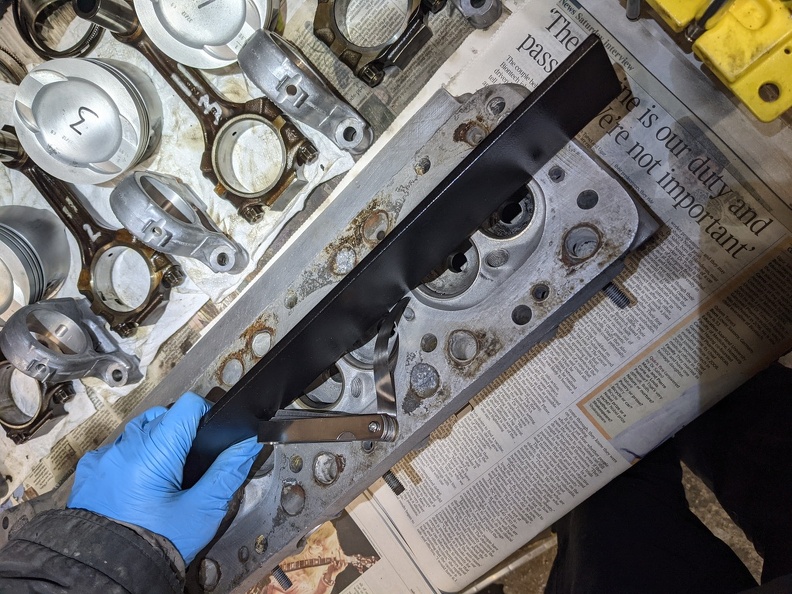
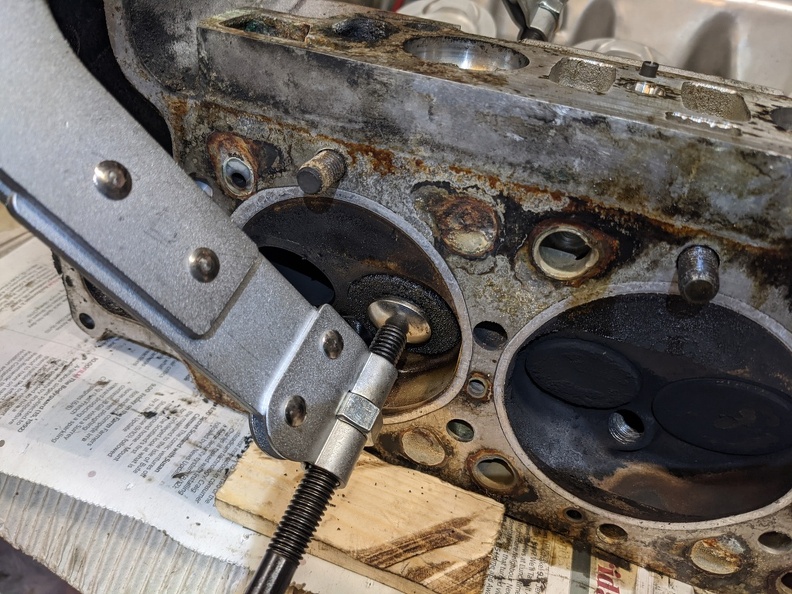
Been watching too many American rebuild videos on youtube! 
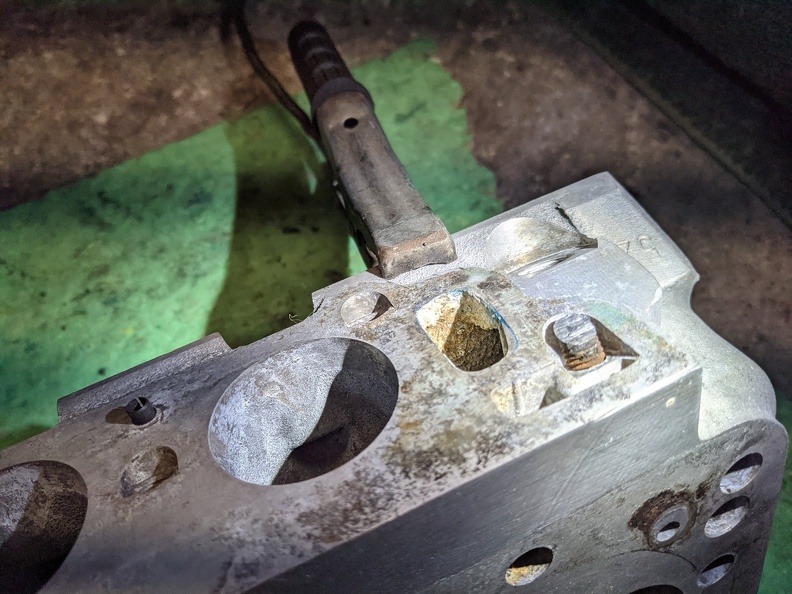
Here are a couple of close ups of the worst bearing above cylinder 8 with ~.1mm clearance, looks like there has been plenty of metal on metal contact. 
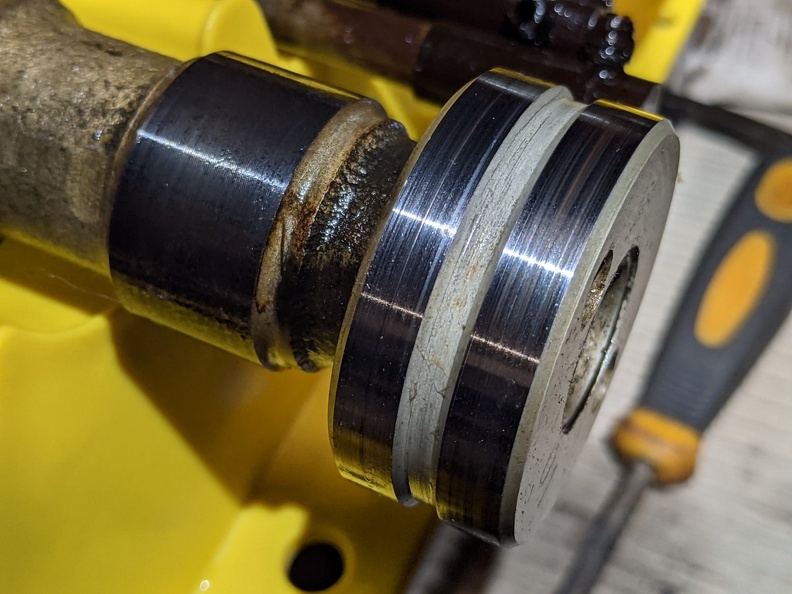
I think I could live with the wear on the left side but would like to find an oversize set of bearings for the right side.
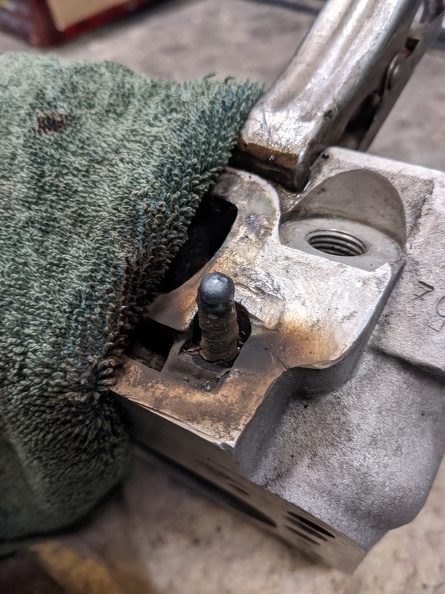
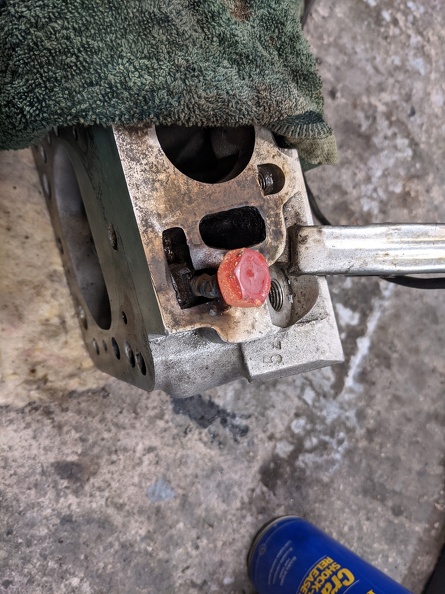
I have been searching for a set of oversized cam bearings so that I could grind the cam, however I don't seem to be able to find any in stock and they are NLA at MB, so it looks like I will need to buy both a standard bearing set and new CAM, ouch! I got back into the garage this afternoon and started work on the first head. It was easy to remove the collets as the tool locked in place. Six months ago I glued this valve guide in place with high temp loctite, it held for most of the summer but I started getting a puff of smoke on start up again in September, it must have worked its way loose again then. Into a bath of hot degreaser. Once it had heated up I took the opportunity to remove the remainder of the valve guides. Washed and dried. I will remove the broken bolt from this tomorrow.... ....and clean up the valves.
I have no idea but it sounds like a good idea, the bearing internal surfaces do seem to have a lot of features though. I will ask around. So far I found: New cam is £200 New bearing set £480
Yes, 5 bearings, three different journal sizes. I think getting someone to get put in sleeves and keep the concentricity across all 5 would be a challenge given they are odd sizes so can't be line bored.
Sorry but can't help with that. Any competent machine shop should be able to do the line boring, I would imagine, but the set up is a bit particular in this case since it's not just a case of running a single cutter through the bore. I'm sure there will be someone here with experience of doing it, or knowledge thereof.
I’ve had a similar problem a couple of times on Volvo 240s where the oil gallery in the head became blocked and seized the cam, at the time we had a really good engine machine shop in town that regrouped the cam bearing surfaces line bored the head then fitted new cam bearings which were then line bored . One of the cars was still going strong ten years later
Too busy to get out to the garage today, but did do some more measuring of the old and new valve guides and the head valve guide bores. The valve guide situation is a bit odd, in EPC the original size that was used is no longer available and has been replaced by a fractionally bigger set, EPC refers to these as "repair stage 1", whereas in the workshop manual there is no mention of the original size, it refers to the EPC stage 1 as the "standard dimension". I think that at some stage when Mercedes realised that they had a problem with loose valve guides they dropped the original size and adopted the 1st oversize as the standard replacement. Here are the old and new guides, I also purchased a single EPC oversize 2 in case I needed it for the problems I had on the intake of cylinder 1. You can see here that the old cylinder 1 valve guide easily slips into the head. The good news after doing all the measurement is that I wont need to bore out the head for the "oversize 2" valve guide as it is well within the recommend overlap. Still got to check the other head but don't expect any issues there. Next I did an inspection of all the valve seats for damage, good news again there, there were no chips or damage. They are supposed to have a 3 angle grind but its not very obvious. Cylinder 1 exhaust Cylinder 1 intake. The remainder of the valve seats on the first head were the same.
Aren't valve guides normally to the surface of the port? Those valve guides look very short to me. Is that a normal thing?
@RaceDiagnostics this is all way beyond anything I know, do, or comprehend. But your attention to detail is nothing short of legendary once done I’m sure you’ll have the most sorted SL ever
I spent a long time in the garage today but made limited progress. First I stripped down the second head. The tray is now full! Next was a lot of scrubbing in the hot degreaser bath. I then checked both heads for flatness, both were good. but both heads don't look great, do you think they will seal ok or do they need skimmed? Next I went back to the sheared bolt on the first head. Built up with weld. Then nut welded on. I managed to get the bolt turning but had to go through this process a lot of times. I think the thread has galled since I am making such slow progress. It is now sitting in a puddle of "plus gas" overnight to see if that helps. I then went on to try to clean up the valves, I will leave them in this oven cleaner overnight, but don't have a good feeling of success. The main ingredient is Potassium Hydroxide. Does anyone have a suggestion of the best way to do this?
Two drills one with a wire brush on to get the bulk of it off and some rough grit paper for the remainder... other rotating tools are available
Bench grinder with a wire brush works well if you have one or a gasket stripper aerosol will soften the carbon. Is it worth taking a chance on not skimming the heads after all the work and effort your putting in?