Pete.
Forum Supporter
- Messages
- 15,154
- Location
- Kent, UK
I wanted to make sure that my box square and Chinese granite square were telling the truth in terms of squareness measurement. The box square I got used from somewhere and it's obviously good quality but very old. The granite square I bought new and it did come with a certificate of squareness but we all know what they are worth.
First the box square. I already knew that it had a very tiny error in one face and suspected that it was in the bottom face which is the one that it would be normally standing on.
I already had the gauge set up from yesterday so I used that to check the two pairs of faces on the box square for parallel. The two side faces were spot on, the top and bottom showed out of parallel by 0.00015" (just under 4 microns). The two vertical faces read perfectly parallel (to the limits I could measure them) so that gave me a starting point.
We know that the top and bottom faces were out of parallel but what we don't know is which one is out of square with the sides (or if both of them are). To check for this I set up the following gauge:
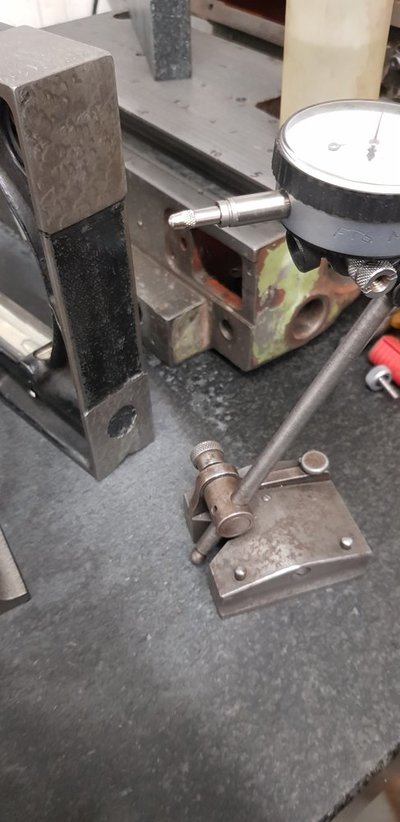
If you ever wondered what the ball is for on a surface gauge - this is it (or at least, this is one use). I set the dial point as close to directly above the ball end as I could. It doesn't need to be perfect for these comparative measurements. This dial gauge is VERY sensitive 1 micron resolution (0.00004") and it's very important to make sure all readings are set up exactly identical. To do this I put the square and the gauge alongside the Mercer comparator stand base and took some readings.
I put the square on one good known parallel face and brought it up to the dial gauge then zeroed the dial. This is measuring the top face which is the one I thought would be OK.
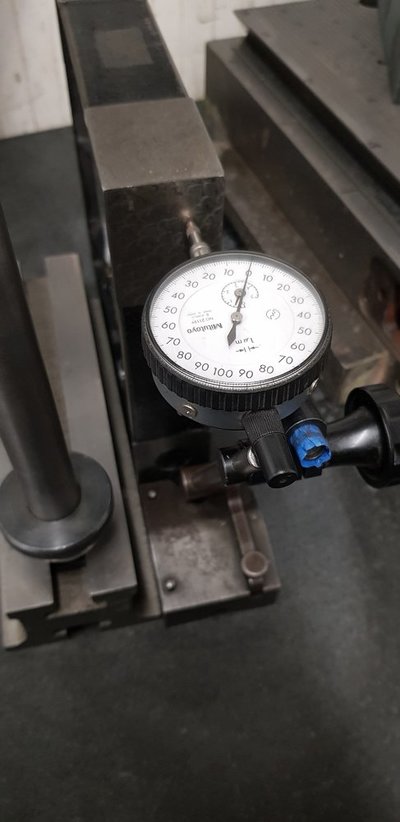
Next I carefully backed the square away, flipped it over and brought it up to the dial again.
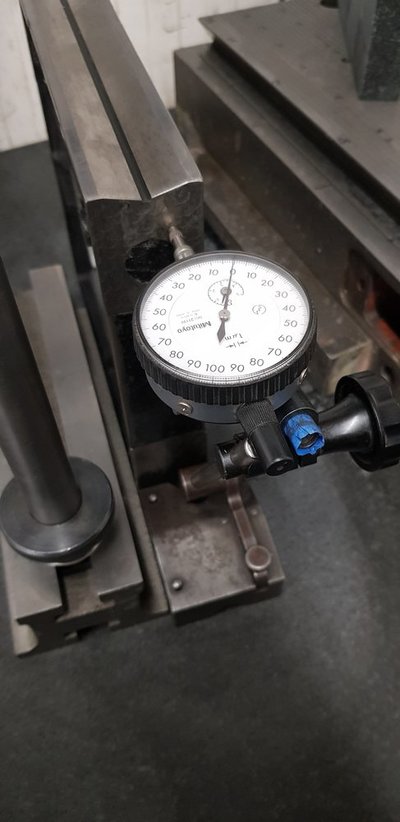
I got the same reading exactly. The top face must be dead square to both of the two sides. That means it's the bottom face that's got some wear. It's not surprising given the age of the square and the fact that the face has only two narrow lands and a vee in between for measuring cylindrical objects.
So I mixed some 5 micron diamond paste with light oil to make a thin slurry and spread it on one of my lapping plates. I put the square on the slurry mix, held the 'low' end and hinged the 'high' end to and fro in the slurry puddle. The idea is that the end that needs lapping down more has the most movement in the slurry and the low end is just a pivot. I stopped a couple of times when I saw the slurry turning grey (indicating that it was removing metal) and in no time flat I had the faces reading parallel again.
Here's the result from parallel measurement. I moved the square, not the gauge stand. The results were more consistant that way.
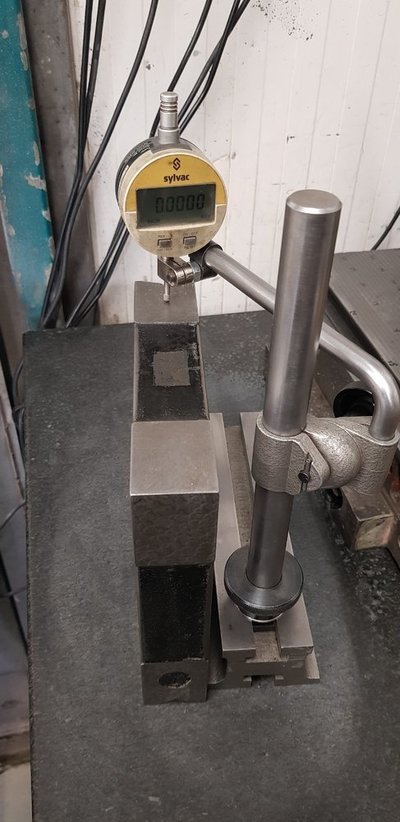
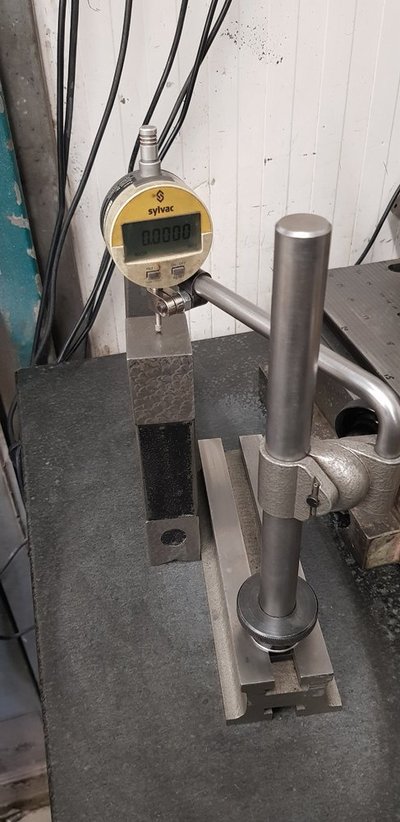
To check the granite square I simply set up the stand and zeroed it against the now-known-true box square, then brought the granite square up to the dial.
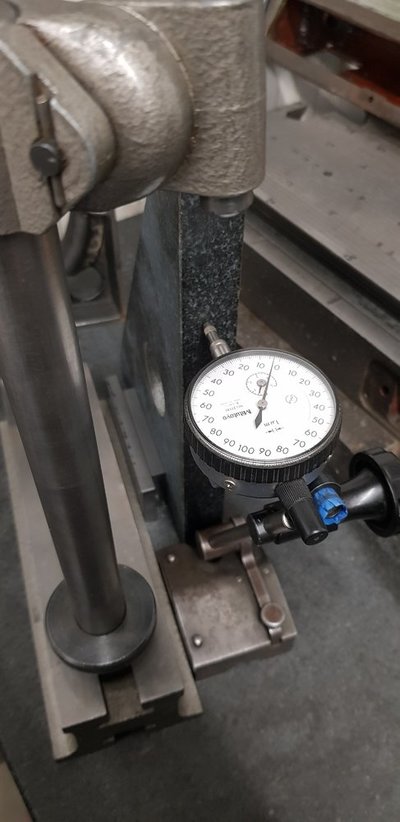
2 microns out over 8" That's less than a ten-thousandth of an inch so I'm leaving it well alone. Better than I expected TBH.
First the box square. I already knew that it had a very tiny error in one face and suspected that it was in the bottom face which is the one that it would be normally standing on.
I already had the gauge set up from yesterday so I used that to check the two pairs of faces on the box square for parallel. The two side faces were spot on, the top and bottom showed out of parallel by 0.00015" (just under 4 microns). The two vertical faces read perfectly parallel (to the limits I could measure them) so that gave me a starting point.
We know that the top and bottom faces were out of parallel but what we don't know is which one is out of square with the sides (or if both of them are). To check for this I set up the following gauge:

If you ever wondered what the ball is for on a surface gauge - this is it (or at least, this is one use). I set the dial point as close to directly above the ball end as I could. It doesn't need to be perfect for these comparative measurements. This dial gauge is VERY sensitive 1 micron resolution (0.00004") and it's very important to make sure all readings are set up exactly identical. To do this I put the square and the gauge alongside the Mercer comparator stand base and took some readings.
I put the square on one good known parallel face and brought it up to the dial gauge then zeroed the dial. This is measuring the top face which is the one I thought would be OK.

Next I carefully backed the square away, flipped it over and brought it up to the dial again.

I got the same reading exactly. The top face must be dead square to both of the two sides. That means it's the bottom face that's got some wear. It's not surprising given the age of the square and the fact that the face has only two narrow lands and a vee in between for measuring cylindrical objects.
So I mixed some 5 micron diamond paste with light oil to make a thin slurry and spread it on one of my lapping plates. I put the square on the slurry mix, held the 'low' end and hinged the 'high' end to and fro in the slurry puddle. The idea is that the end that needs lapping down more has the most movement in the slurry and the low end is just a pivot. I stopped a couple of times when I saw the slurry turning grey (indicating that it was removing metal) and in no time flat I had the faces reading parallel again.
Here's the result from parallel measurement. I moved the square, not the gauge stand. The results were more consistant that way.


To check the granite square I simply set up the stand and zeroed it against the now-known-true box square, then brought the granite square up to the dial.

2 microns out over 8" That's less than a ten-thousandth of an inch so I'm leaving it well alone. Better than I expected TBH.


