


Hi all. Just thought I'd post a few pics of how my first attempts at fixing 'a few rust spots' on my 65 Mustang.
I hope these images are okay. Hopefully, they're not too bad and aren't too large.
It's been a very steep learning curve as I haven't welded thin metal before, but I've learnt a heck of a lot from this website and it's given me the confidence to have a go (thanks Malcolm). The main things I've found so far are that the majority of the time taken is the preparation of the affected areas and replacement panels/patches. Especially as most joins are butt welded, and I've found even a smallish gap (over 1mm) can cause difficulties. Also, Some of the panels I was welding to were galvanised and I found the best way to cope with this was to grind as much of the platining off as possible without thinning the metal too much. Otherwise, it kept spitting, preventing good penetration and causing melting back of the thin metal being welded to it.
Hopefully, my welding will get neater when I move onto the bodywork. I'll have to be watchful of warping issues - so far I've only done stuff most people won't see!!
Anyway, see what you think.
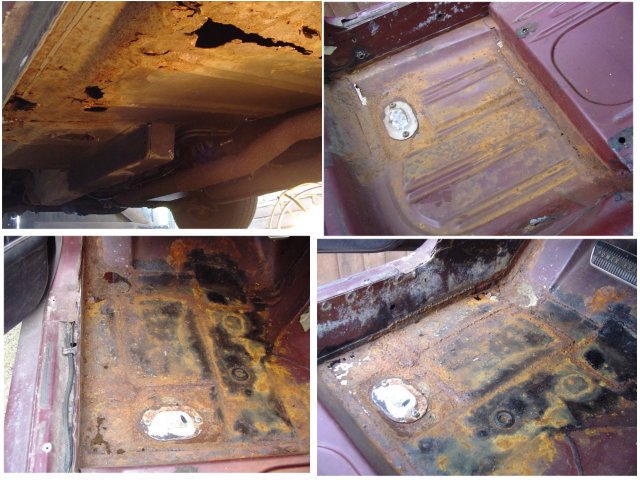
That's all the rust gone - way past the point of no return now.
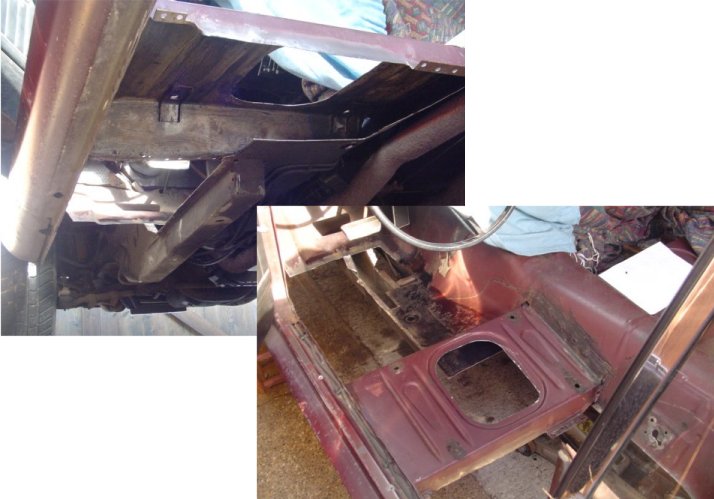
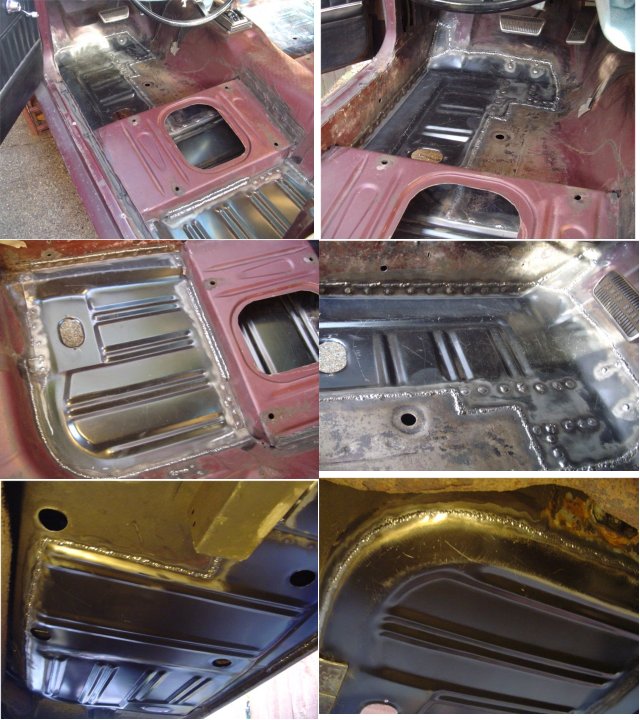
Just a small repair then! This is were you can all have a go at my welding. I left the panel between the sill and tunnel (the driver seat sits on this) intact (apart from an access whole I cut in the top) as it would have weakened the floor structure.
The wonderful discovery of what lay (or not) beneath the carpet on the left side of the car. You may be able to see many previous repair patches in the footwell - these were tacked on over the original floor! I think some of it was held on with paint!
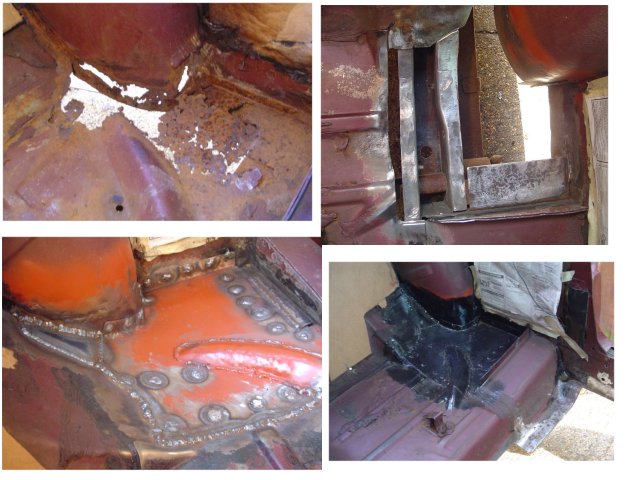
My very first repair!!! This shows the left rear floor under the rear seat or what there was of it! The patch panel took ages to shape and fit.
I hope these images are okay. Hopefully, they're not too bad and aren't too large.
It's been a very steep learning curve as I haven't welded thin metal before, but I've learnt a heck of a lot from this website and it's given me the confidence to have a go (thanks Malcolm). The main things I've found so far are that the majority of the time taken is the preparation of the affected areas and replacement panels/patches. Especially as most joins are butt welded, and I've found even a smallish gap (over 1mm) can cause difficulties. Also, Some of the panels I was welding to were galvanised and I found the best way to cope with this was to grind as much of the platining off as possible without thinning the metal too much. Otherwise, it kept spitting, preventing good penetration and causing melting back of the thin metal being welded to it.
Hopefully, my welding will get neater when I move onto the bodywork. I'll have to be watchful of warping issues - so far I've only done stuff most people won't see!!
Anyway, see what you think.
That's all the rust gone - way past the point of no return now.
Just a small repair then! This is were you can all have a go at my welding. I left the panel between the sill and tunnel (the driver seat sits on this) intact (apart from an access whole I cut in the top) as it would have weakened the floor structure.
The wonderful discovery of what lay (or not) beneath the carpet on the left side of the car. You may be able to see many previous repair patches in the footwell - these were tacked on over the original floor! I think some of it was held on with paint!
My very first repair!!! This shows the left rear floor under the rear seat or what there was of it! The patch panel took ages to shape and fit.
Last edited by a moderator:
")

