


A little update on the Mustang we are trying to keep alive.
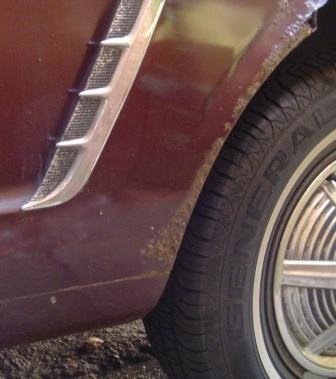
New floors went in around 3 years ago now, but busy with 2 new additions to the family since, so the rot has really got its teeth into the rest of the car. Have managed to sort out cowl and front and rear screen surronds leaving the bottom of both rear quarters, rear boot panel, bottom of front offside wing and bottom of nearside door.
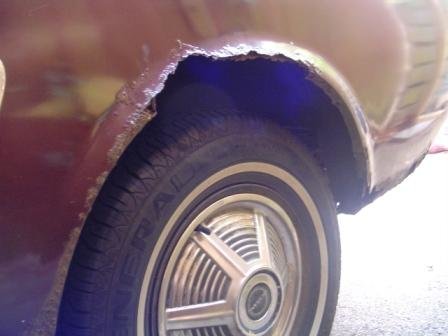
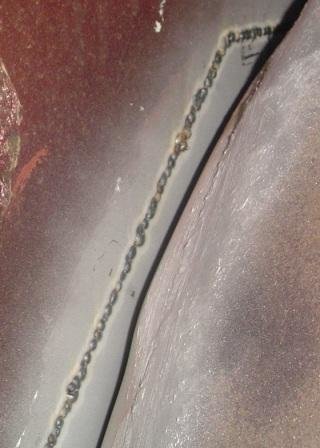
Anyway, last couple of weekends has seen some of the nearside rear quarter done. This included my first try at welding on a large flat(ish) panel where any warping would be easy to see.
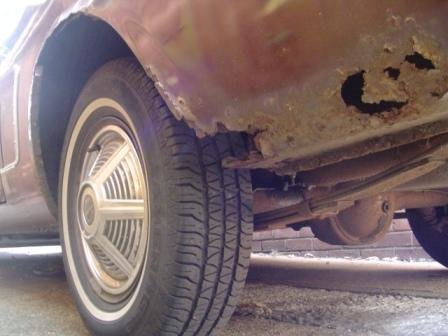
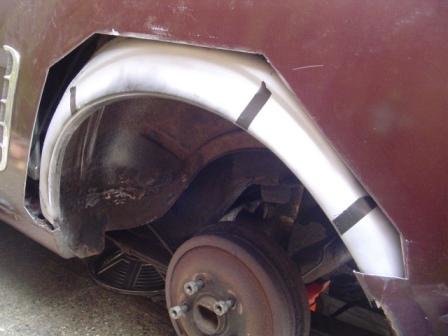
Most of the top part of the arch disappeared when I leant against it while refitting the rear screen! As you can see, the inner arch was as bad as expected. The replacemnet panels, particularly the outer arch were just plain awful. It has taken quite a lot of 'persuasion' to knock at least some shape into the new panels so they kind of resemble the original lines. Still, you live and learn - buy better panels or enjoy learning the art of panel beating!
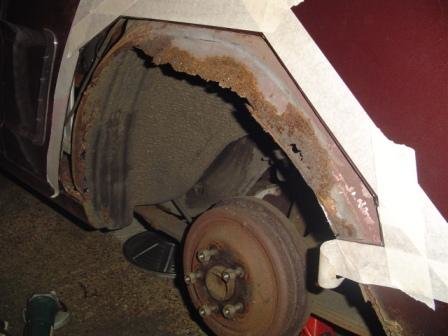
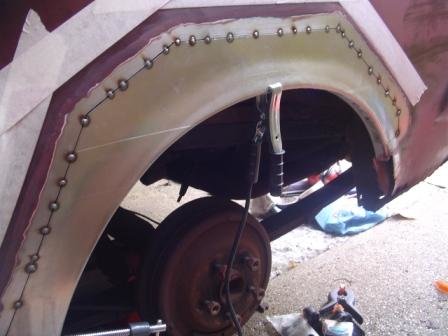
Panel fit and preperation took ages and using the 'tack and wait' method to minimise distortion seemed to be quite successful. I was worried about weld penetration though - as the tacks got closer together, I found it difficult to get the balance between ensuring the weld was deep enough and not blowing holes. The second from last pic is from the inside of the boot showing weld penetration
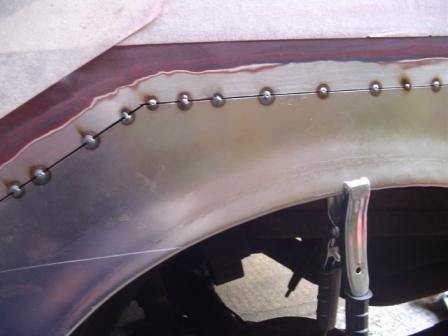
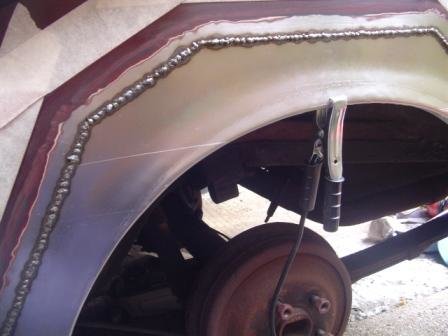
Still, there's an arch where there wasn't one before and, considering there is no filler on the last pic, I'm quite happy with the results so far. By the way, the most visible line just inside the primered area is not the weld, that's just the edge of the very thick original (and a bit more) paint! Perhaps a few more threats with the hammer just to make sure there are no high spots should do it, but access to the back side of the panel (especially towards the front of the arch) is restricted.
Have a look...
New floors went in around 3 years ago now, but busy with 2 new additions to the family since, so the rot has really got its teeth into the rest of the car. Have managed to sort out cowl and front and rear screen surronds leaving the bottom of both rear quarters, rear boot panel, bottom of front offside wing and bottom of nearside door.
Anyway, last couple of weekends has seen some of the nearside rear quarter done. This included my first try at welding on a large flat(ish) panel where any warping would be easy to see.
Most of the top part of the arch disappeared when I leant against it while refitting the rear screen! As you can see, the inner arch was as bad as expected. The replacemnet panels, particularly the outer arch were just plain awful. It has taken quite a lot of 'persuasion' to knock at least some shape into the new panels so they kind of resemble the original lines. Still, you live and learn - buy better panels or enjoy learning the art of panel beating!
Panel fit and preperation took ages and using the 'tack and wait' method to minimise distortion seemed to be quite successful. I was worried about weld penetration though - as the tacks got closer together, I found it difficult to get the balance between ensuring the weld was deep enough and not blowing holes. The second from last pic is from the inside of the boot showing weld penetration
Still, there's an arch where there wasn't one before and, considering there is no filler on the last pic, I'm quite happy with the results so far. By the way, the most visible line just inside the primered area is not the weld, that's just the edge of the very thick original (and a bit more) paint! Perhaps a few more threats with the hammer just to make sure there are no high spots should do it, but access to the back side of the panel (especially towards the front of the arch) is restricted.
Have a look...
-
 LeftRearArch01.jpg28.5 KB · Views: 1,100
 -
 LeftRearArch02.jpg27.7 KB · Views: 931
 -
 LeftRearArch03.jpg32.8 KB · Views: 909
 -
 LeftRearArch04.jpg31.2 KB · Views: 910
 -
 LeftRearArch05.jpg28.6 KB · Views: 911
 -
 LeftRearArch06.jpg32.2 KB · Views: 903
 -
 LeftRearArch07.jpg26.8 KB · Views: 3,629
 -
 LeftRearArch08.jpg30.2 KB · Views: 1,935
 -
 LeftRearArch09.jpg31 KB · Views: 911
 -
 LeftRearArch10.jpg20.5 KB · Views: 1,030


