


I`ve found loads of useful information on the site when doing previous research, thought I`d share a recent roll-cage install I did on my son`s E36 track car.
One of the trickiest things with a cage install (apart from some of the welding angles), is ensuring you only weld something once you are SURE you don`t need to weld another part of the cage that`ll be inaccessible once fitted. ie, don`t weld the footplates in first, you can`t drop the cage and weld the top of the joins)
We`d spent quite some time looking at cages and choosing the best compromise between weight and safety. Its tempting to go for a full multipoint, turret triangulation and multiple bars, but the whole project is about performance on a budget. Adding more weight than needed didn`t really follow that thought process.
Apologies about some of the photos being out of sequence, I only realised we hadn`t taken them when it came to typing this up, others are poor quality as I only had my cameraphone to hand and couldn`t be bothered going and fetching the compact.
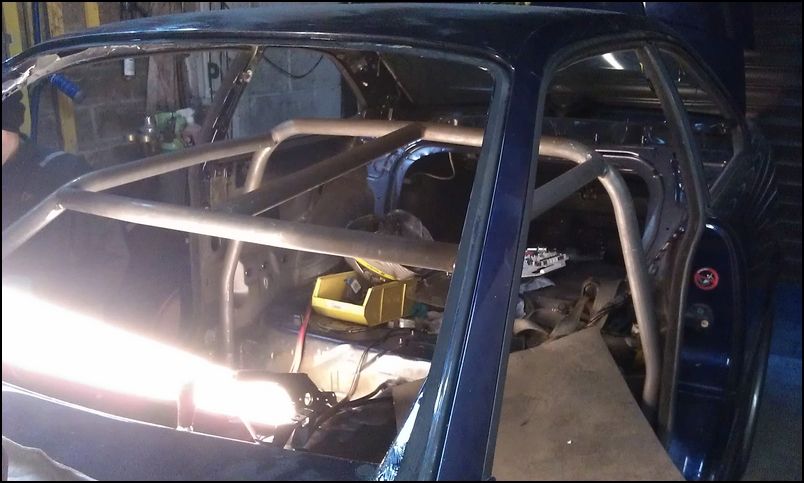
Cage is a `custom cages` weld in kit.
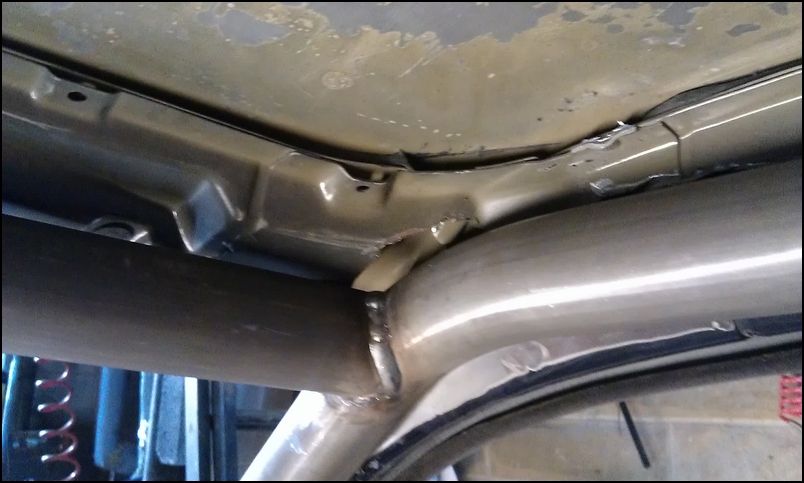
A-Pillar bars fitted well, needed a little modification to the inner roof skin above the doors to be able to get a close fit. ie, a hammer and angle grinder...
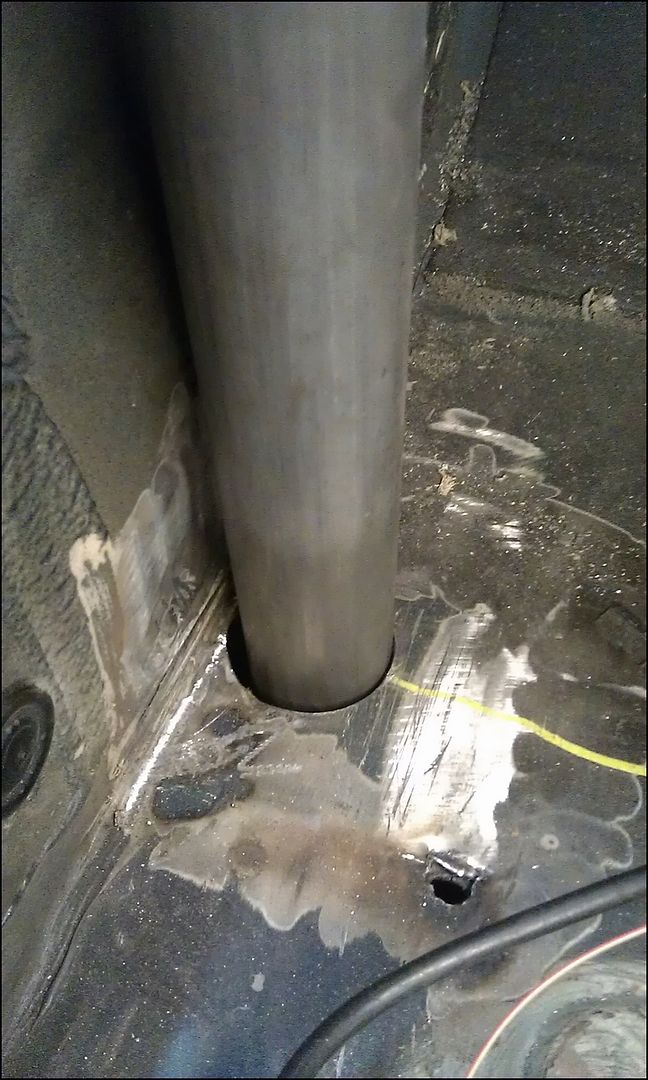
As the cage would sit on the floor, we hole-sawed into the floor (after checking nothing was on the underneath !). This allowed us to lower the cage through the floor to get full access to weld around the tubes.
Once everything was tacked in place, the feet were removed and the cage lowered so we could weld the top of the joins.

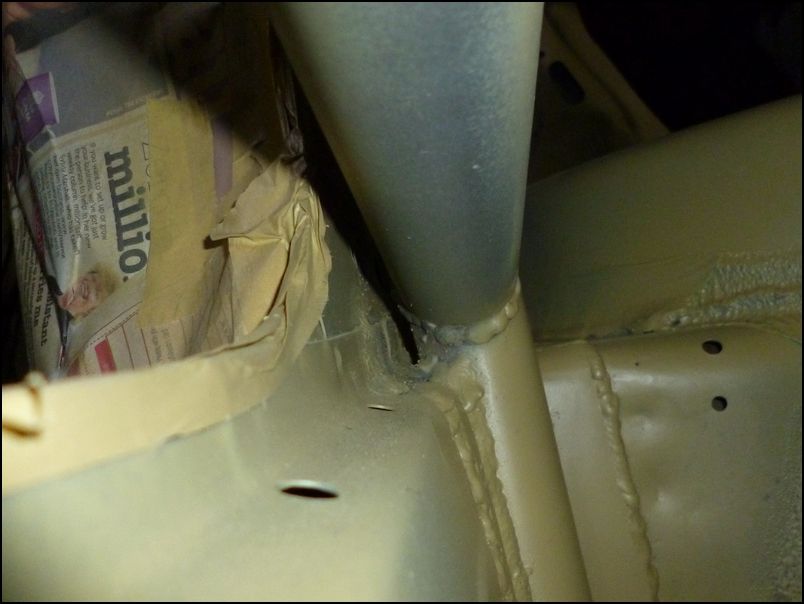
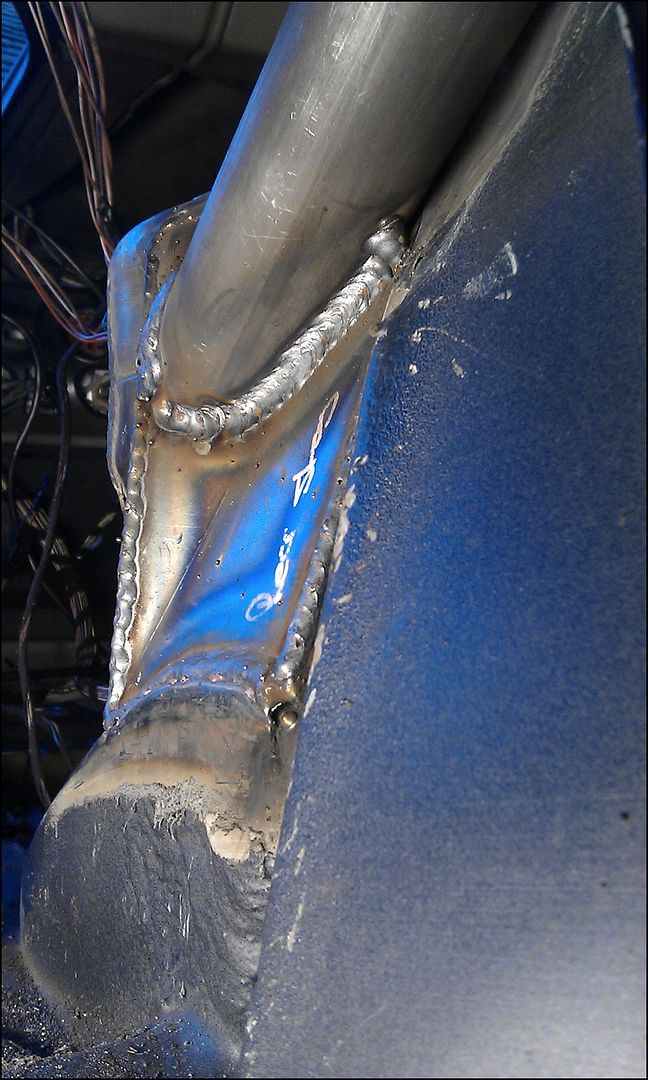
The feet of the cage were pulled away from the shell so we could weld round the back of the doorbars.
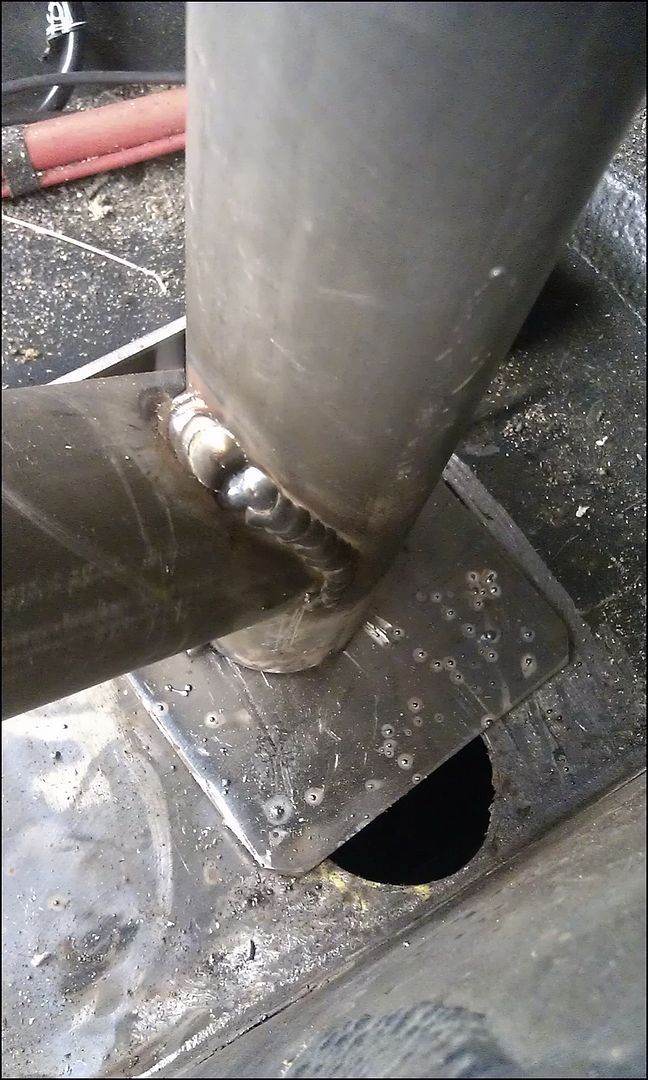
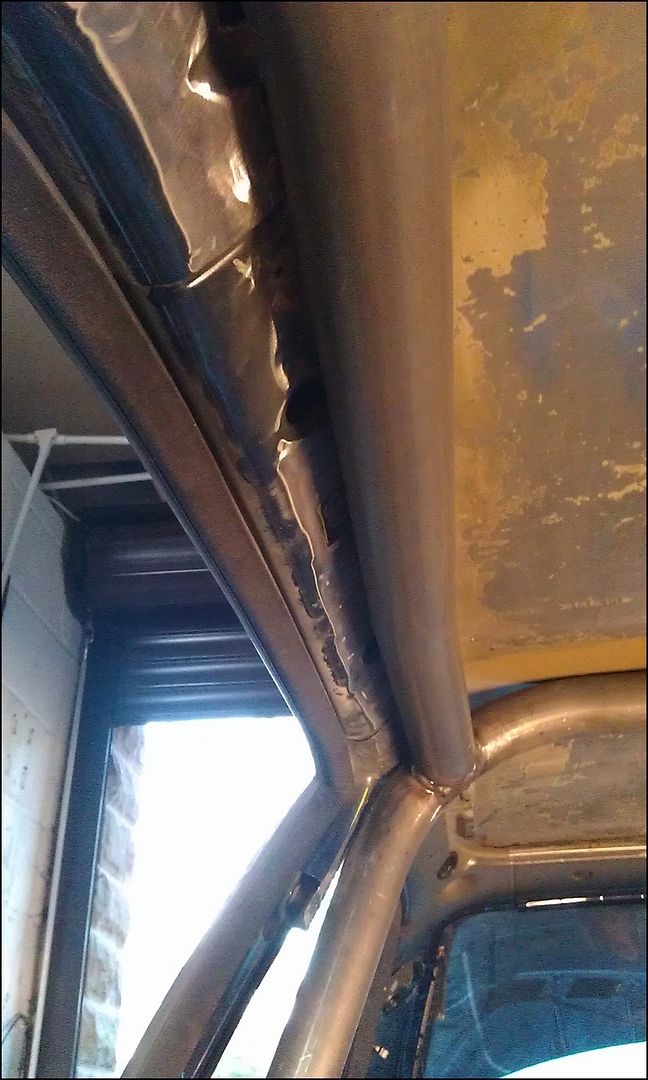
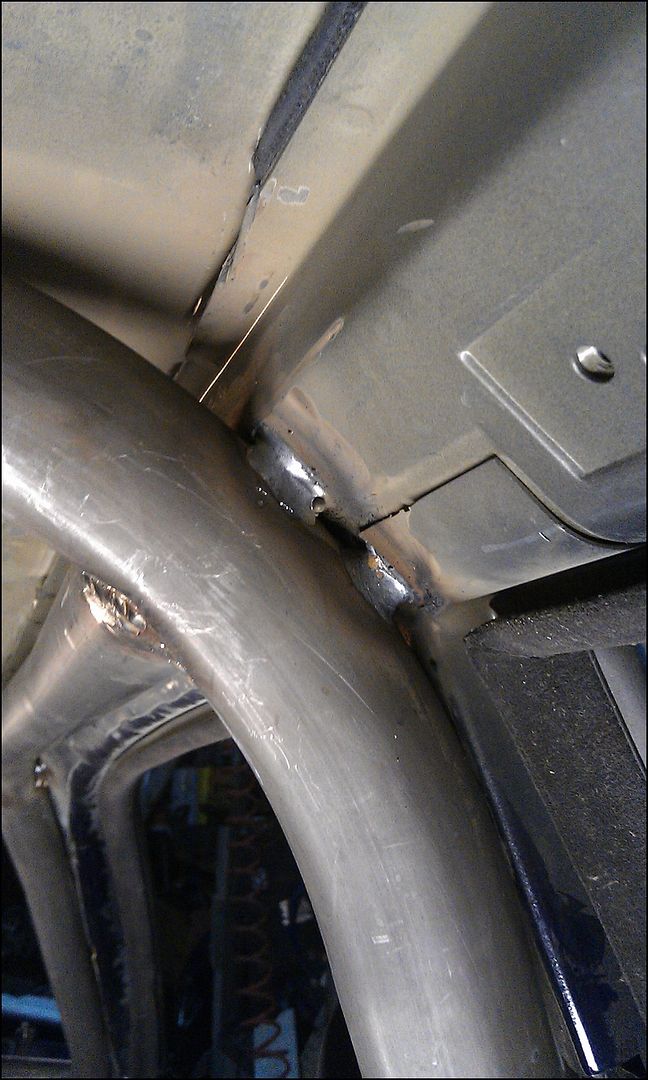
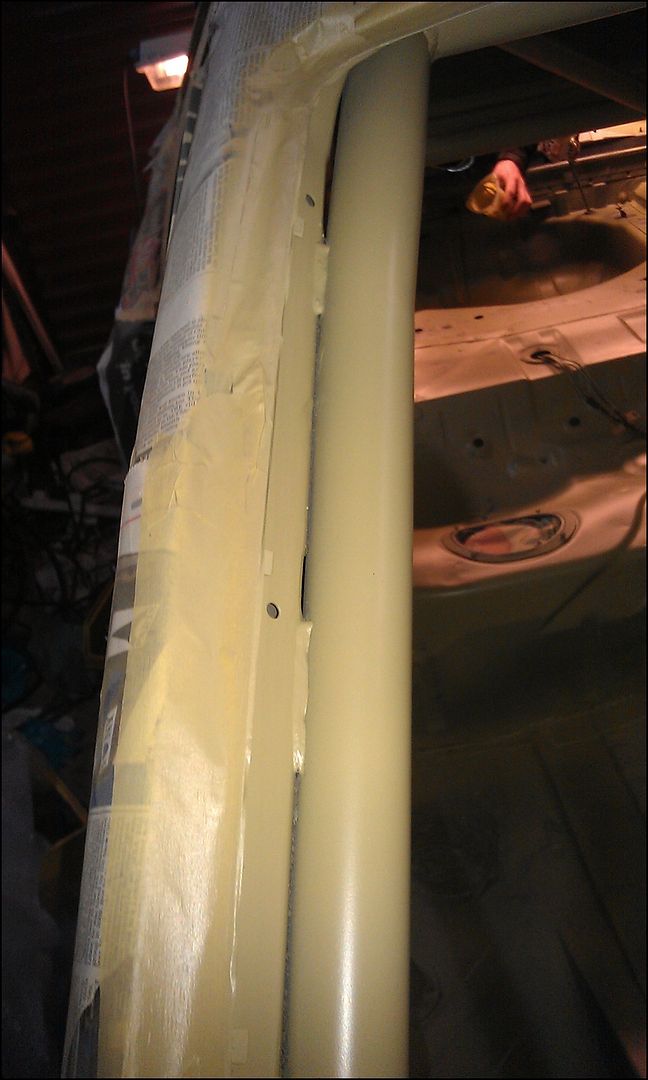
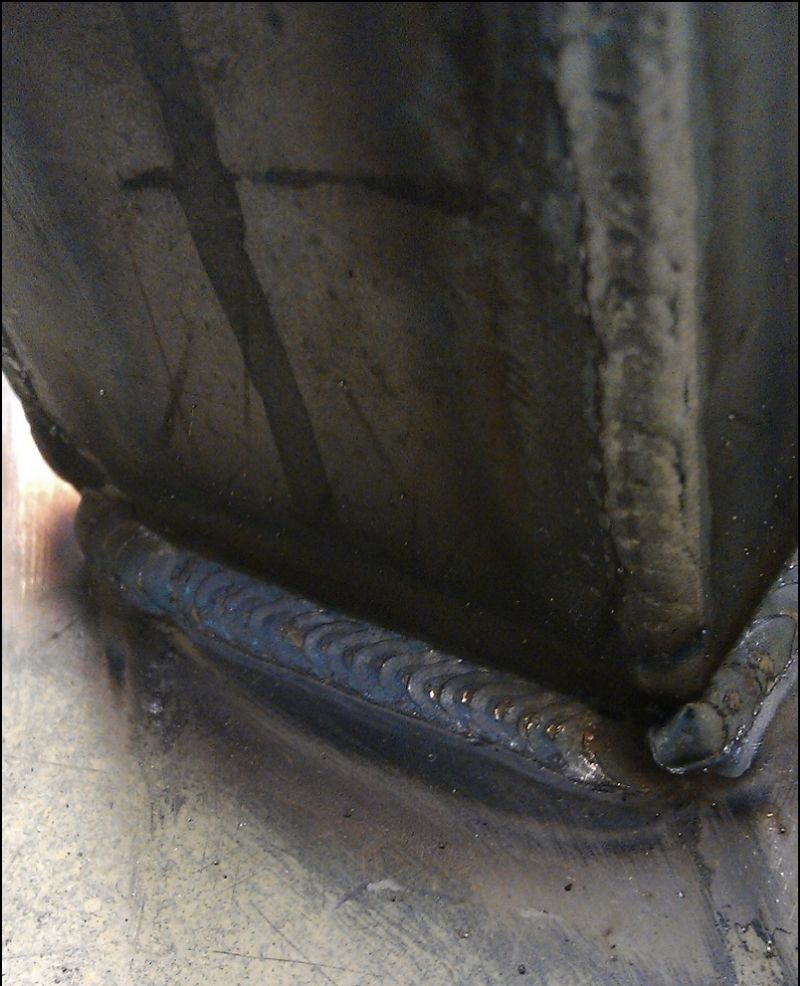
The B Hoop was cut vertically to allow a much longer weld, along the height of the tube in the photo below. It`s also welded around the top, where you can still see the full circle of the tube. As always, welding near seams is a pain, the seam sealer starts bubbling out when hot, affecting the weld
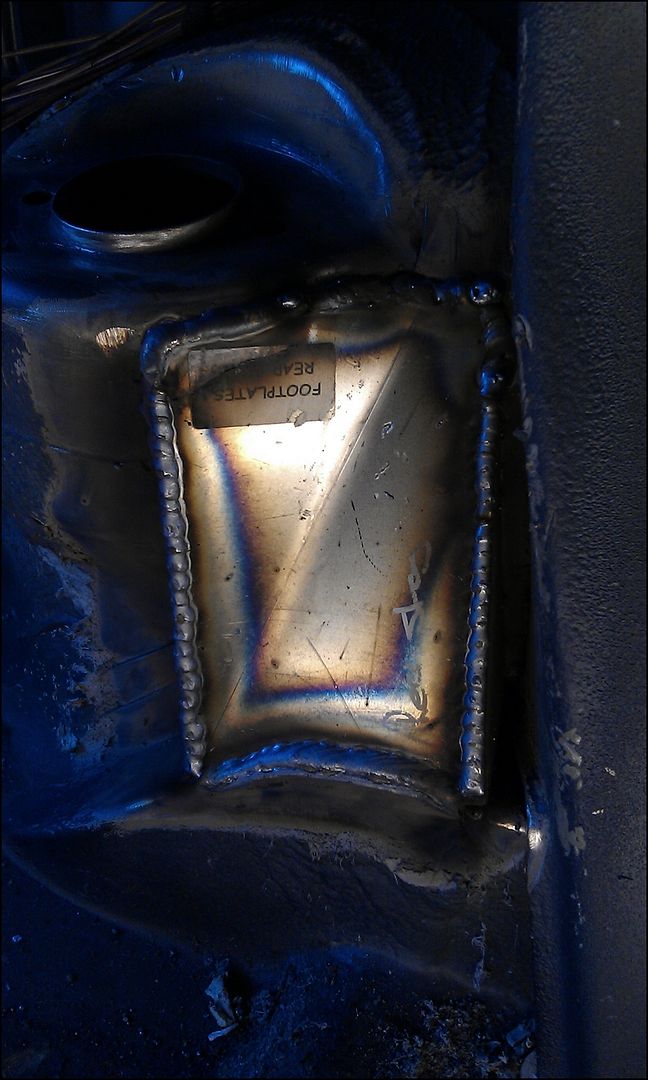
 I took this photo when I`d welded the footplate back in position covering the hole in the floor we`d dropped the cage through to weld the top.
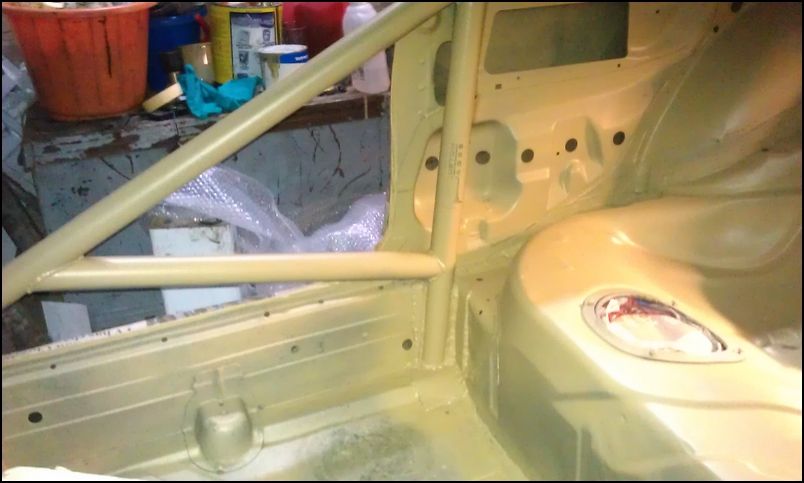
Once in position (out of sequence photo)
We are able to tie the cage to the shell easily.
Rear footplates were fitted as close to the top-mount as possible to help to strengthen the suspension pickup. Had to use a stop-start welding method as I was welding along the edge of 2 peices of 3mm steel. Trying to run a continuous bead ending up melting the metal. Perhaps it was my technique / weld settings, but I tried for some time with offcuts and just couldn`t do it without stop-starting. You can see the cold spots at the centre of the welds, not ideal but best I could do.
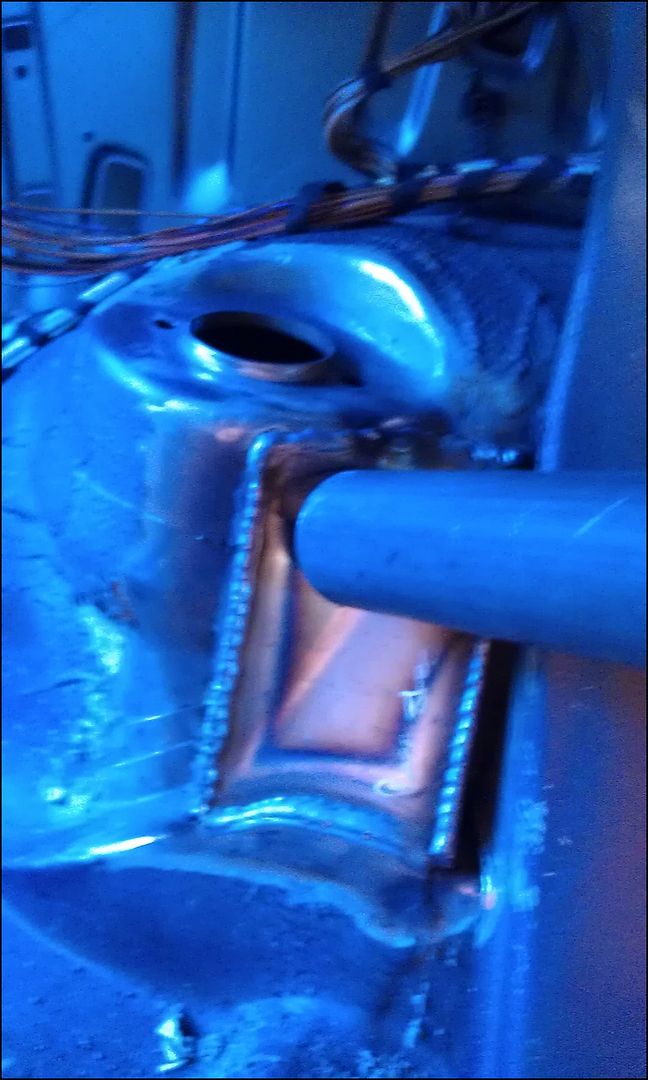
Laying on my back meant I could get a nice long bead on the underside of the tube
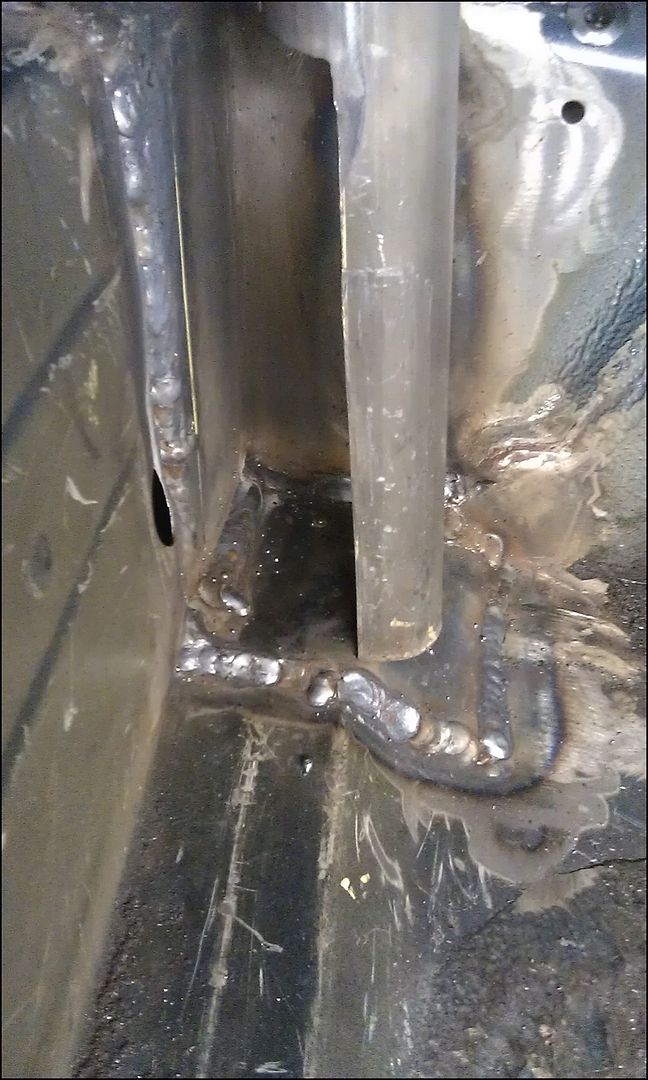
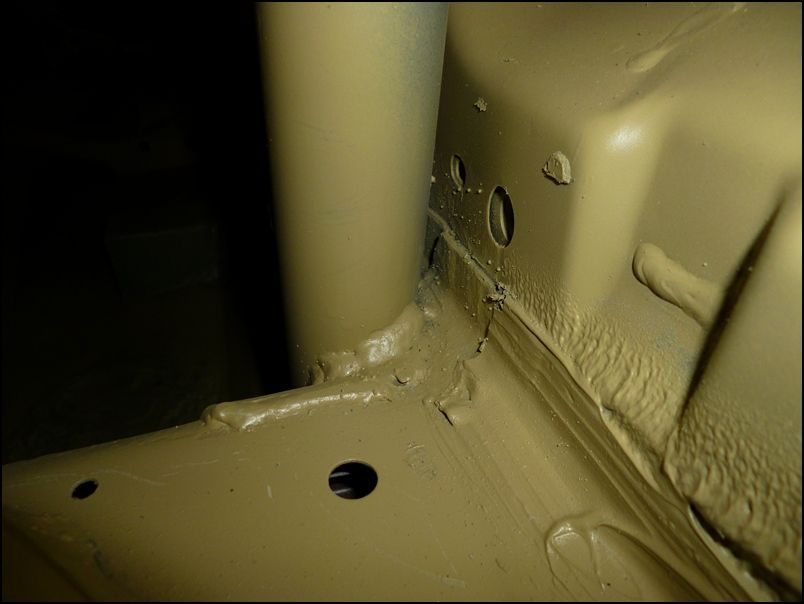
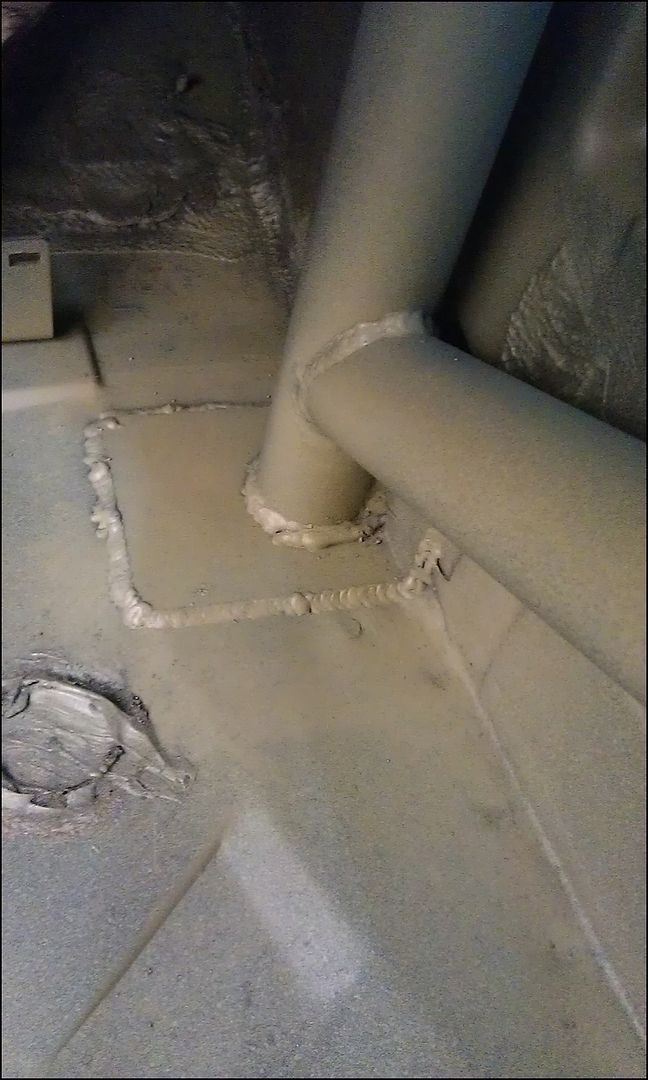
Once the A pillar footplate was in position, it was welded to the floor and the tube welded to the plate. (shown here after first coat of etch primer). The thin floor and 3mm footplates meant not burning through was a challenge..
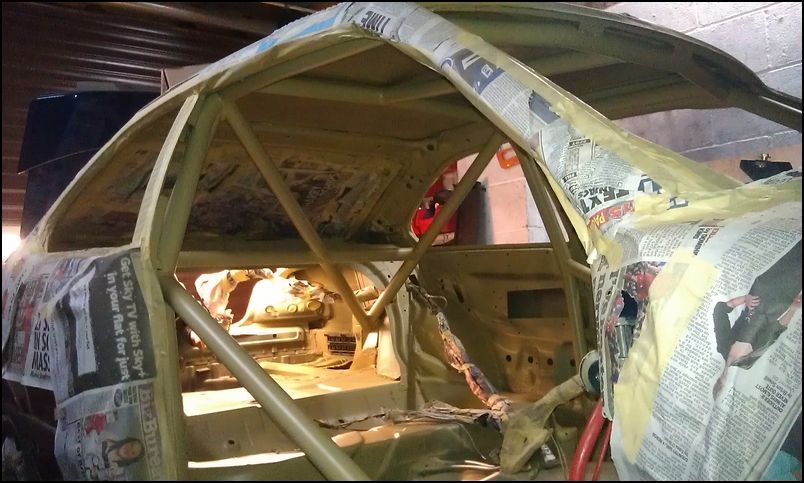
Car masked and etch-primered after much prep, including rubbing down the entire interior, cleaning off the weld `splatter`, wrapping the wiring loom and then panel-wipe everywhere.
Welded to the A-Pillar
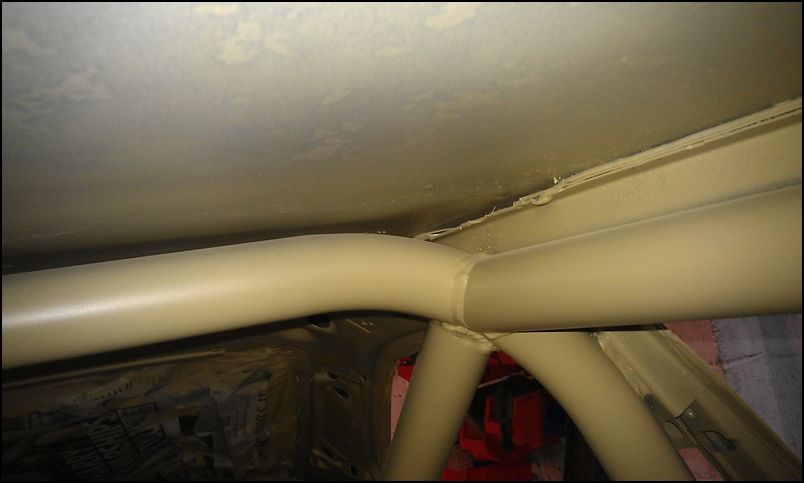
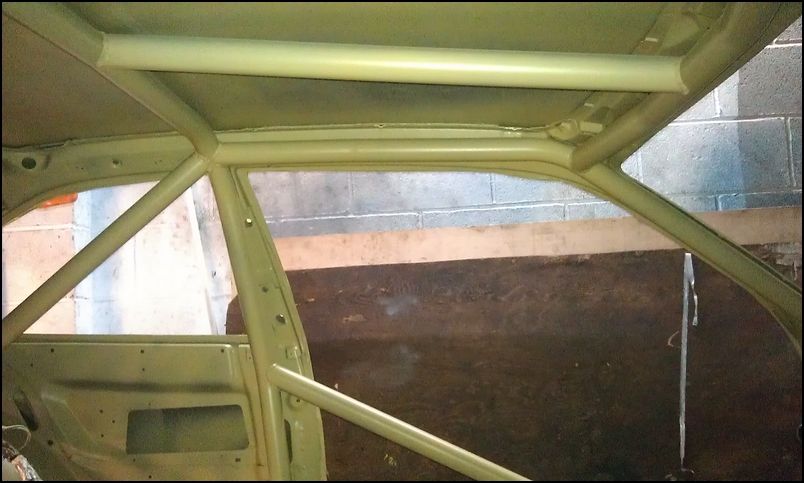
We added a single roof bar rather than a diagonal. This IS allowed in the blue book and means it won`t be in the way of a helmet. I`ve sat in E36`s with this configuration and a diagonal and preferred the single straight bar.
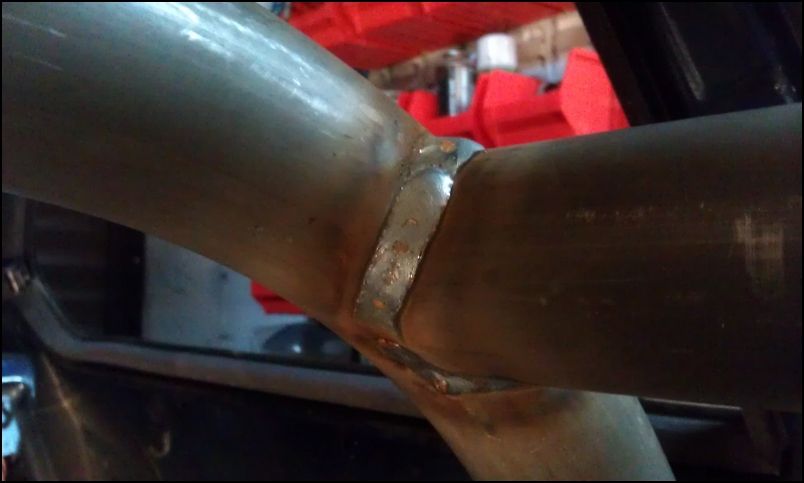
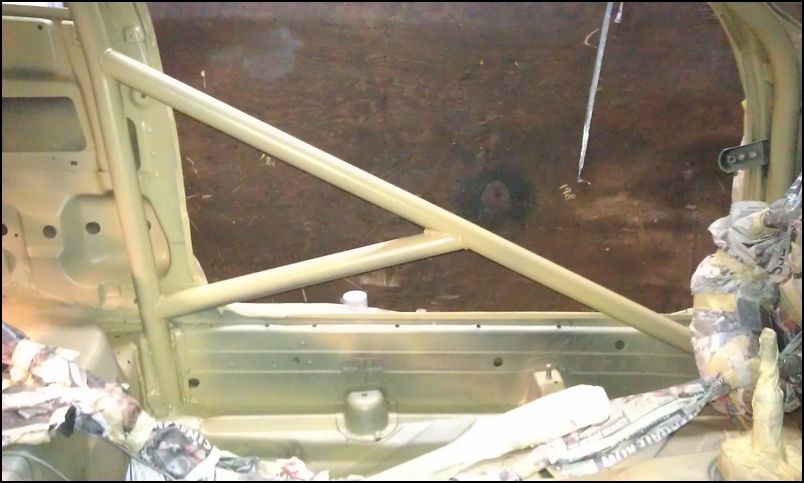
Door bars with added `Y` to protect the hip area, but still give easy access. If we`d triangulated to the turrets, these would have been `X` bars to tie it together, but the missing X isn`t needed on our setup.
Very happy with the install, these things take time and several of the tubes needed the profile `tweaking`. The cage is as close to the shell as we could possible do it.
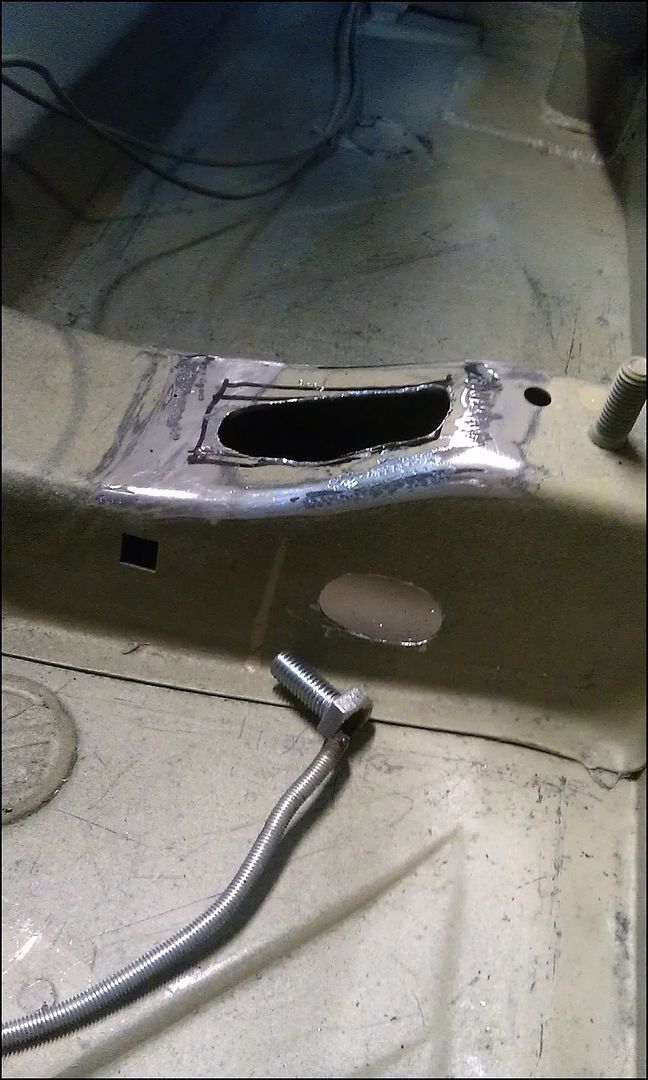
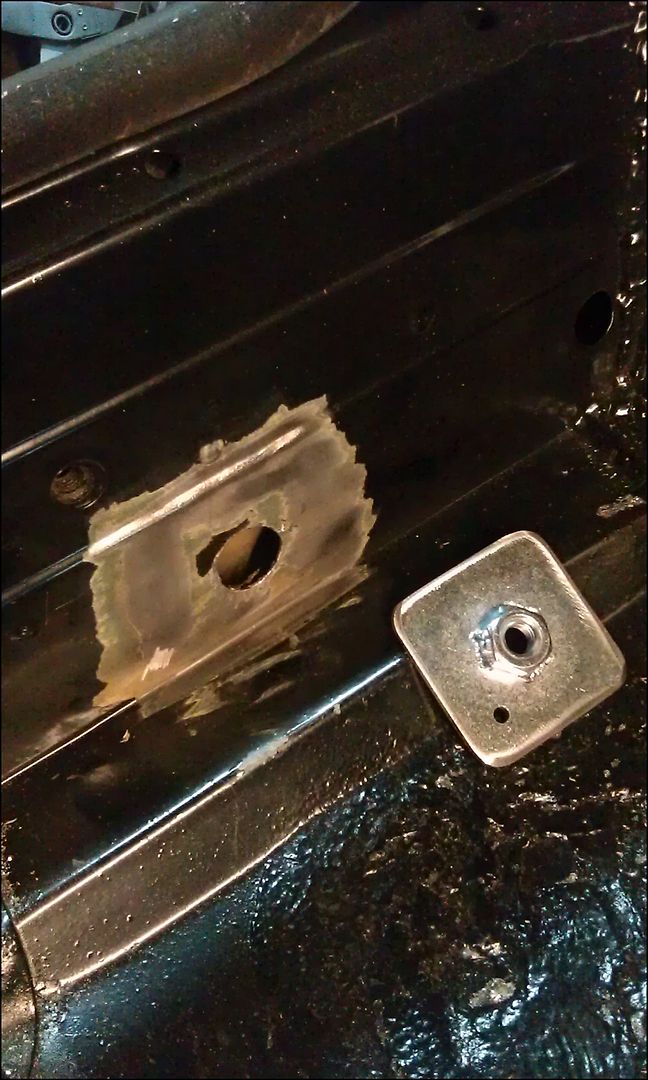
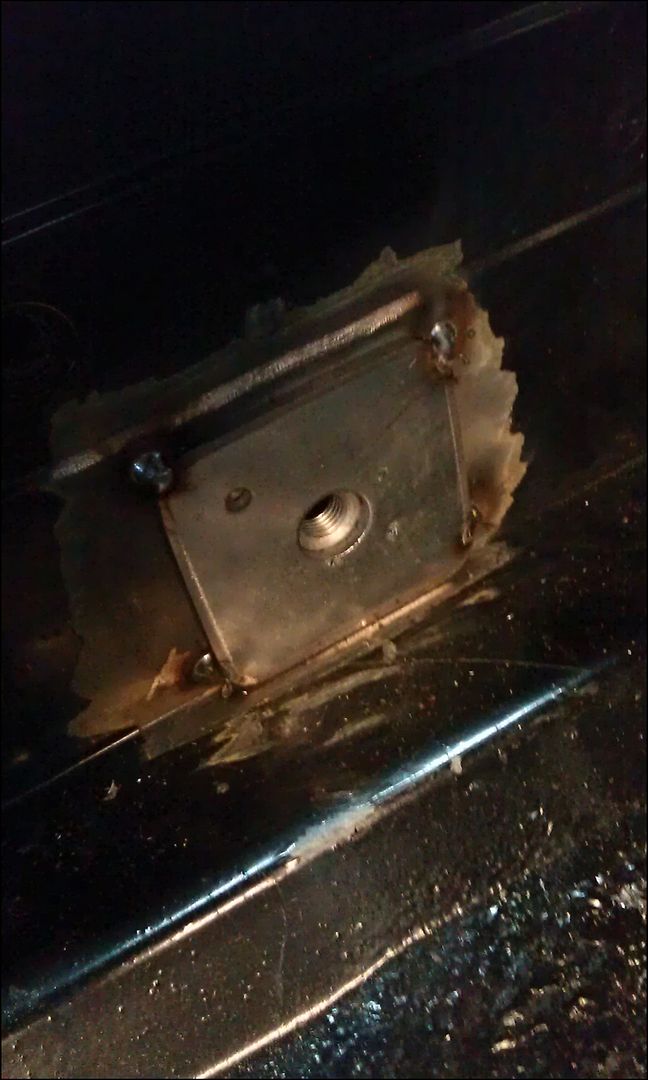
We will be bucket seats and side-mounts. The standard sill-side mount is too far away so I needed to extend it closer to the middle of the car to allow us to fit the side-mounts. As we don`t have the seat yet, we aren`t 100% on the centres, so will need to drill the plate once we have the seat. To enable a bolt to be fed from underneath, we made 2 `access holes`.
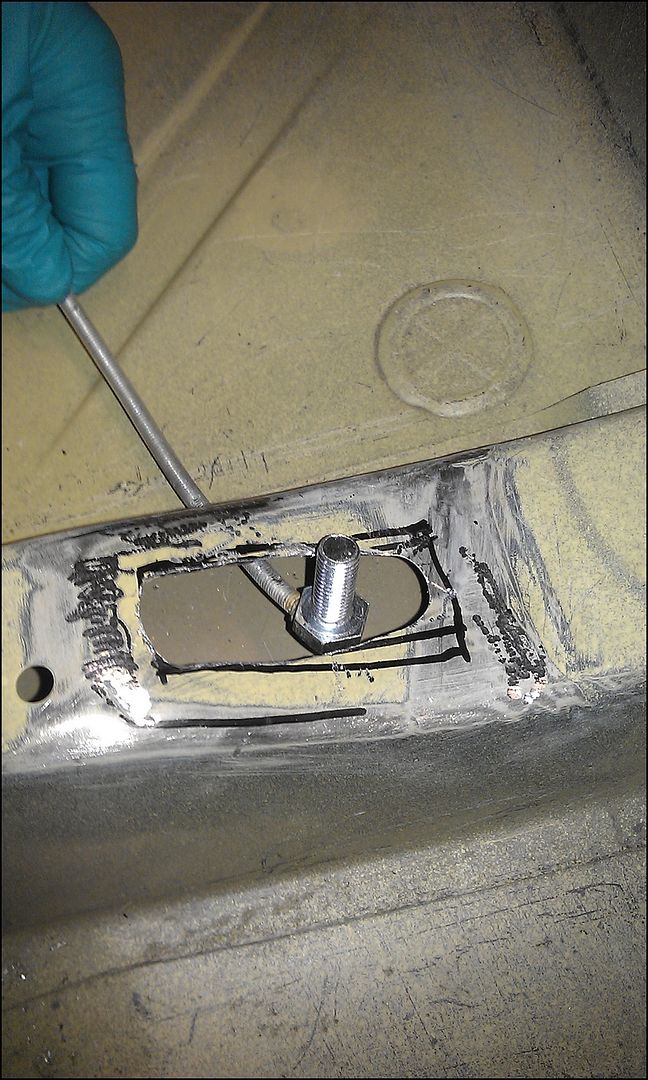
A bolt, tacked onto a length of bar will then be able to be fed through the new plate and held in position whilst the nut is fitted. It`ll become clear when I post photos of the side-mount install")
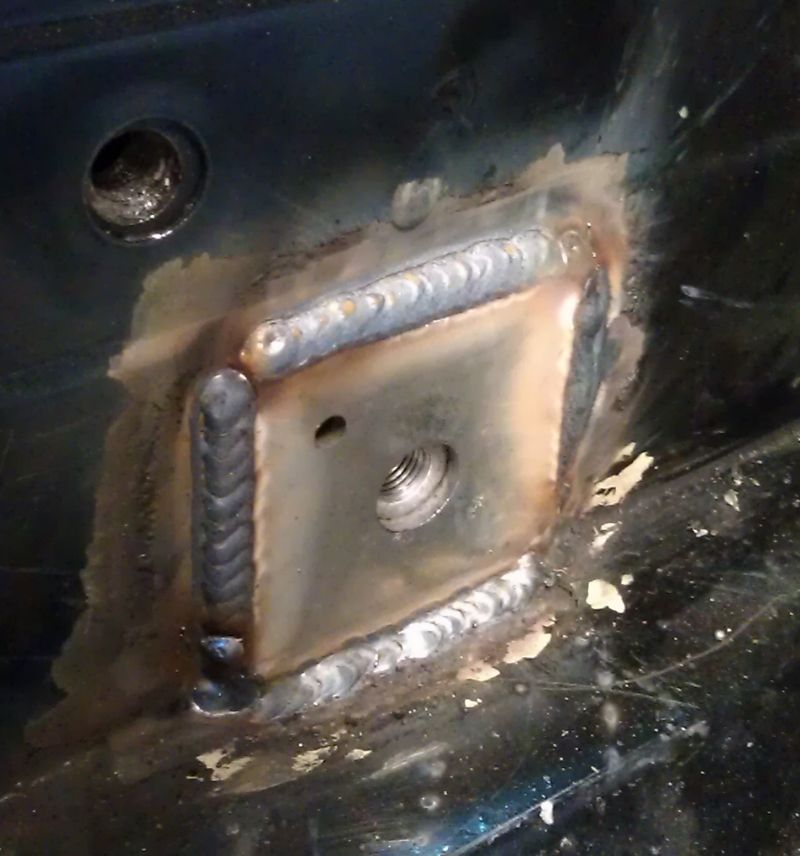
`box` made to correct size.
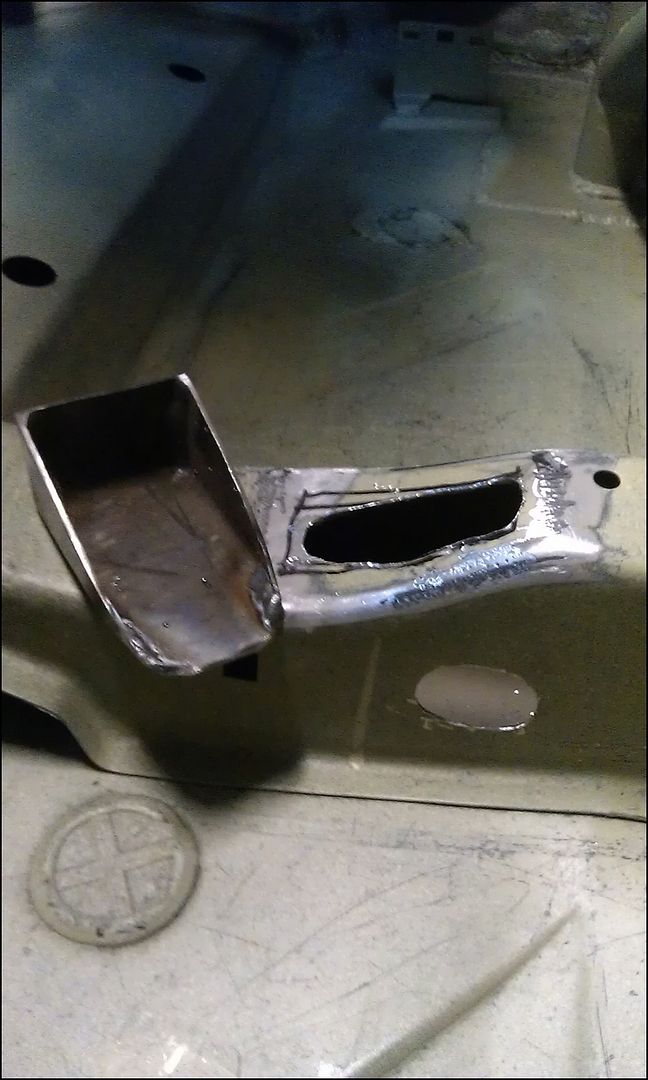
Welded to the existing chassis.
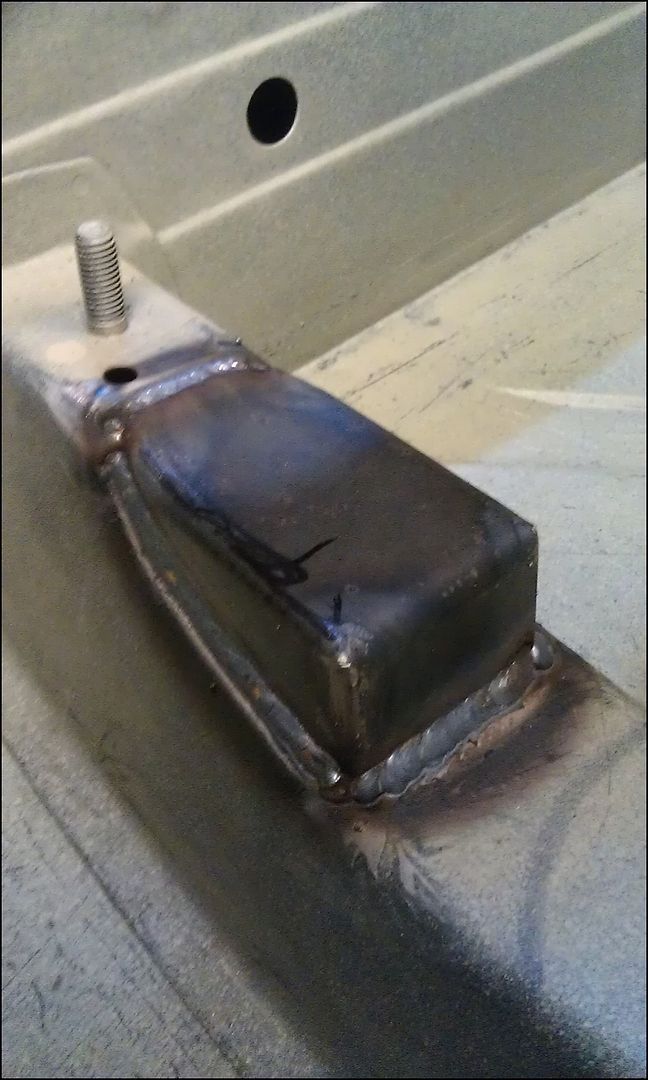
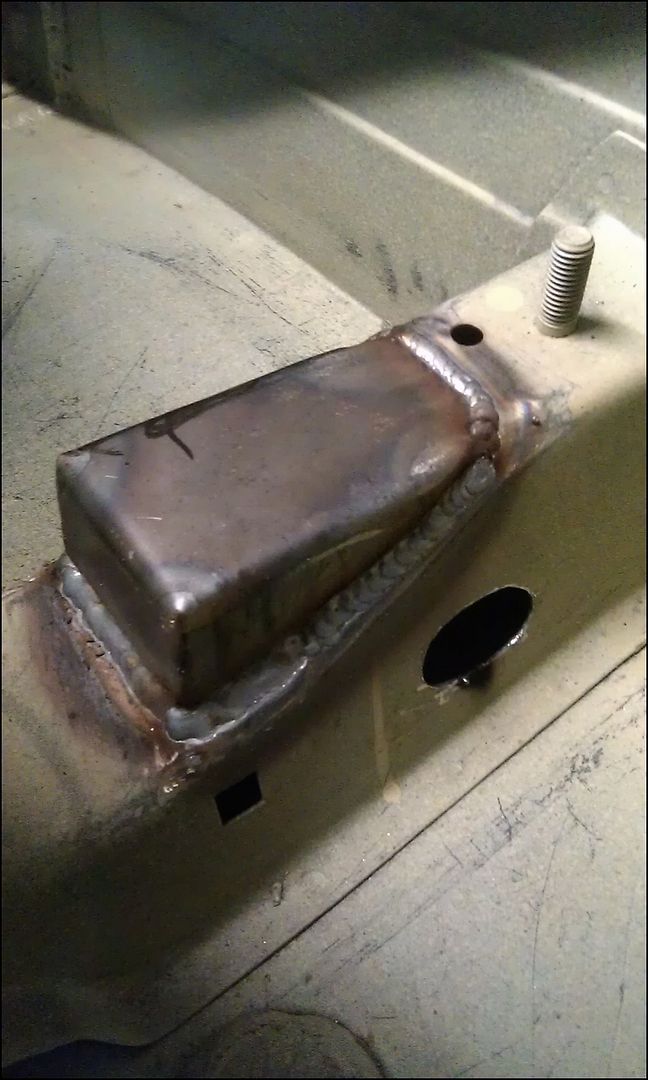
Level with the original mounts.
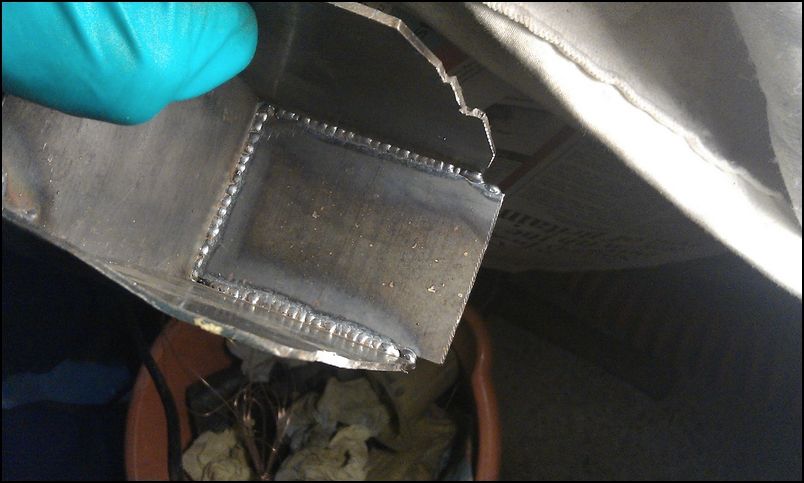
Very happy with the weld penetration when making the `box`

Also pretty pleased with welding the box to the car.

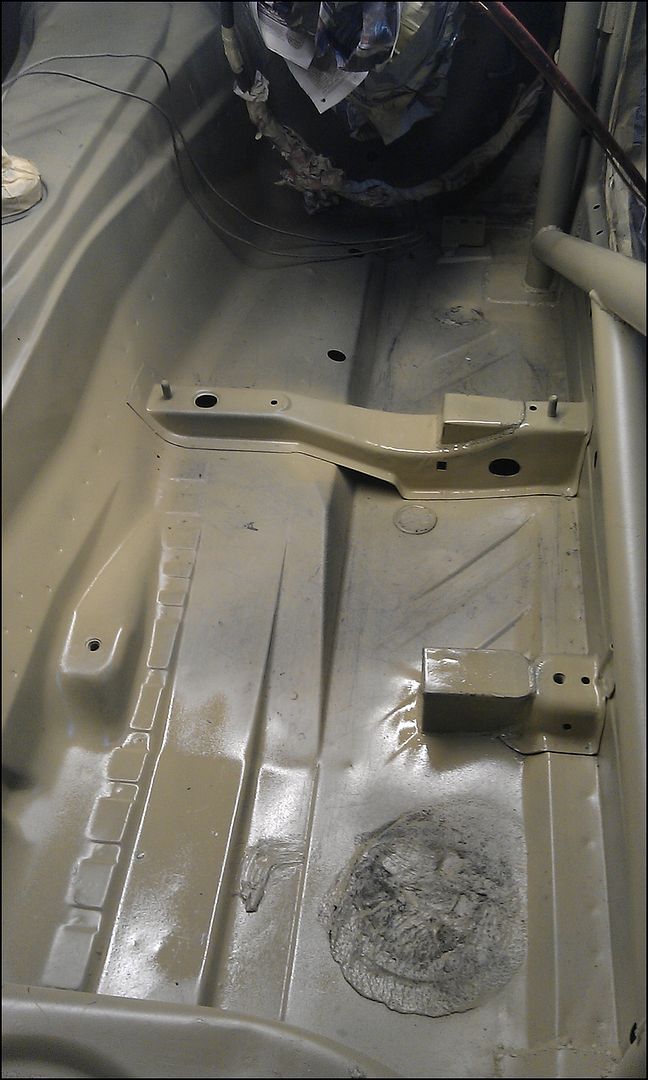
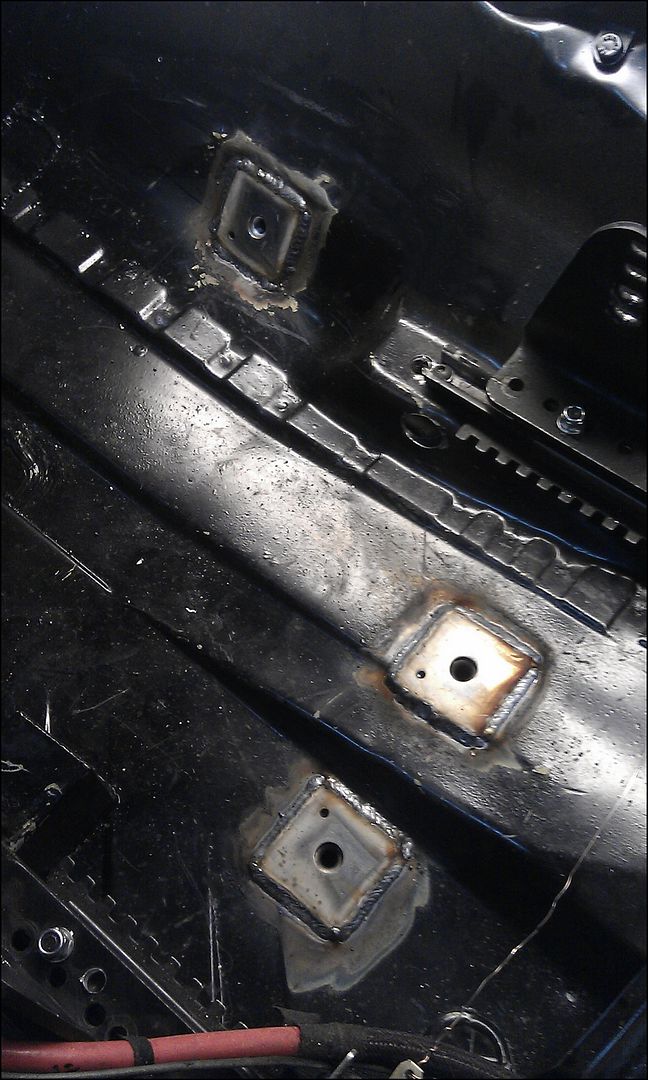
Both `boxes` added. This will allow the seat to be moved towards to centre of the car and inline with the steeringwheel. Etch primer still wet.
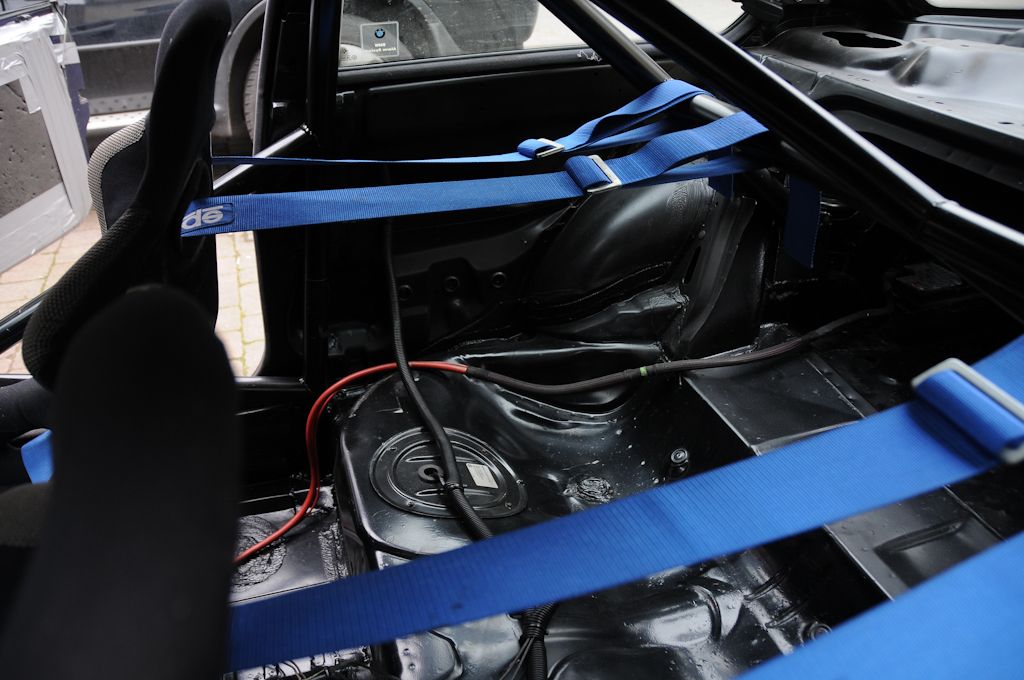
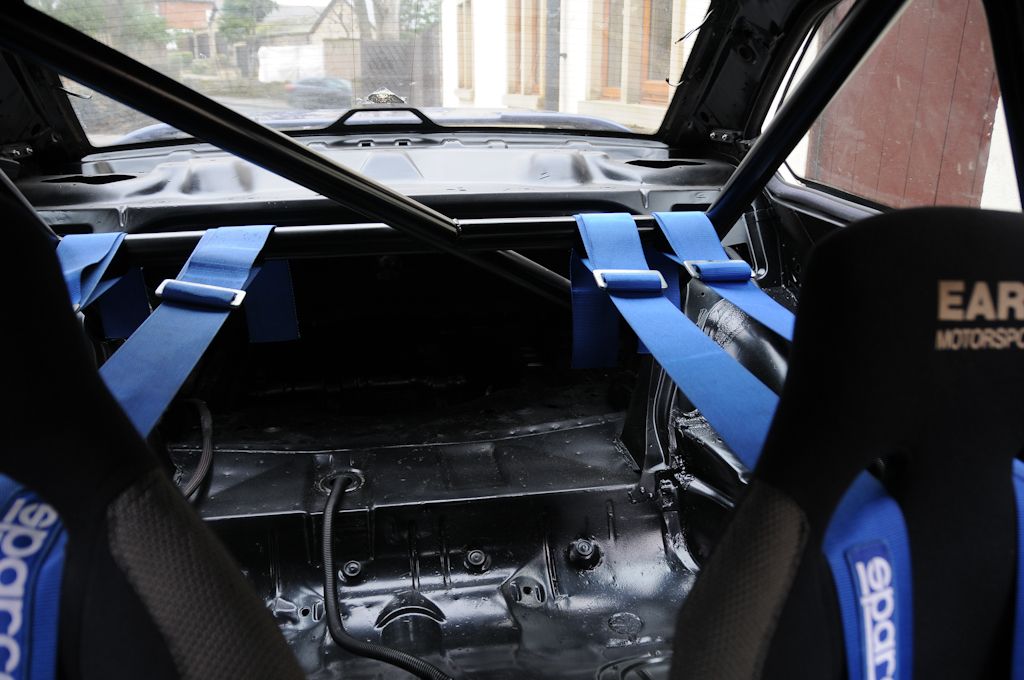
The harness could be properly positioned so I knew where to mount the harness plates.
Hole Drilled and paint removed
Tacked into place
Welded.
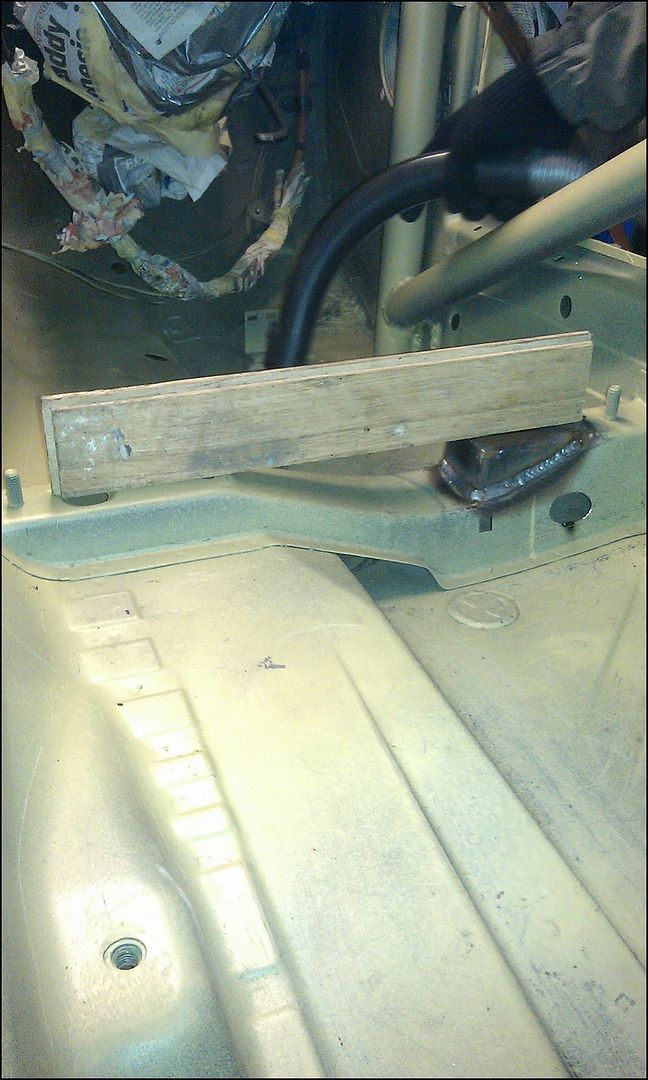
Before welding the floor plates on the passenger side, I made sure the fuel lines were protected, rockwool, timber and a sheet of steel above the wood

Same for floor, tunnel
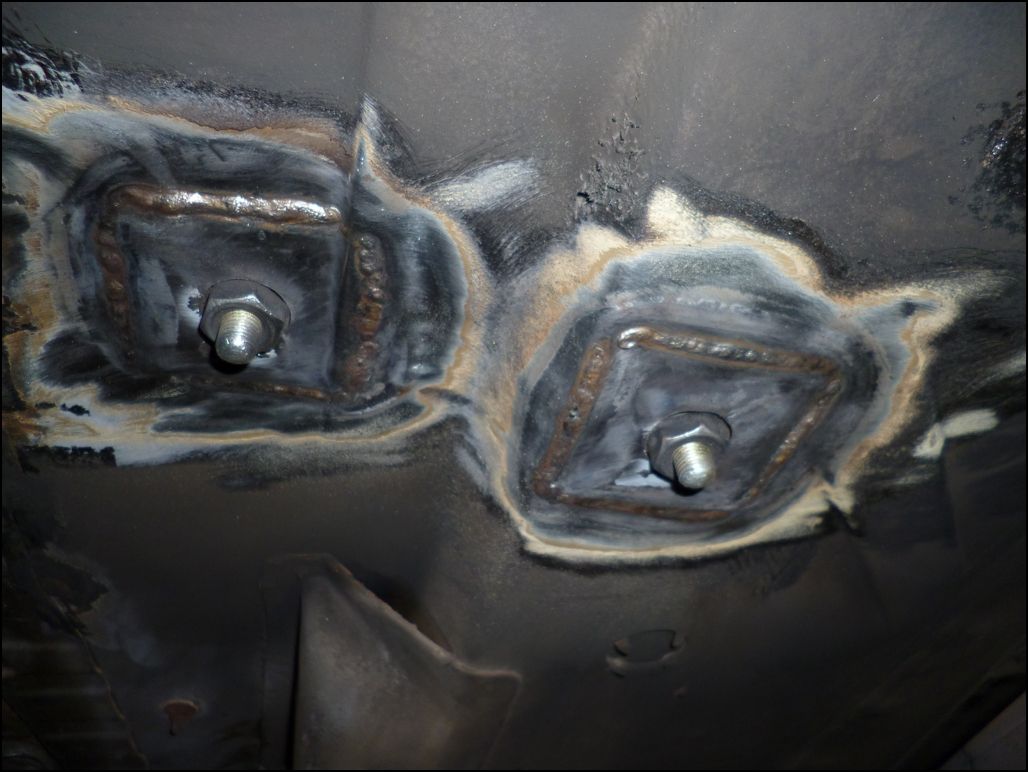
Happy with the weld penetration, photo was taken a week after the welding was done, even though the car was in a garage, you can see the rust starting to form !
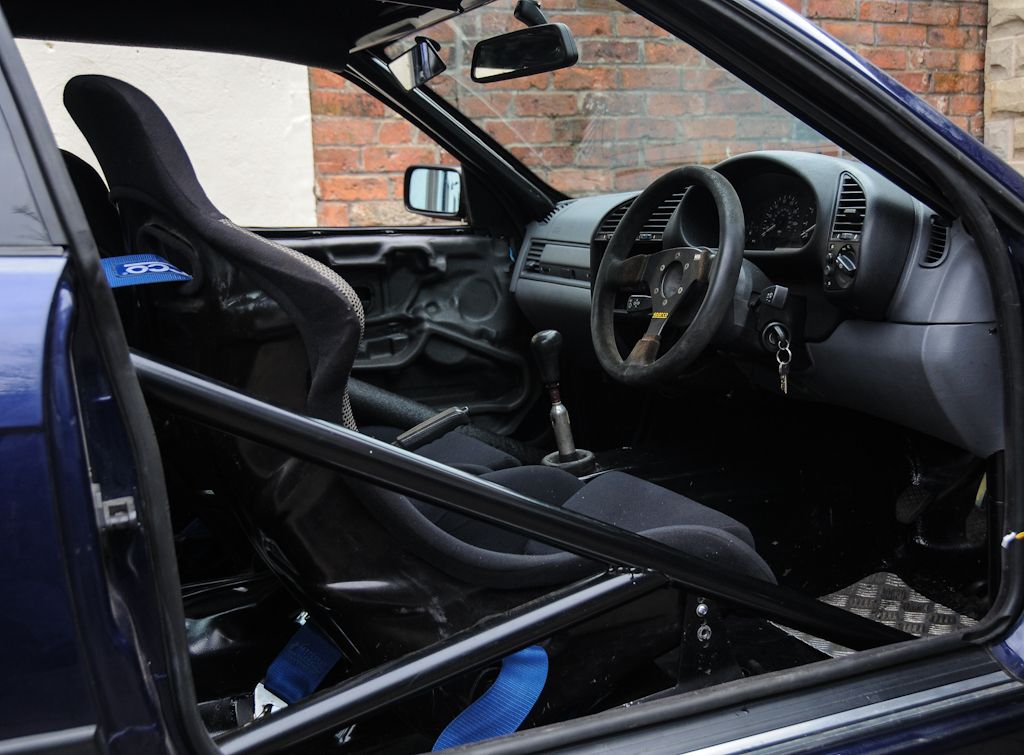
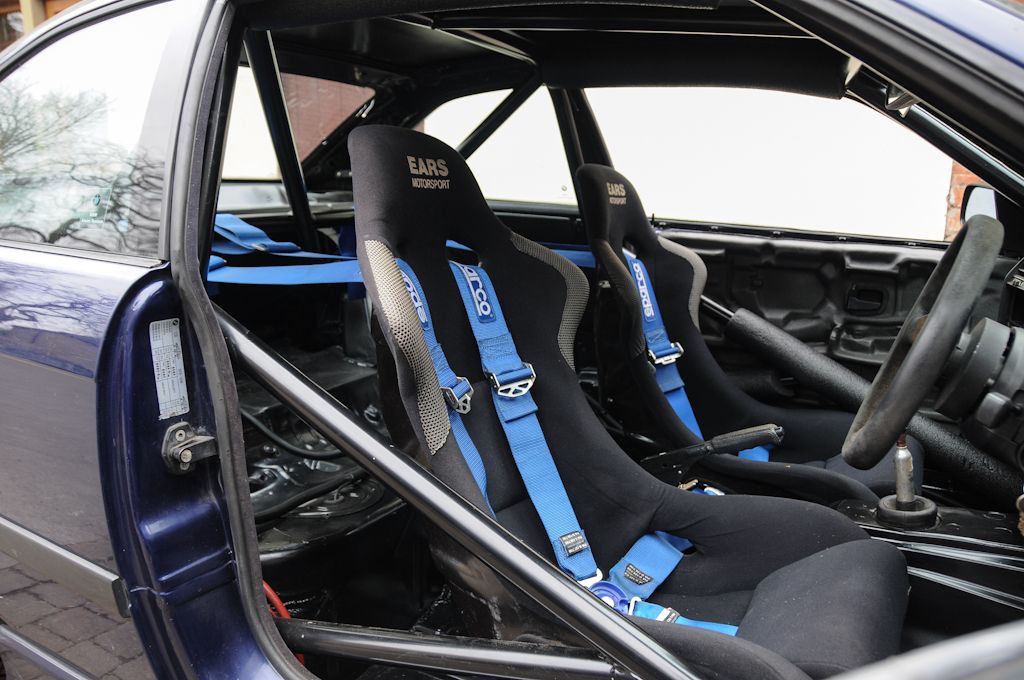
Painted, with Seat and Harness fitted.
One of the trickiest things with a cage install (apart from some of the welding angles), is ensuring you only weld something once you are SURE you don`t need to weld another part of the cage that`ll be inaccessible once fitted. ie, don`t weld the footplates in first, you can`t drop the cage and weld the top of the joins)
We`d spent quite some time looking at cages and choosing the best compromise between weight and safety. Its tempting to go for a full multipoint, turret triangulation and multiple bars, but the whole project is about performance on a budget. Adding more weight than needed didn`t really follow that thought process.
Apologies about some of the photos being out of sequence, I only realised we hadn`t taken them when it came to typing this up, others are poor quality as I only had my cameraphone to hand and couldn`t be bothered going and fetching the compact.
Cage is a `custom cages` weld in kit.
A-Pillar bars fitted well, needed a little modification to the inner roof skin above the doors to be able to get a close fit. ie, a hammer and angle grinder...
As the cage would sit on the floor, we hole-sawed into the floor (after checking nothing was on the underneath !). This allowed us to lower the cage through the floor to get full access to weld around the tubes.
Once everything was tacked in place, the feet were removed and the cage lowered so we could weld the top of the joins.
The feet of the cage were pulled away from the shell so we could weld round the back of the doorbars.
The B Hoop was cut vertically to allow a much longer weld, along the height of the tube in the photo below. It`s also welded around the top, where you can still see the full circle of the tube. As always, welding near seams is a pain, the seam sealer starts bubbling out when hot, affecting the weld
Once in position (out of sequence photo)
We are able to tie the cage to the shell easily.
Rear footplates were fitted as close to the top-mount as possible to help to strengthen the suspension pickup. Had to use a stop-start welding method as I was welding along the edge of 2 peices of 3mm steel. Trying to run a continuous bead ending up melting the metal. Perhaps it was my technique / weld settings, but I tried for some time with offcuts and just couldn`t do it without stop-starting. You can see the cold spots at the centre of the welds, not ideal but best I could do.
Laying on my back meant I could get a nice long bead on the underside of the tube
Once the A pillar footplate was in position, it was welded to the floor and the tube welded to the plate. (shown here after first coat of etch primer). The thin floor and 3mm footplates meant not burning through was a challenge..
Car masked and etch-primered after much prep, including rubbing down the entire interior, cleaning off the weld `splatter`, wrapping the wiring loom and then panel-wipe everywhere.
Welded to the A-Pillar
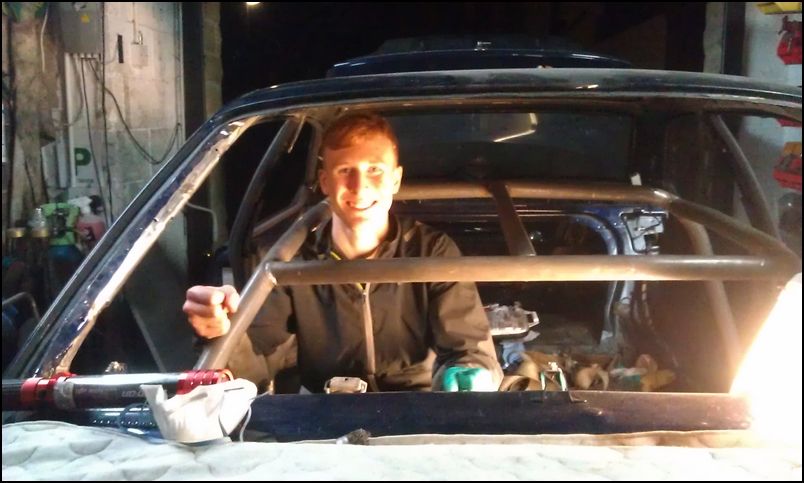
We added a single roof bar rather than a diagonal. This IS allowed in the blue book and means it won`t be in the way of a helmet. I`ve sat in E36`s with this configuration and a diagonal and preferred the single straight bar.
Door bars with added `Y` to protect the hip area, but still give easy access. If we`d triangulated to the turrets, these would have been `X` bars to tie it together, but the missing X isn`t needed on our setup.
Very happy with the install, these things take time and several of the tubes needed the profile `tweaking`. The cage is as close to the shell as we could possible do it.
We will be bucket seats and side-mounts. The standard sill-side mount is too far away so I needed to extend it closer to the middle of the car to allow us to fit the side-mounts. As we don`t have the seat yet, we aren`t 100% on the centres, so will need to drill the plate once we have the seat. To enable a bolt to be fed from underneath, we made 2 `access holes`.
A bolt, tacked onto a length of bar will then be able to be fed through the new plate and held in position whilst the nut is fitted. It`ll become clear when I post photos of the side-mount install
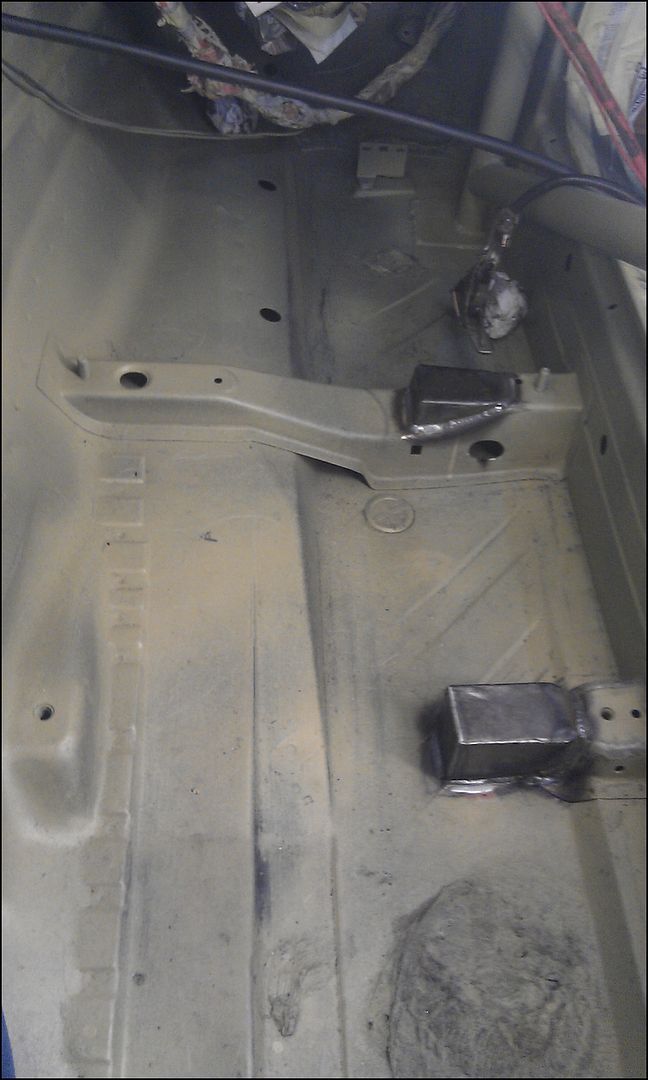
`box` made to correct size.
Welded to the existing chassis.
Level with the original mounts.
Very happy with the weld penetration when making the `box`
Also pretty pleased with welding the box to the car.
Both `boxes` added. This will allow the seat to be moved towards to centre of the car and inline with the steeringwheel. Etch primer still wet.
The harness could be properly positioned so I knew where to mount the harness plates.
Hole Drilled and paint removed
Tacked into place
Welded.
Before welding the floor plates on the passenger side, I made sure the fuel lines were protected, rockwool, timber and a sheet of steel above the wood
Same for floor, tunnel
Happy with the weld penetration, photo was taken a week after the welding was done, even though the car was in a garage, you can see the rust starting to form !
Painted, with Seat and Harness fitted.

 It`s a copy / paste from a build thread elsewhere.


