


I have started a ground up restoration on a late Bay camper and although I have a ramp in the workshop I find these really cumbersome for resto’s – we also need it accessible for run of the mill work.
So I decided to invest in a rotisserie/rollover jig. There are a couple of options, a rollover jig lets you roll the van on its side so you can work underneath, a full rotisserie lets you spin the van on its axis. A rotisserie takes less space so that was the way I wanted to go.
There are a number of ways of doing this with plans available from various internet sources as well as a number of suppliers. At the mega expensive end you can spend circa £1000 for rollers or hydraulic
rotisseries at places like CJ Autos http://www.cjautos.site90.net/nbnstd.html or there are a number of places that do simple A frames with mounting brackets for different vehicles.
Rather than muck about building one from plans I decided to purchase a simple A frame rotisserie, but in kit form to save money, and assemble it myself. I ended up buying this one http://www.rolloverjigs.com/ as despite the rubbish website it seemed to have decent reviews on e-bay etc. Basic kit is £240 including sub frame/mount specific to a late bay.
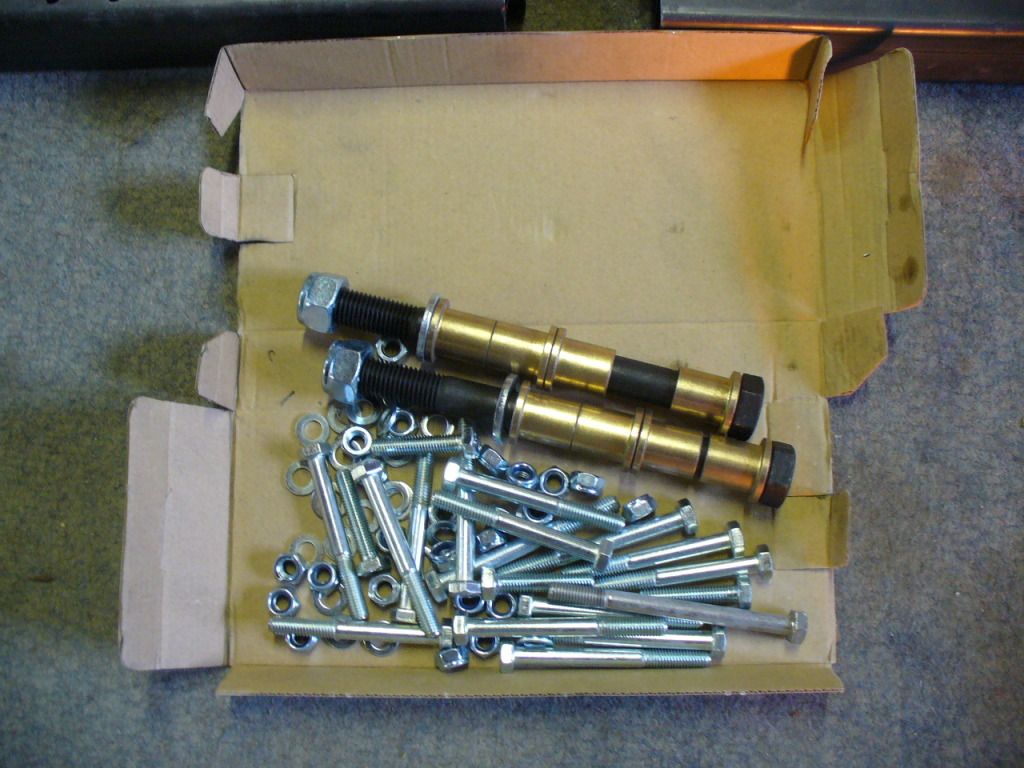
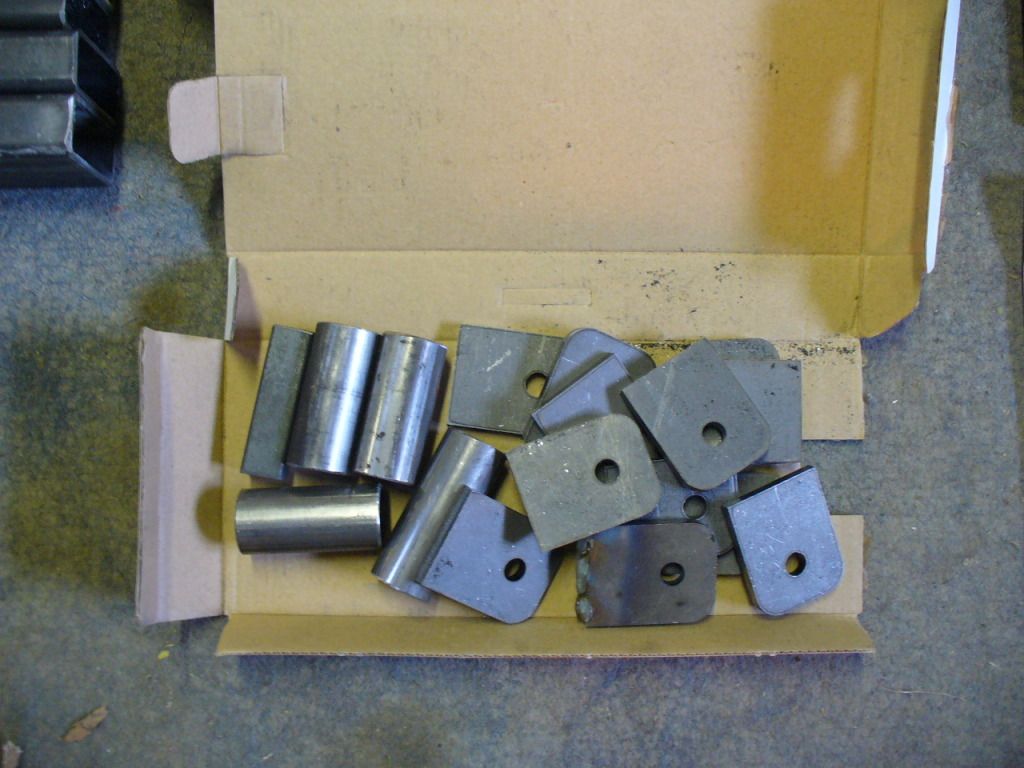
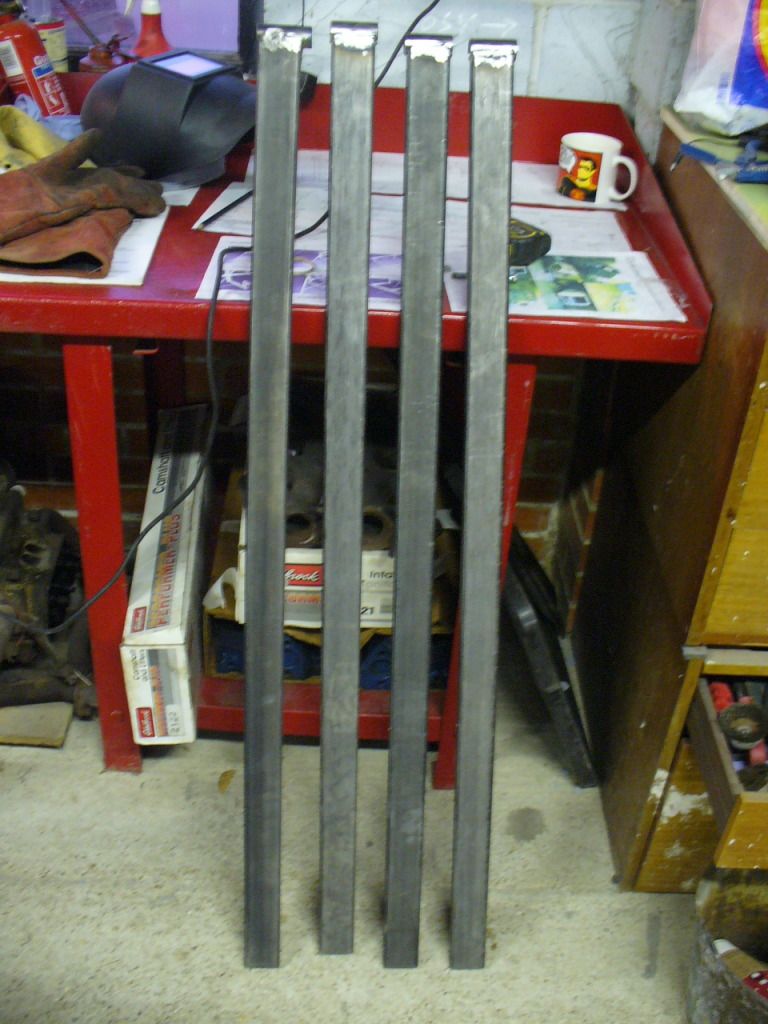
Collected from the supplier in Herts to save on delivery and this is what you get:
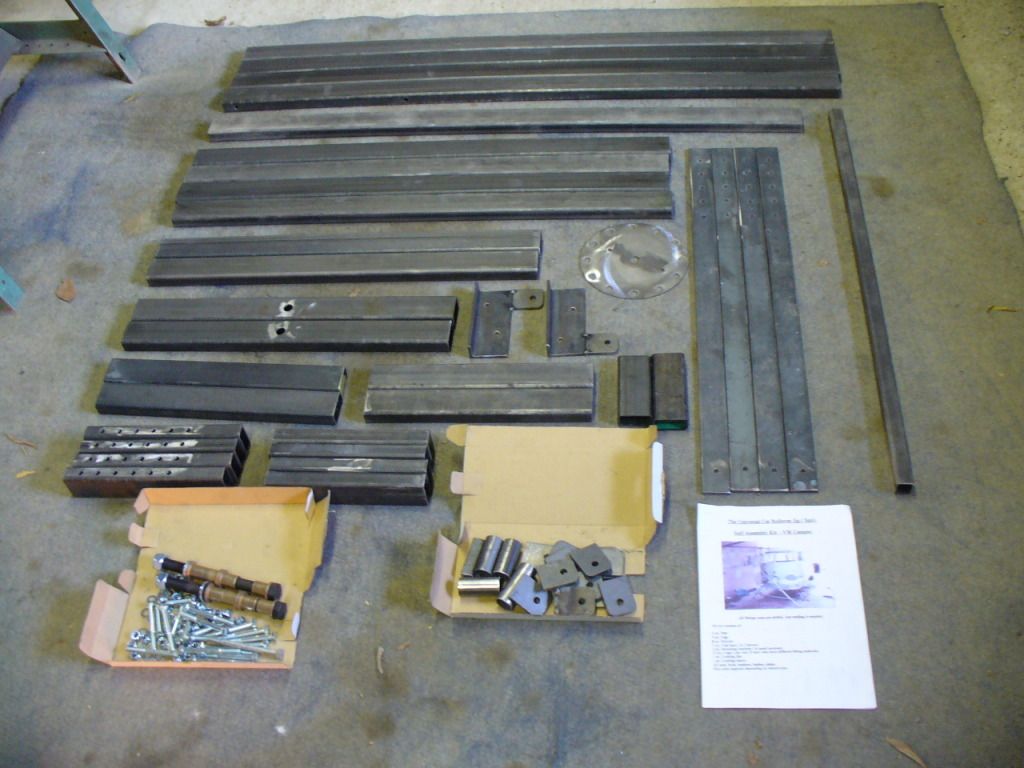
Basically a load of 50mm x 25mm x 2.5mm section cut into a range of lengths with a collection of nuts and bolts etc.

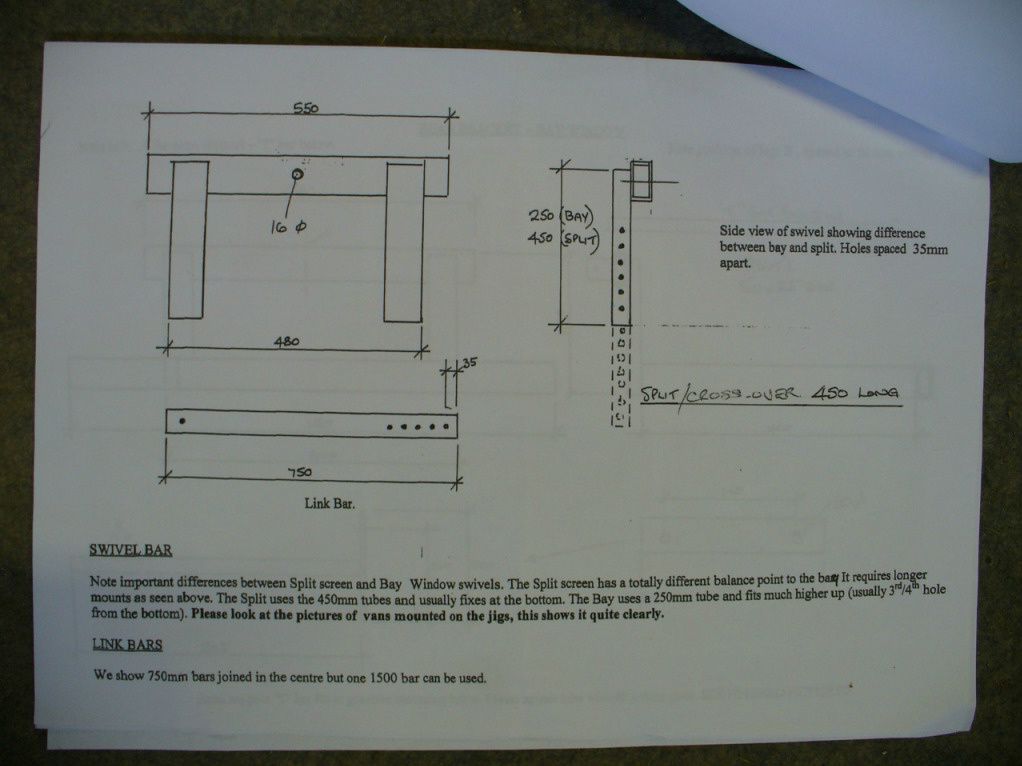
Instructions are basic drawings, no process flow although it is all pretty logical. This is an example of one of the pages, not photo’d them all as wouldn’t be fair to copy the guy’s plans
I started by laying out all the parts in their relevant positions to make sure they were all there. Couple of parts I have questions on so will have to contact the seller but basically all there.
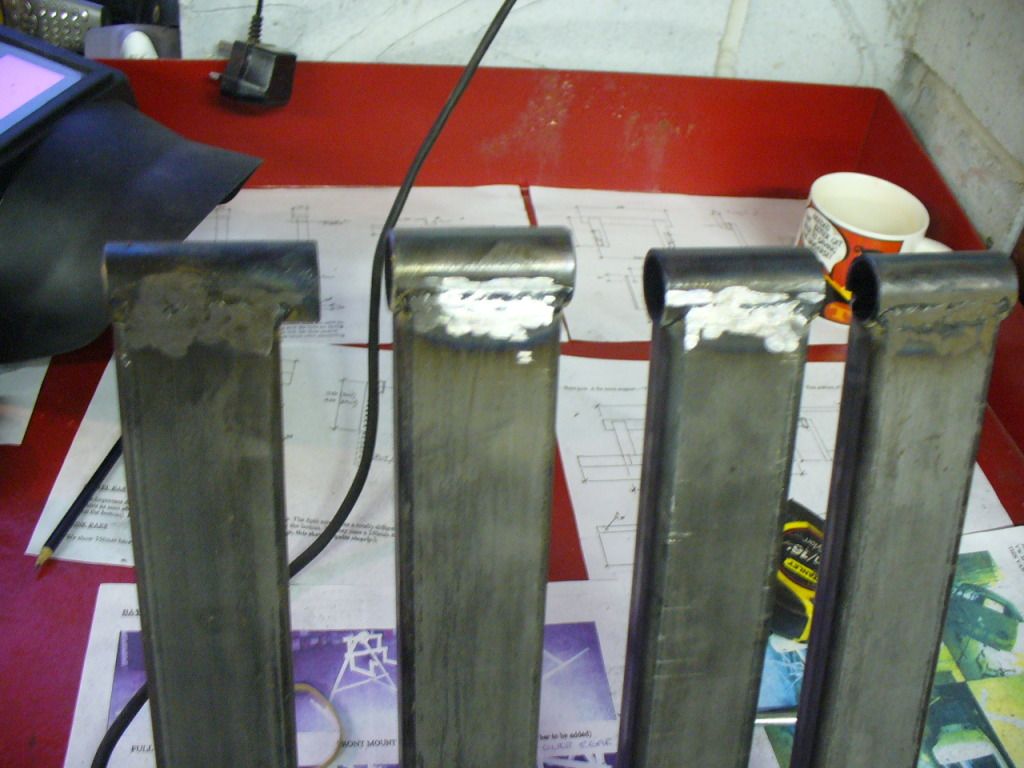
Started by assembling the two A frames. These have 4 legs that you weld 50mm pre-drilled lugs onto, the A frame uprights bolt onto these lugs. You also have to cut a “v” in the top of the uprights and weld on a section of tube which will hold the brass bushes and pivot bolt.
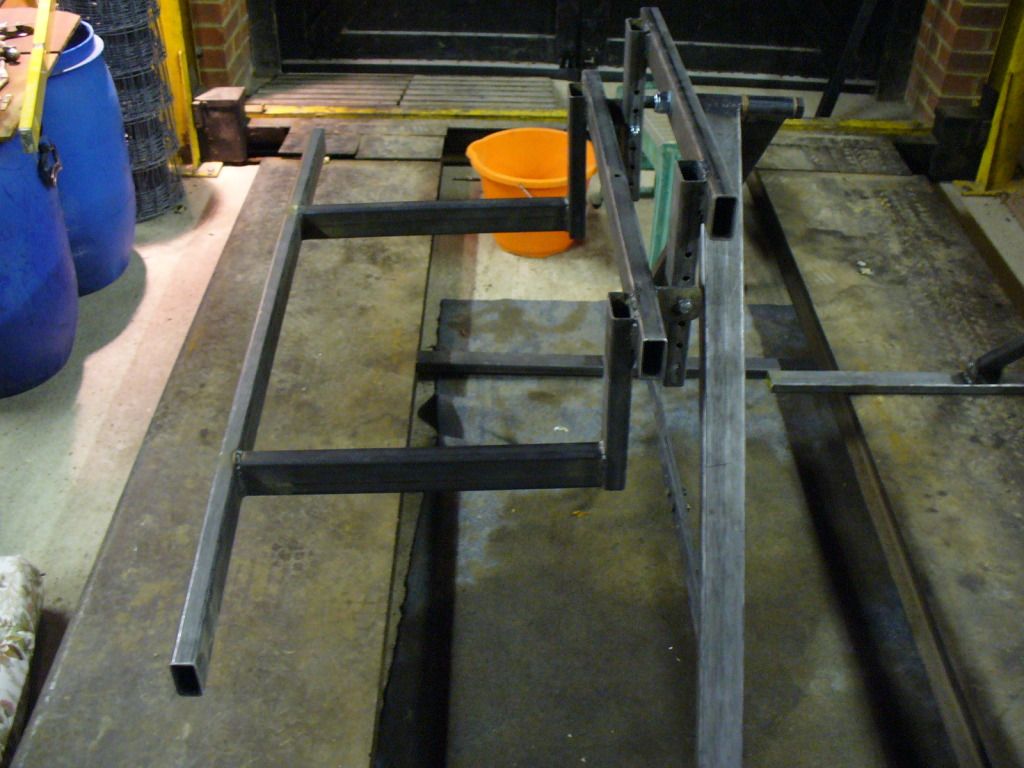
Once this is all together you can fit the spreader bars and it looks something like this:

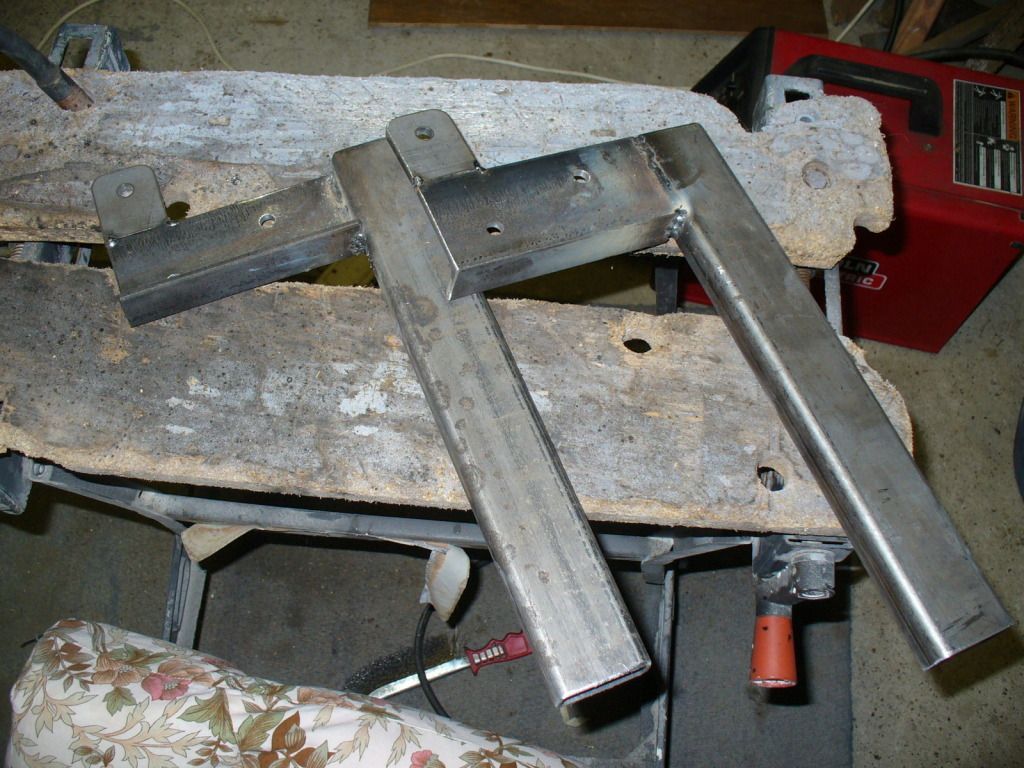
The pivot bolt on each A frame bolts onto a separate frame that the manufacturer calls a swivel frame, the vehicle specific sub frame then bolts to this.
The front swivel frame is basically a cross bar with two drop bars hanging from it. The drop bars are pre-drilled so the sub frame can be mounted at different heights to helps get the right centre of gravity/balance point for the vehicle.
This can be seen in the top of the following picture.

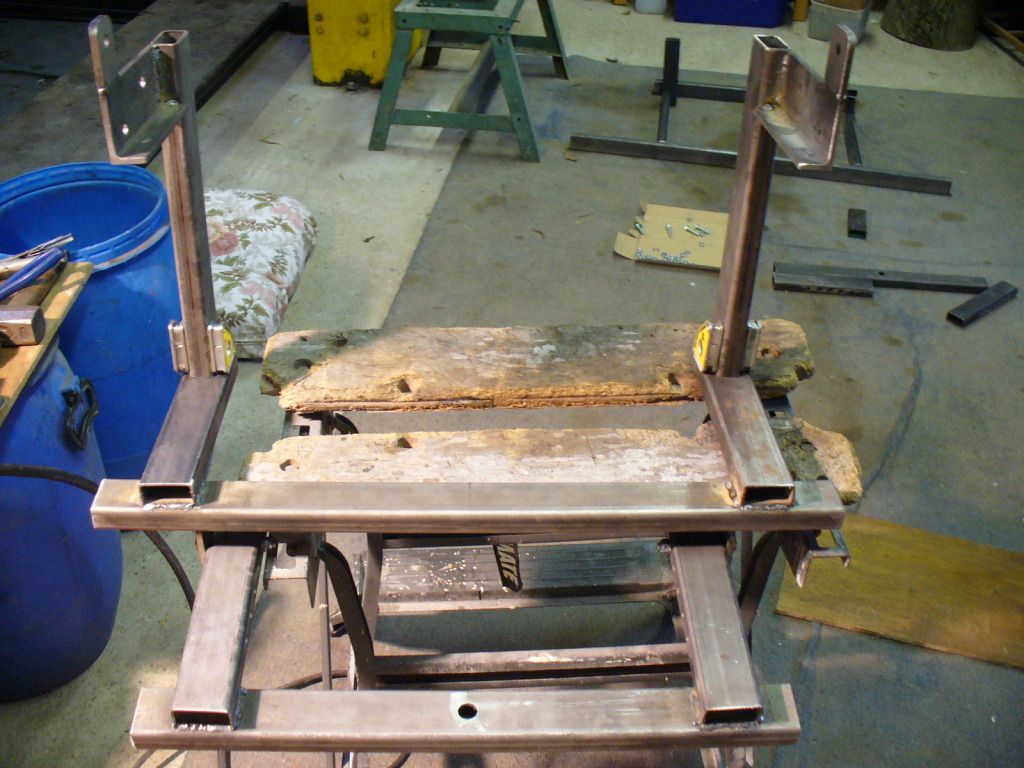
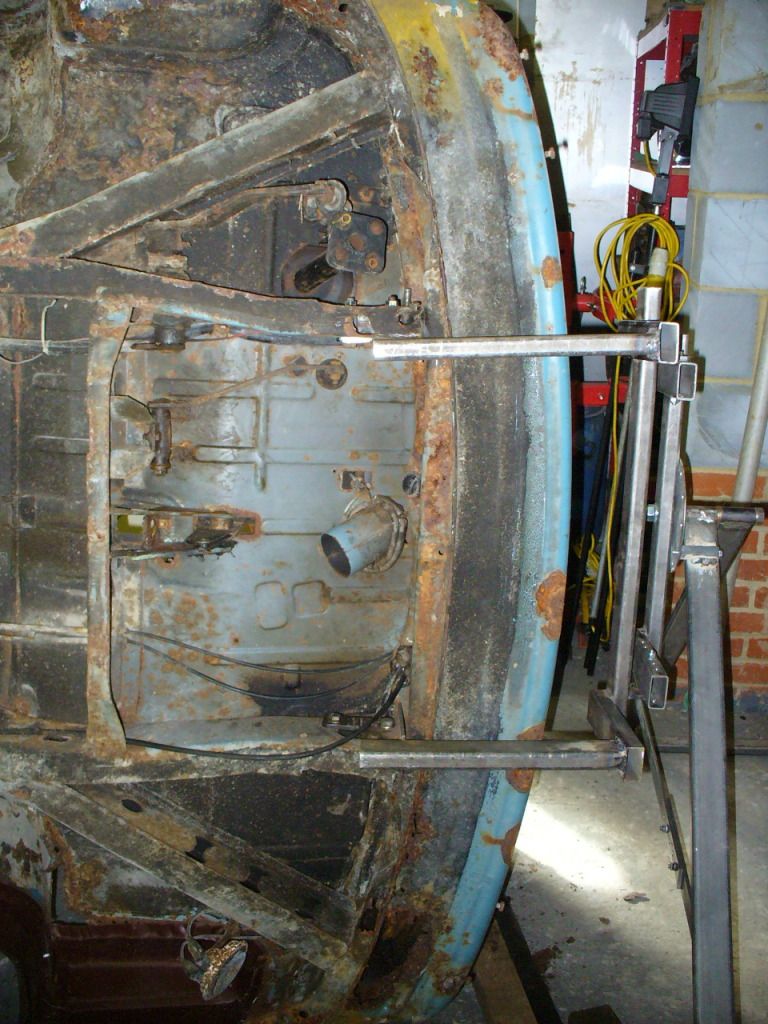
The front sub-frame has legs that fit inside the chassis rails and pick up on existing mountings. I haven’t fitted these to the van yet so haven’t done final assembly until I can see how good a fit they are. They look like this:
The assembled sub-frame will look like this:
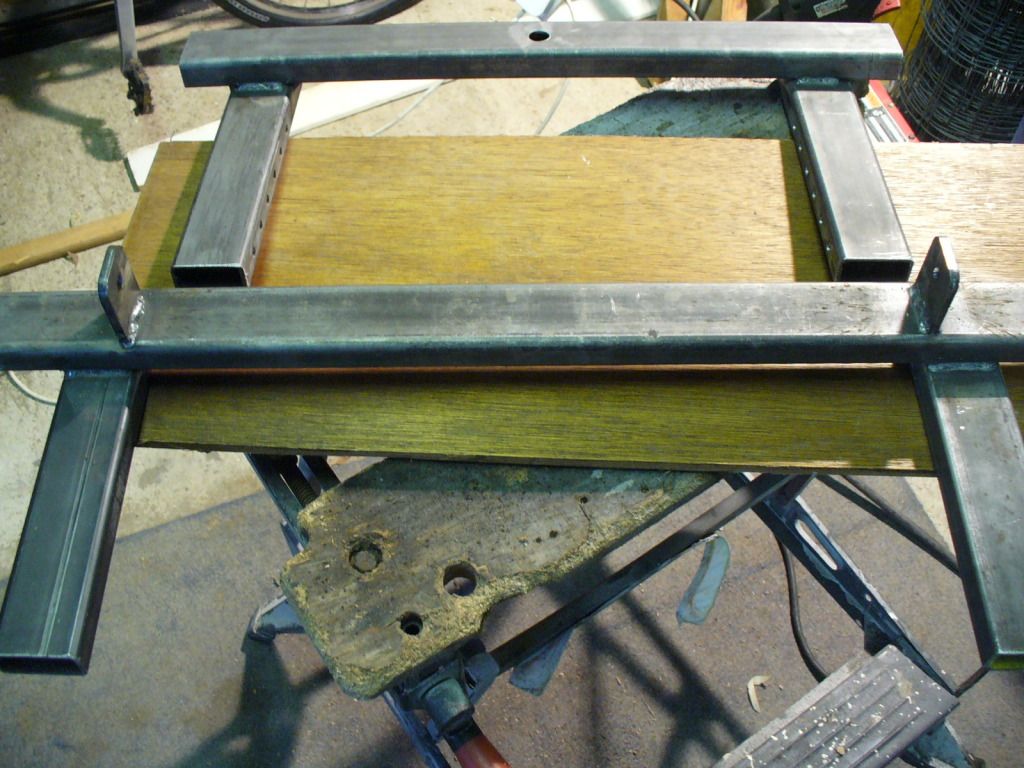
The sub frame mounts to the swivel/A frame via a couple of lugs. These allow the sub-frame to swivel and drop which apparently makes fitment easier – we will see later . The lugs/fixing looks like this:
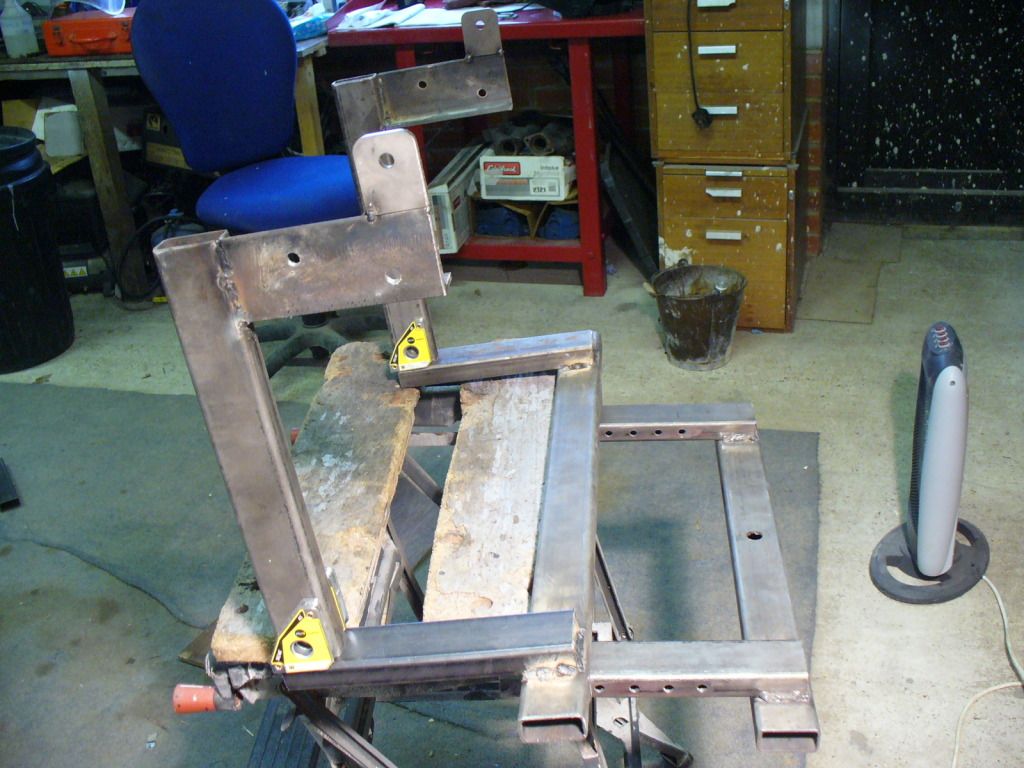
The rear swivel frame is basically identical just with a wider cross bar. The rear sub frame fits onto the swivel frame in the same way and mounts to the van where the engine mounting/carrier fits. This piece isn’t predrilled on mine so I will look at this when it is in situ.
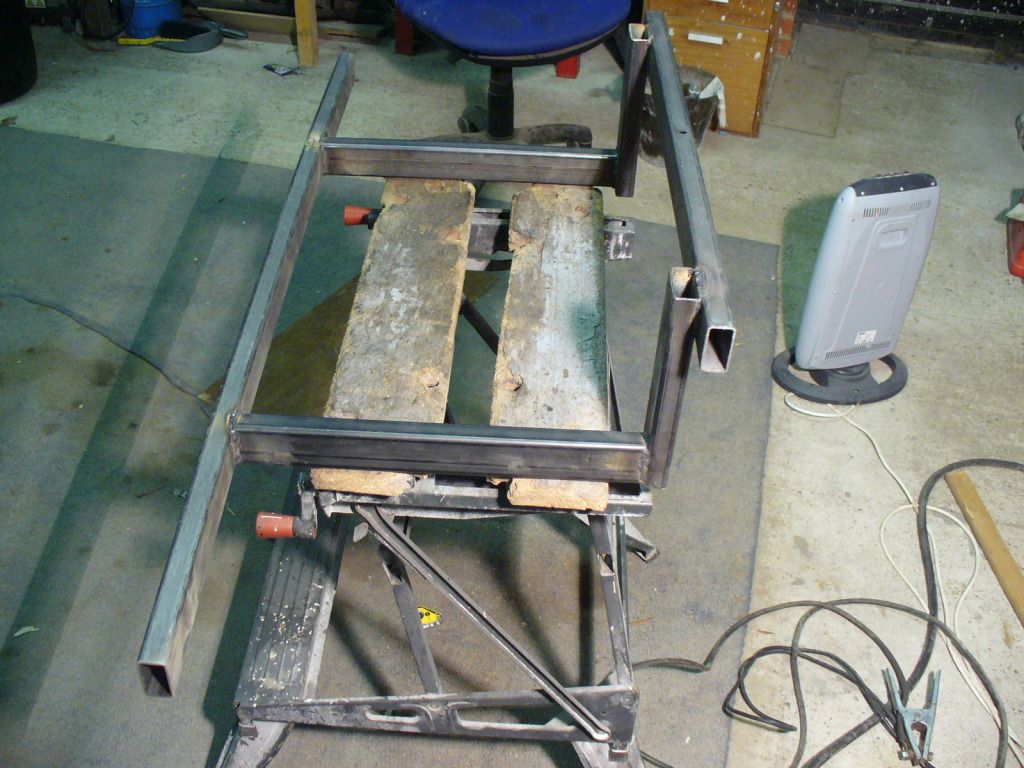
This is what the assembled rear A frame looks like:
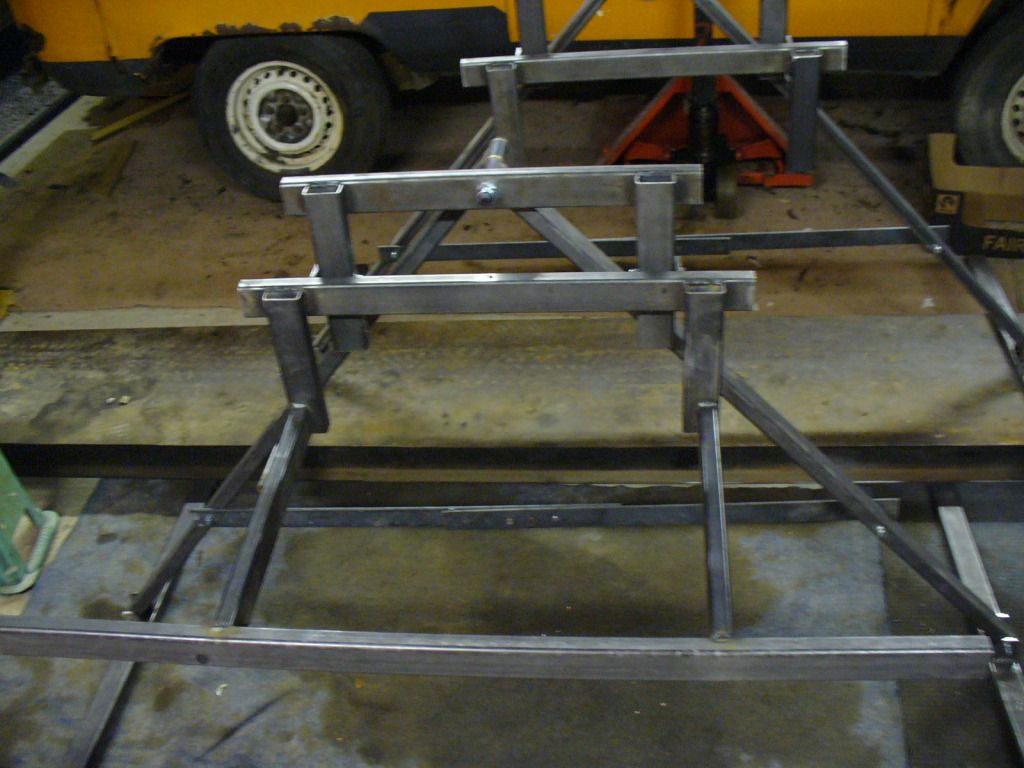
And this is the rear and front A frames together.
So, all assembled now apart from an extra brace for the rear sub-frame that should go onto the gearbox mounts. 1 piece of this seems to be missing so need to check if it is necessary or not.
Opinion so far is that the kit is pretty comprehensive. Instructions could be better if you were inexperienced at fabrication but then in that case you would probably buy the pre-assembled version.
Really you are paying for someone having worked out the design, balance points, mounting points etc. and going to the hassle of cutting all the box section to size. For the price it feels like pretty good value really given the amount of steel involved.
The real test will be when we try to assemble it to the van and see how well it works. Need to get the engine/transmission and suspension assemblies out first so will update when this is done.
Hope this is of interest.
MM
So I decided to invest in a rotisserie/rollover jig. There are a couple of options, a rollover jig lets you roll the van on its side so you can work underneath, a full rotisserie lets you spin the van on its axis. A rotisserie takes less space so that was the way I wanted to go.
There are a number of ways of doing this with plans available from various internet sources as well as a number of suppliers. At the mega expensive end you can spend circa £1000 for rollers or hydraulic
rotisseries at places like CJ Autos http://www.cjautos.site90.net/nbnstd.html or there are a number of places that do simple A frames with mounting brackets for different vehicles.
Rather than muck about building one from plans I decided to purchase a simple A frame rotisserie, but in kit form to save money, and assemble it myself. I ended up buying this one http://www.rolloverjigs.com/ as despite the rubbish website
it seemed to have decent reviews on e-bay etc. Basic kit is £240 including sub frame/mount specific to a late bay.Collected from the supplier in Herts to save on delivery and this is what you get:
Basically a load of 50mm x 25mm x 2.5mm section cut into a range of lengths with a collection of nuts and bolts etc.
Instructions are basic drawings, no process flow although it is all pretty logical. This is an example of one of the pages, not photo’d them all as wouldn’t be fair to copy the guy’s plans
I started by laying out all the parts in their relevant positions to make sure they were all there. Couple of parts I have questions on so will have to contact the seller but basically all there.
Started by assembling the two A frames. These have 4 legs that you weld 50mm pre-drilled lugs onto, the A frame uprights bolt onto these lugs. You also have to cut a “v” in the top of the uprights and weld on a section of tube which will hold the brass bushes and pivot bolt.
Once this is all together you can fit the spreader bars and it looks something like this:
The pivot bolt on each A frame bolts onto a separate frame that the manufacturer calls a swivel frame, the vehicle specific sub frame then bolts to this.
The front swivel frame is basically a cross bar with two drop bars hanging from it. The drop bars are pre-drilled so the sub frame can be mounted at different heights to helps get the right centre of gravity/balance point for the vehicle.
This can be seen in the top of the following picture.
The front sub-frame has legs that fit inside the chassis rails and pick up on existing mountings. I haven’t fitted these to the van yet so haven’t done final assembly until I can see how good a fit they are. They look like this:
The assembled sub-frame will look like this:
The sub frame mounts to the swivel/A frame via a couple of lugs. These allow the sub-frame to swivel and drop which apparently makes fitment easier – we will see later
. The lugs/fixing looks like this:
The rear swivel frame is basically identical just with a wider cross bar. The rear sub frame fits onto the swivel frame in the same way and mounts to the van where the engine mounting/carrier fits. This piece isn’t predrilled on mine so I will look at this when it is in situ.
This is what the assembled rear A frame looks like:
And this is the rear and front A frames together.
So, all assembled now apart from an extra brace for the rear sub-frame that should go onto the gearbox mounts. 1 piece of this seems to be missing so need to check if it is necessary or not.
Opinion so far is that the kit is pretty comprehensive. Instructions could be better if you were inexperienced at fabrication but then in that case you would probably buy the pre-assembled version.
Really you are paying for someone having worked out the design, balance points, mounting points etc. and going to the hassle of cutting all the box section to size. For the price it feels like pretty good value really given the amount of steel involved.
The real test will be when we try to assemble it to the van and see how well it works. Need to get the engine/transmission and suspension assemblies out first so will update when this is done.
Hope this is of interest.
MM

 , can't edit the original post so had to put them down here.


")


