


You are using an out of date browser. It may not display this or other websites correctly.
You should upgrade or use an alternative browser.
You should upgrade or use an alternative browser.
Milling machine column extension.
- Thread starter zzr1200
- Start date
zzr1200
Working at 650 ft on open steel work.
- Messages
- 5,483
- Location
- Glapwell, Chesterfield, Derbyshire, UK
When I done my extension I encountered a couple of problems of my own making caused by the way I machined the extension, so I'll try to eliminate my mistakes in the process.
The drawings are not to scale but the measurements are the ones I used for my mill.
If you have a similar mill please check all the stated dimensions against your mill before cutting/machining any metal stock...
Right down to the write up/process, I used and should have used in the first place.
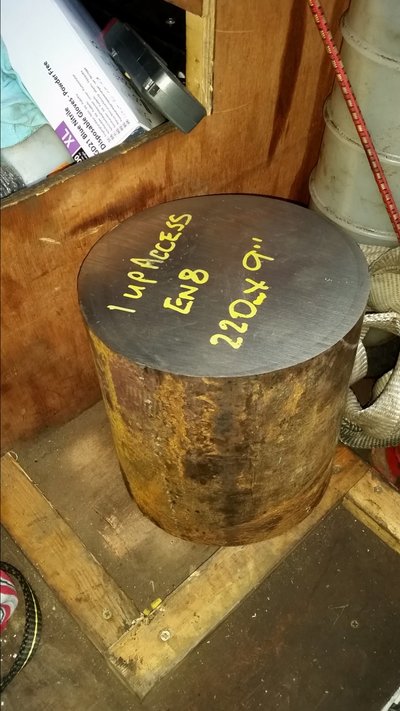
My first mistake was caused by thinking the bar stock had been cut square to its centre line it wasn't far off the centre line but far enough to cause some remachining later.
I drilled a pilot hole for the extension top boss pocket to a depth of 1 1/2 inches and used this pilot hole again after the machining the initial 3" pocket for my tailstock live centre.
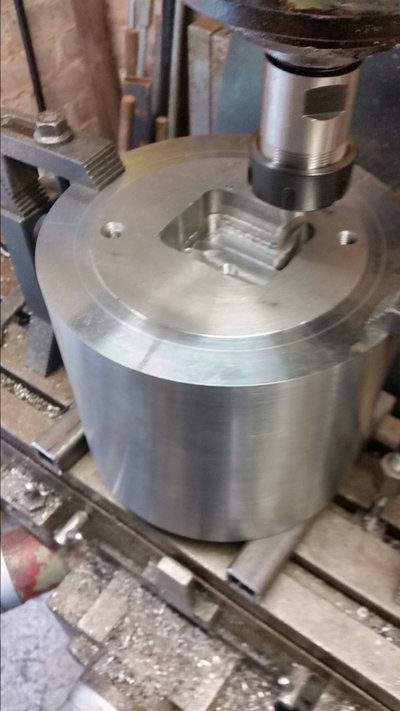
Also due to the original mills lack of head room I couldn't use my rotary table so ended up milling a square pocket hole, which also caused a few problems with machining it into a round hole due to the diameter/size of the live tailstock centre.
So when you prepare you bar stock for machining, pack the bar so the centre lines vertical to the table. I would also advise at this stage milling the initinal small diameter pocket (to the finished depth) in the top of the bar stock, so you can drill your turning centres (top and bottom) and have enough room to use the live tailstock centre and turning tools.
The drive dog bolt holes for turning the extension column for this model of mill between centres should be 5 1/5 inches.
I milled the boss pocket after turning the mating faces and the outside surface between centres, when I redrilled the centre hole using my pilot hole the new centre hole for the tailstock was now off the material centre line and caused the wobbles, but at least I had enough bar diameter left to allow for my c**k up.....

The drawings are not to scale but the measurements are the ones I used for my mill.
If you have a similar mill please check all the stated dimensions against your mill before cutting/machining any metal stock...
Right down to the write up/process, I used and should have used in the first place.
My first mistake was caused by thinking the bar stock had been cut square to its centre line it wasn't far off the centre line but far enough to cause some remachining later.
I drilled a pilot hole for the extension top boss pocket to a depth of 1 1/2 inches and used this pilot hole again after the machining the initial 3" pocket for my tailstock live centre.
Also due to the original mills lack of head room I couldn't use my rotary table so ended up milling a square pocket hole, which also caused a few problems with machining it into a round hole due to the diameter/size of the live tailstock centre.
So when you prepare you bar stock for machining, pack the bar so the centre lines vertical to the table. I would also advise at this stage milling the initinal small diameter pocket (to the finished depth) in the top of the bar stock, so you can drill your turning centres (top and bottom) and have enough room to use the live tailstock centre and turning tools.
The drive dog bolt holes for turning the extension column for this model of mill between centres should be 5 1/5 inches.
I milled the boss pocket after turning the mating faces and the outside surface between centres, when I redrilled the centre hole using my pilot hole the new centre hole for the tailstock was now off the material centre line and caused the wobbles, but at least I had enough bar diameter left to allow for my c**k up.....
Last edited:
zzr1200
Working at 650 ft on open steel work.
- Messages
- 5,483
- Location
- Glapwell, Chesterfield, Derbyshire, UK
Part 2.
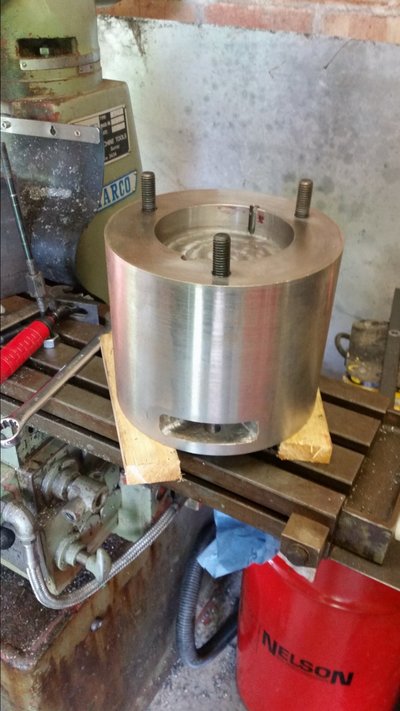
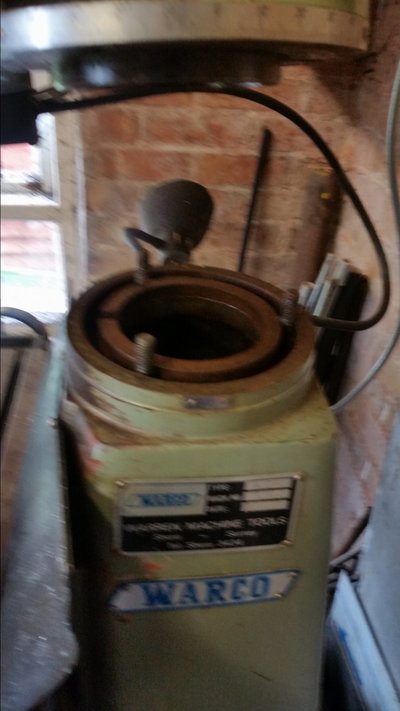
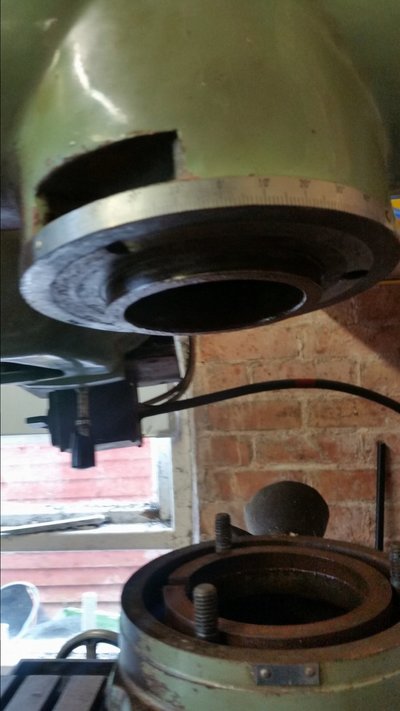
I machined a 1 inch deep pocket to a diameter of 4.520 inch measured from my mills tee piece locating boss and the socket in the top of the mills column.
By using 5 1/5 inch bolt hole centres for the drive dogs you will retain the holes, in case you should at any time need to remount the extension between centres.
In one of my photos you can see I ended up machining mine partly out.
zzr1200
Working at 650 ft on open steel work.
- Messages
- 5,483
- Location
- Glapwell, Chesterfield, Derbyshire, UK
Part 3.
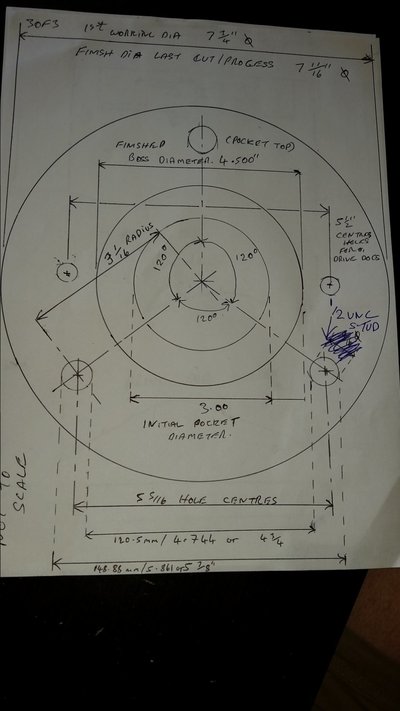
Here's a drawing of the top view (with the measurements) of my column extension.
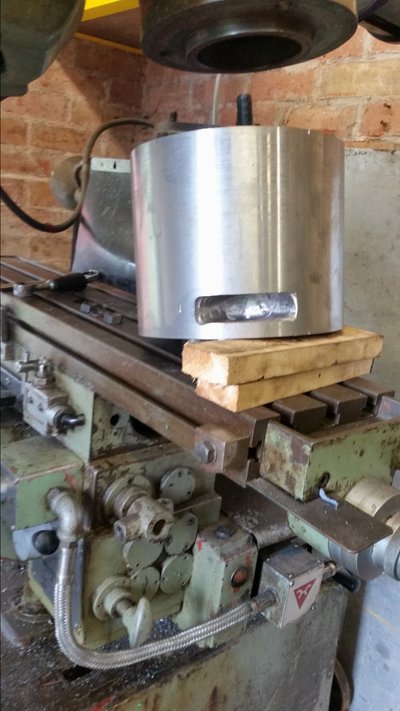
You will notice at the top of the page that there's a working diameter. (7 3/4") and a finished diameter (7 11/16") in the process of the machining and moving between the lathe and milling you will get bumps/digs and marks in/on the outer surface due to the weight of this item, it starts out at around 65Kg and slowly gets lighter.
The finishing cut is to machine out the surface marks.
The only thing left to do now is move the degree scale from the mills tee head to the bottom of the extension spacer.
View attachment 110199
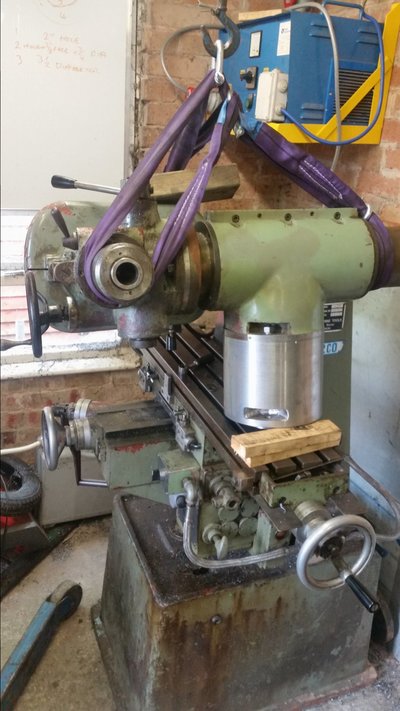
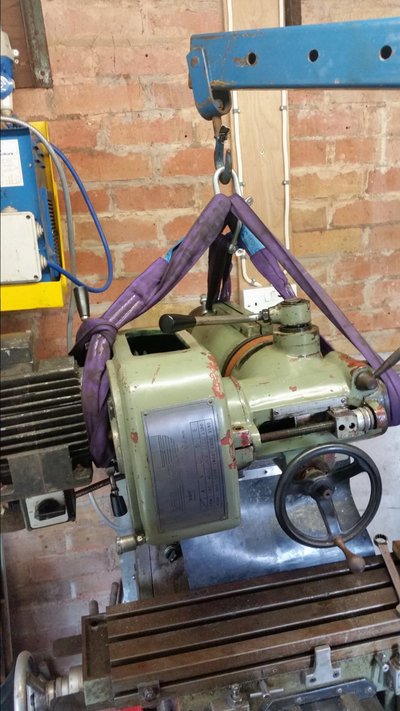
Also the remaining pictures of the installation to follow.
Here's a drawing of the top view (with the measurements) of my column extension.
You will notice at the top of the page that there's a working diameter. (7 3/4") and a finished diameter (7 11/16") in the process of the machining and moving between the lathe and milling you will get bumps/digs and marks in/on the outer surface due to the weight of this item, it starts out at around 65Kg and slowly gets lighter.
The finishing cut is to machine out the surface marks.
The only thing left to do now is move the degree scale from the mills tee head to the bottom of the extension spacer.
View attachment 110199
Also the remaining pictures of the installation to follow.
Last edited:
zzr1200
Working at 650 ft on open steel work.
- Messages
- 5,483
- Location
- Glapwell, Chesterfield, Derbyshire, UK
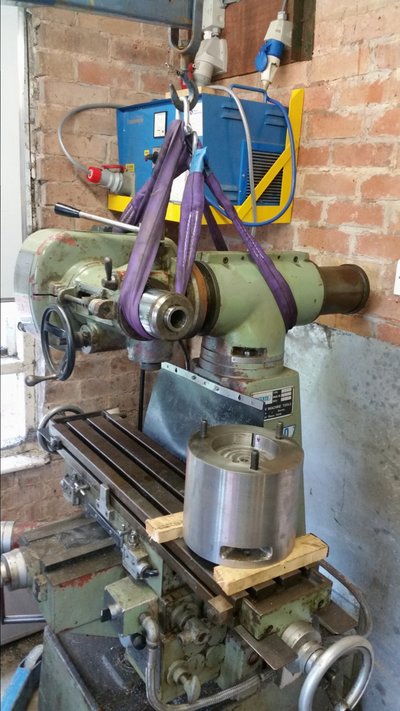
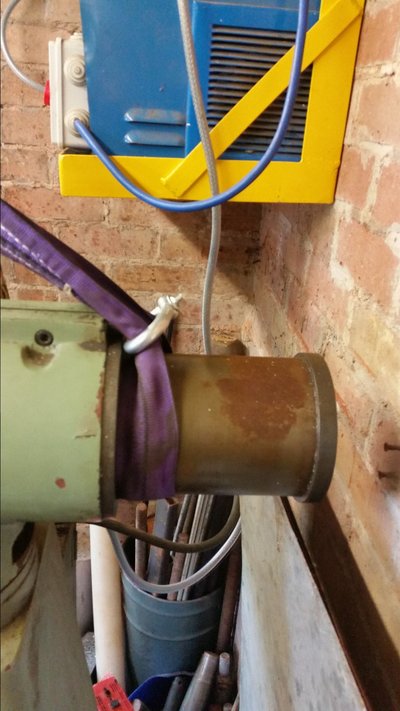
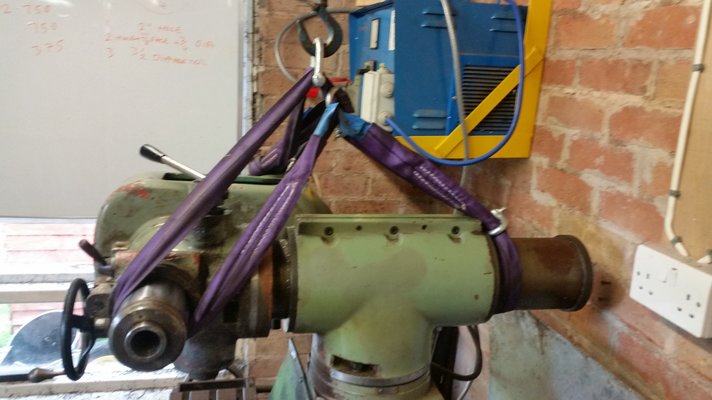
The remaining photos
-
20170506_130413.jpg1 MB · Views: 30
-
 20170501_104437.jpg164.7 KB · Views: 54
 -
 20170520_124853.jpg256.7 KB · Views: 42
 -
20170520_120722.jpg3 MB · Views: 27
-
 20170520_120359.jpg208.1 KB · Views: 47
 -
 20170520_130557.jpg202.8 KB · Views: 48
 -
 20170520_131512.jpg219.3 KB · Views: 46
 -
 20170520_125842.jpg155.3 KB · Views: 47
zzr1200
Working at 650 ft on open steel work.
- Messages
- 5,483
- Location
- Glapwell, Chesterfield, Derbyshire, UK

zzr1200
Working at 650 ft on open steel work.
- Messages
- 5,483
- Location
- Glapwell, Chesterfield, Derbyshire, UK
Turned between centres on the lathe.How did you get the top and bottom exactly parallel ? Surface grind ?
indy4x
Member
- Messages
- 3,141
- Location
- Pontypool, South Wales. UK
Just another tease Indy4x new column extension in the raw...
Just to be done sorry, Indy.
Can't wait to get my hands on it, hopefully it will be here next weekend
indy4x
Member
- Messages
- 3,141
- Location
- Pontypool, South Wales. UK
Thanks for the comprehensive write up and all the photos, pretty much covers all of the questions I had and the photos help, only difference is I'm going to have to work in metric as all of my measuring equipment is in mm.
Looks like I will be dragging the bar stock up to my BIL workshop as it will comfortably fit under his quill when sat on a rotary table
Looks like I will be dragging the bar stock up to my BIL workshop as it will comfortably fit under his quill when sat on a rotary table
zzr1200
Working at 650 ft on open steel work.
- Messages
- 5,483
- Location
- Glapwell, Chesterfield, Derbyshire, UK
I can see no point in boring the centre away, why pay for material and just turn it into swarf unless you have to.
Plus I suppect a solid mass half way up the column also acts as a anti-vibration damping device, you will be surprised how much weight you will machine off the bar stock.
One thing I left off the method/process write up was, the 1/2" UNC studs are cut down 3" set screw with 1 1/4" above the top surface of the extension.
Can you let me know about the collection/meet with your mate.
zzr1200
Working at 650 ft on open steel work.
- Messages
- 5,483
- Location
- Glapwell, Chesterfield, Derbyshire, UK
Just out of interest for anyone who may have this mill or a Warco mill of this age, the three nuts holding the tee piece to the column appear to be 1/2 BSW, I presume the nuts holding the motor head to the ram are also 1/2 BSW.
