mileshc
Member
- Messages
- 35
I am new to Welding & the forum, as of Dec 2008 I had never seen a Euro torch or liner before.
As I have learnt much from lurking on the site & from it's illustrious, unkempt & slightly dishevelled members. I thought I should give something back for others who might benefit.
Please note I am an self confessed Oaf. Also note there are more ways than one to eat a banana.
Thanks to: Welequip for the bit's & help, Malcolm for this Website, My mother & wife, members of this site & of course god / s or other deity or philosophy, you might wish to believe in; or not.
Liner installation for a Euro Torch Assembly (Binzel MB25 in this case).
The procedure is very straight forward & involves few tools & 5 minutes or so to complete.
150mm (6”) - 200mm (8”)adjustable spanner (Oaf's always use adjustable's)
Snipe nose pliers (good quality) or Grinder / Dremmel?
Indelible marker pen
Rule
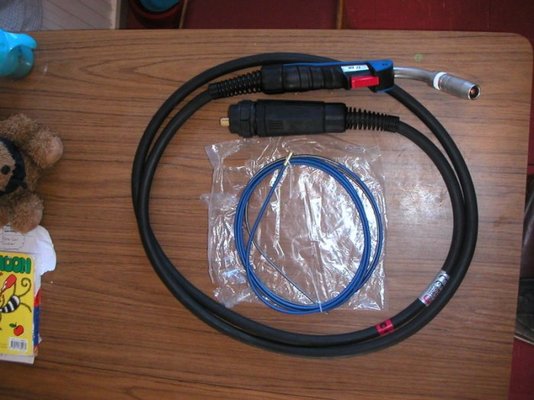
MB25 Torch complete with New Blue 0.6 – 0.8mm Insulated Steel Liner.
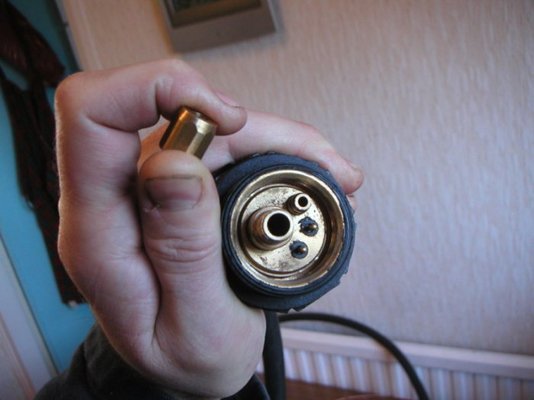
First remove the liner retaining nut from the connector end.
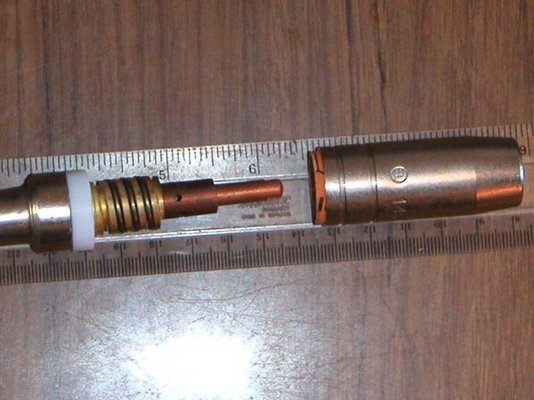
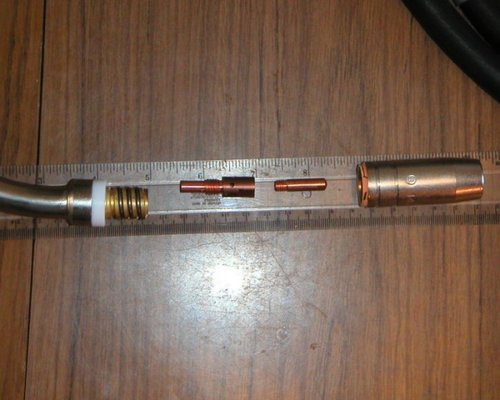
Next by hand, unscrew, twist off the shroud (nice & shiny this one).
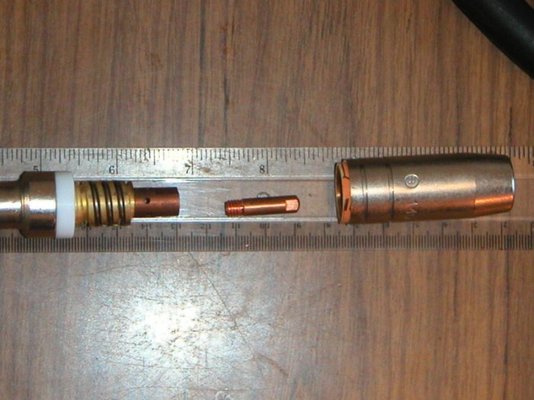
Now unscrew the contact tip, using the two flats on either side. A 0.6mm from a MB15 shown here.
Next unscrew the gas diffuser, also has two flats, from the swan neck.
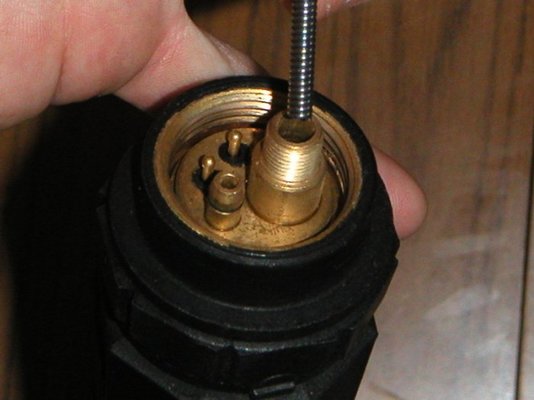
Insert the new liner, it is supplied longer, so needs to be carefully measured before cutting. It may need a bit of wiggling or twisting. You need to lay the whole torch assembly out on the floor, in a straight line. Otherwise the cut point you mark will be incorrect. The picture is just for illustration.
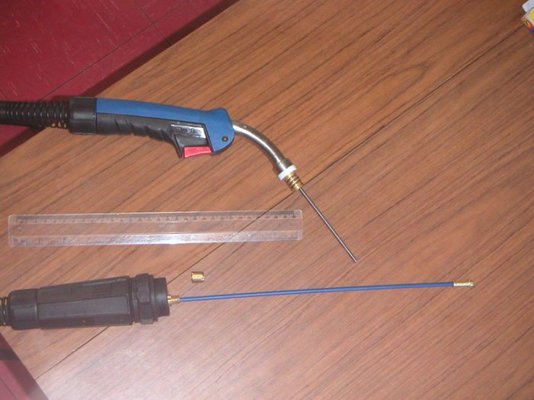
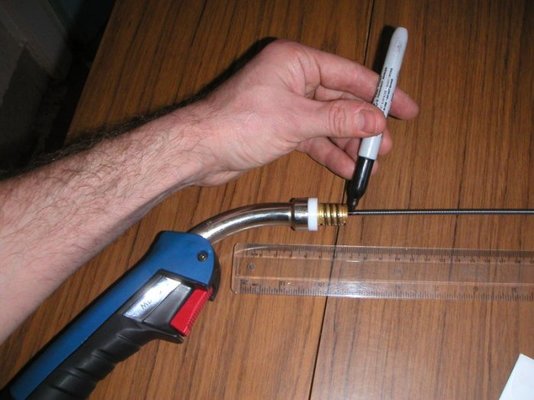
Here we mark the end of the liner, torch layed straight, this is NOT the cut point. Remove the liner. You now need the gas diffuser, the liner sits in this once it is inserted. So you need to determine how much. Pop the diffuser on the very end of the liner, mark it & measure with a rule the amount of liner that sits inside the diffuser. Check the length of the diffuser including threads against the swan neck of the torch. You can now determine the actual cut point. In this example the cut was made 10mm down from the original mark, made with the liner inserted. Ensure there no burrs & the cut is concentric, not squished.
Here you can see the connector & torch with the liner inserted but not secured.
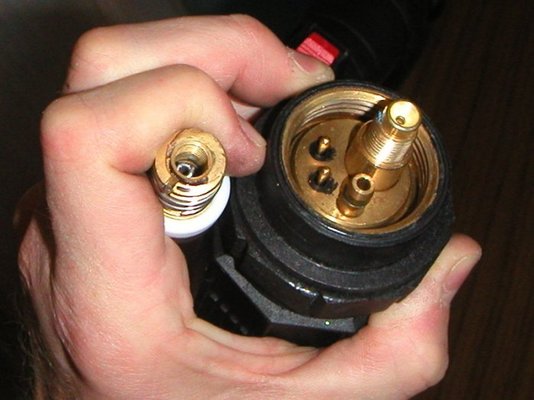
Now the liner is secured with the reattaining nut & gas diffuser. That should be it, job done.
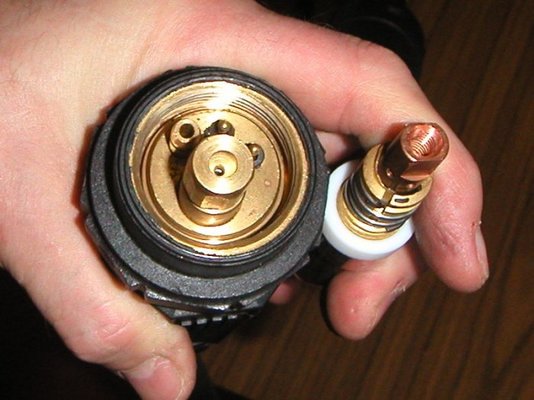
I perhaps haven't explained in words the measuring & cutting very clearly here. But it really is a simple procedure. Even for an Oaf ;-)
As I have learnt much from lurking on the site & from it's illustrious, unkempt & slightly dishevelled members. I thought I should give something back for others who might benefit.
Please note I am an self confessed Oaf. Also note there are more ways than one to eat a banana.
Thanks to: Welequip for the bit's & help, Malcolm for this Website, My mother & wife, members of this site & of course god / s or other deity or philosophy, you might wish to believe in; or not.
Liner installation for a Euro Torch Assembly (Binzel MB25 in this case).
The procedure is very straight forward & involves few tools & 5 minutes or so to complete.
150mm (6”) - 200mm (8”)adjustable spanner (Oaf's always use adjustable's)
Snipe nose pliers (good quality) or Grinder / Dremmel?
Indelible marker pen
Rule
MB25 Torch complete with New Blue 0.6 – 0.8mm Insulated Steel Liner.

First remove the liner retaining nut from the connector end.

Next by hand, unscrew, twist off the shroud (nice & shiny this one).

Now unscrew the contact tip, using the two flats on either side. A 0.6mm from a MB15 shown here.

Next unscrew the gas diffuser, also has two flats, from the swan neck.

Insert the new liner, it is supplied longer, so needs to be carefully measured before cutting. It may need a bit of wiggling or twisting. You need to lay the whole torch assembly out on the floor, in a straight line. Otherwise the cut point you mark will be incorrect. The picture is just for illustration.


Here we mark the end of the liner, torch layed straight, this is NOT the cut point. Remove the liner. You now need the gas diffuser, the liner sits in this once it is inserted. So you need to determine how much. Pop the diffuser on the very end of the liner, mark it & measure with a rule the amount of liner that sits inside the diffuser. Check the length of the diffuser including threads against the swan neck of the torch. You can now determine the actual cut point. In this example the cut was made 10mm down from the original mark, made with the liner inserted. Ensure there no burrs & the cut is concentric, not squished.

Here you can see the connector & torch with the liner inserted but not secured.

Now the liner is secured with the reattaining nut & gas diffuser. That should be it, job done.

I perhaps haven't explained in words the measuring & cutting very clearly here. But it really is a simple procedure. Even for an Oaf ;-)


