peterd51
happy to be here!
- Messages
- 1,593
Hi,
mother wanted some railings across the front of her garden and as I've never made any before I thought it'd be good practice...
but I didn't know it'd takes weeks to get finished!
So I did the measurements and a basic design on paper. Two big panels about 50" long and 40" high, plus a small one for the end about 20" x 23", and three posts. Spacing the rails out at slightly less than 4" I could get eleven rails on each of the big panels and five on the small one, so I decided on a pattern of 'bobbins' with a bit of poke'n'hope.
First job was to cut the metal for the panels, 30 x 10mm...

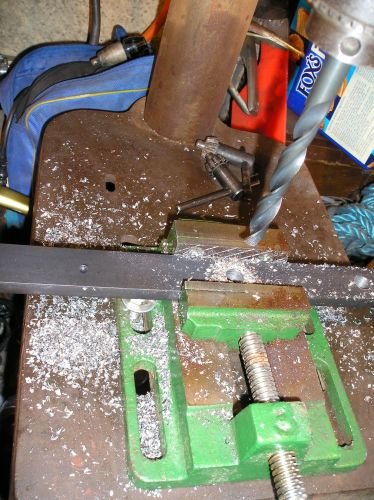
and then to drill holes in the 'rop' rails. Marked up and punched, then popped a 3mm drill through and finished off with a 12mm. I gave each hole a squirt of WD40 from time to time and took it steady so it took a couple of hours to get the holes drilled.

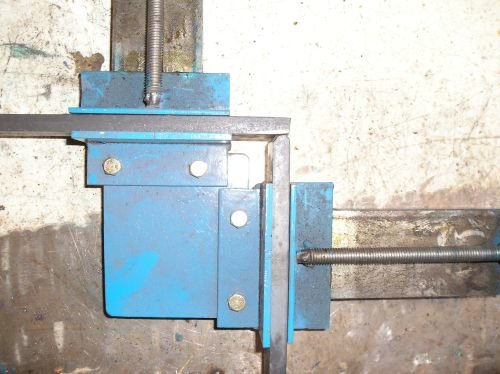
Then after running a bit of 'prep' on the 'sides' I started the welding. Tacked each panel, checked for 90 degrees and welded a bit at a time on each side to keep them lined up.

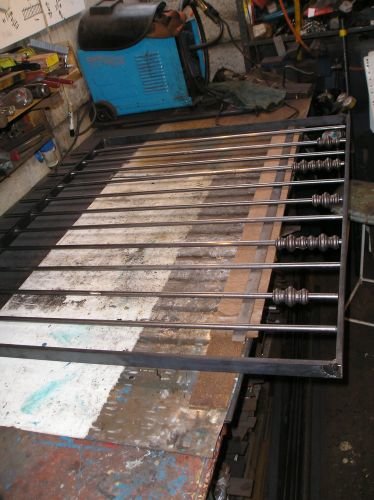
Next job was to cut the rails as accurately as I could, but as usual one or two were 'out' by a couple of millimetres. After threading the bobbins on the relevant rails I lined up the bottom ends of each rail by using wood and metal spacers to set the height above the bench.

As some of the rail-tops were now higher or lower than their neighbours I had to make sure with carefull measuring (and by previously choosing the end rails as matching pairs) that the two end balls were exactly the same height above the top rail. Then using a length of dexion angle iron clamped on as a temprary jig I managed to get all of the balls at the same height. These are 30mm balls to match the panel top width.

continued in next message...
mother wanted some railings across the front of her garden and as I've never made any before I thought it'd be good practice...
but I didn't know it'd takes weeks to get finished!
So I did the measurements and a basic design on paper. Two big panels about 50" long and 40" high, plus a small one for the end about 20" x 23", and three posts. Spacing the rails out at slightly less than 4" I could get eleven rails on each of the big panels and five on the small one, so I decided on a pattern of 'bobbins' with a bit of poke'n'hope.
First job was to cut the metal for the panels, 30 x 10mm...

and then to drill holes in the 'rop' rails. Marked up and punched, then popped a 3mm drill through and finished off with a 12mm. I gave each hole a squirt of WD40 from time to time and took it steady so it took a couple of hours to get the holes drilled.

Then after running a bit of 'prep' on the 'sides' I started the welding. Tacked each panel, checked for 90 degrees and welded a bit at a time on each side to keep them lined up.

Next job was to cut the rails as accurately as I could, but as usual one or two were 'out' by a couple of millimetres. After threading the bobbins on the relevant rails I lined up the bottom ends of each rail by using wood and metal spacers to set the height above the bench.

As some of the rail-tops were now higher or lower than their neighbours I had to make sure with carefull measuring (and by previously choosing the end rails as matching pairs) that the two end balls were exactly the same height above the top rail. Then using a length of dexion angle iron clamped on as a temprary jig I managed to get all of the balls at the same height. These are 30mm balls to match the panel top width.

continued in next message...


 , used to confuse the hell out of me as I have allways be used to metric.
