hotponyshoes
Member
- Messages
- 7,788
- Location
- Somerset. Uk
I was talking about this machine on here the other day and then chatting to one of the esab dealers about it.
Dealer was pretty convincing about it's tig capabilities (which have been pretty lacking on my other rebels) so I got hold of one for a look..
Bit of background:
Did a group buy a few years ago on the Rebel 215ic. Wasn't actually my first choice of machine but I was running the group buy so I ended up with one. Most of the guys in the group wanted something to carry in the van or for site work. The casing of the rebel is ideal for that as its pretty tough.
It's also multi-voltage which is a requirement for some.
I don't like the idea of (expensive!) tft screens on a welder but it was a selling point for the guys. It also looks good (and it's a known brand) which helps if you are turning up to a paid job as, if the customer thinks you have a £2k machine, they don't mind paying you a bit more than the guy with the parkside kit.
After using the mig side of the 215ic for a bit I was so impressed with the S-Mig feature I then got the bigger version (235ic) for the workshop. That's much the same machine except it will take a 300mm drum of wire and has a higher power output.
I'd not really considered the 205ic ac/dc as I already had decent dedicated single process, machines and the 205ic didn't seem like good value to me. But read on..
So, what does it look like?
First thing that impressed me was the size.
For some reason I was expecting it to be the same size as the 235. Ie. A workshop size machine but it's actually identical to the 215. That's a big plus as it means it's easy to stick it on the passenger seat of a car or carry sideways through a doorway.
Same construction as the 215, Metal box surround by a tough plastic cage.
The plastics are pretty tough although the light texture finish does show marks and scratches easily. There are 5 handles so it's pretty easy to grab/lift/drag from any position.
The cage/handles overhang the case. The downside of this is the machine takes up a bit more space than it actually needs. The upside is all the important parts are fairly well protected.
Rear Panel,
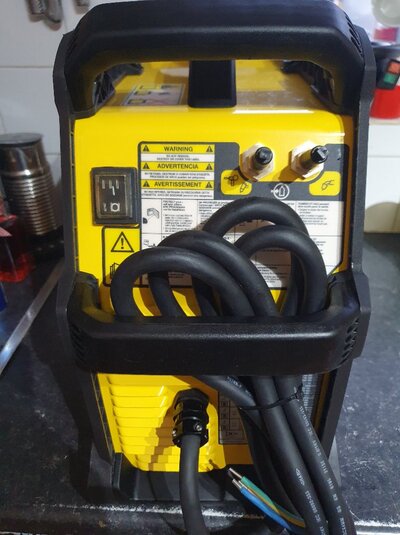
Decent thick rubber power cable that feeds in through a metal amphenol style gland.
Rocker switch for power, this feels a bit cheap but does have a rubber dust cover.
2x quick release fittings for gas (Rectus 21 size) this one actually came with dust covers over the connectors which is a nice touch.
Most importantly, there are 2 of them. The 215 only has a single gas inlet for the mig gas. That means you are limited to using a valved torch with the tig which is what you would expect on a <£100 tig set.
Front Panel,
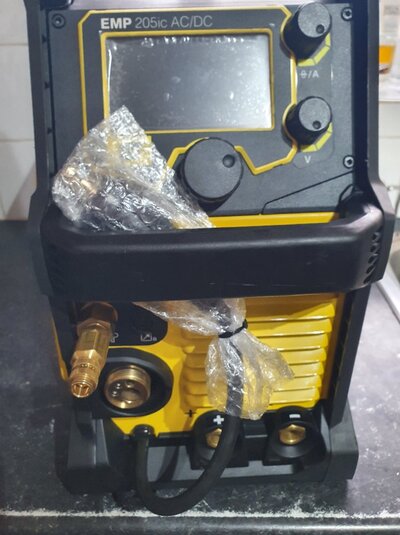
The user interface, euro socket for the mig torch, 2 dinse sockets for the arc/tig leads, trailing cable to select mig polarity, remote control socket and gas outlet for tig.
The tig torch runs from the dinse sockets. Sounds obvious but some other manufacturers use the euro mig socket which means you need to buy a special tig torch and also remove the mig wire before using it!
The machine comes as standard with a threaded gas outlet for the tig. The thread is an odd size so if you buy this from an esab dealer get them to fit a matching quick-release to that as well! Due to the various tig processes available you'll want more than one tig torch to get the best use out of this and a quick fitting makes things easier all round. Get the female connection put onto the machine as the male ends are much cheaper and you might want a few of them.
There is a single remote/interface socket. Probably enough for most people but if you wanted a foot pedal, torch with power control, arc hand remote and a spool gun* you'll be swapping and removing the connector for each process.
I think my main gripe with all multi-process machines is the faffing about switching from one process to another but at least the rebel is easier than some.
Side door,
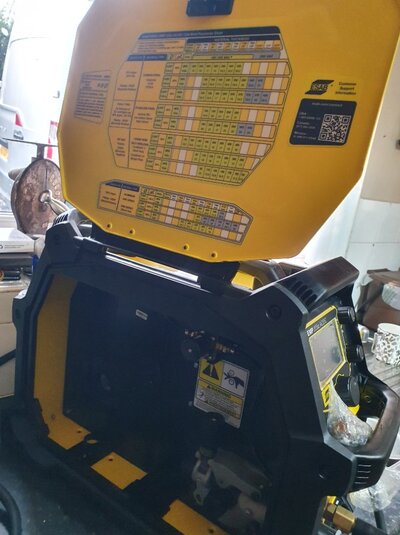
No feeder upgrades on the 205. Uses the same single roll wire feeder with a plain follower. The feeder is a decent quality all-metal unit and looks like it can be removed from the door side if required. The 2 gas solonides are also easily accessible from here.
There is an led strip light on the roof and a couple of storage trays on the floor. One looks like it holds mig torch consumables. Not sure about the other?
There is a comprehensive settings chart on the inside of the door although it's not that useful as several of the gas mixes are not common in the uk and most of the filler materials are given as esab names rather than generic material grades.
User interface,
This is pretty simple, a digital (tft?) display and 3 knobs.
The knobs are the infinite rotating type. The bigger one has a push to select function. They have a tactical click when rotated.
Functions change depending on what's shown on the screen.
They are also speed-sensitive, so turning normally 1 click = 1 amp. Turning quickly then 1 click = 5 amp. That makes it easily to quickly and accurately make adjustments over a wide range.
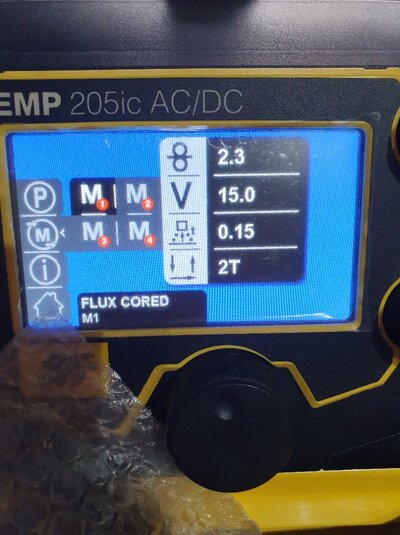
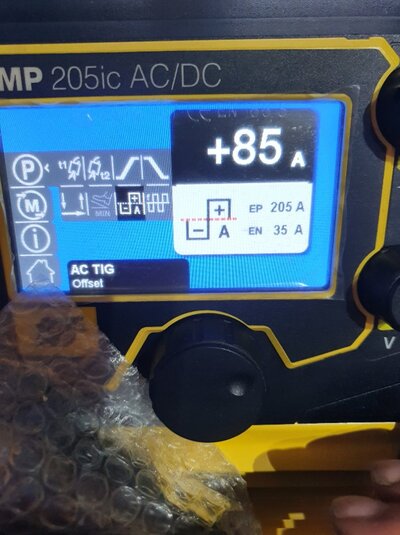
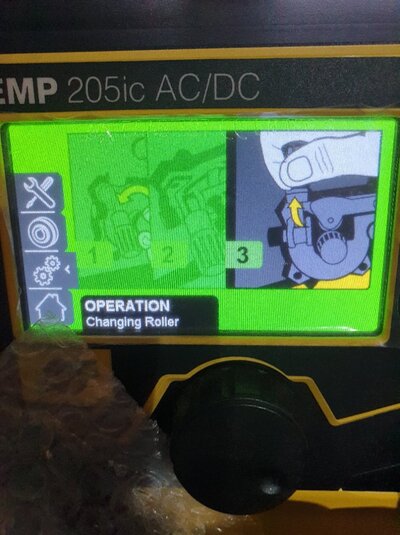
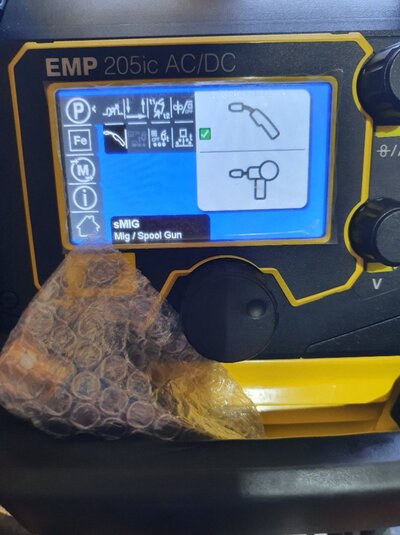
The display is crisp and clear (the screen protection film is still on in these photos)
The graphics don't have any fuzzy edges or blur like the cheaper machines with this sort of display so even the small text is easy to read. The colour scheme and contrast make it quite visible from most angles and it's bright enough to use outside in most conditions.
Functions,
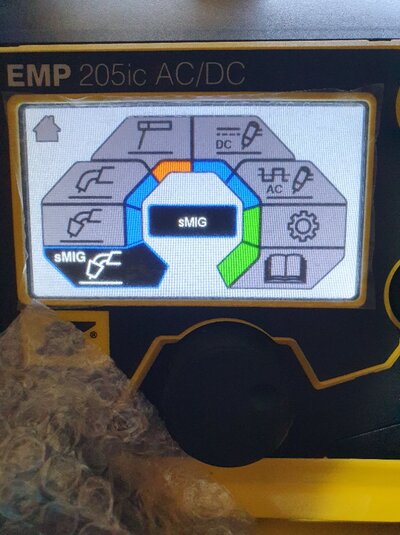
Powering on the machine runs the fans up briefly then the machine goes silent and displays the home screen.
Start-up is quick unlike some other machines which feel the need to show you settings or safety warnings during the boot cycle.
The first obvious improvement is the home screen layout. It's the same as the other rebels except, because they have one less process they have an odd number of icons. Rather than change the size of each icon they just make one twice the size so it looks odd. My guess is that this is the machine the layout was designed for and they modified the others!
Process selection is easy, just rotate the big knob to highlight the process you want to use and press it in. As the different icons are highlighted the text in the centre changes so you don't need to remember what picture is for what. This follows through with all the various settings, all icons have a separate text description and some have further text descriptions available explaining what they do.
Dealer was pretty convincing about it's tig capabilities (which have been pretty lacking on my other rebels) so I got hold of one for a look..
Bit of background:
Did a group buy a few years ago on the Rebel 215ic. Wasn't actually my first choice of machine but I was running the group buy so I ended up with one. Most of the guys in the group wanted something to carry in the van or for site work. The casing of the rebel is ideal for that as its pretty tough.
It's also multi-voltage which is a requirement for some.
I don't like the idea of (expensive!) tft screens on a welder but it was a selling point for the guys. It also looks good (and it's a known brand) which helps if you are turning up to a paid job as, if the customer thinks you have a £2k machine, they don't mind paying you a bit more than the guy with the parkside kit.
After using the mig side of the 215ic for a bit I was so impressed with the S-Mig feature I then got the bigger version (235ic) for the workshop. That's much the same machine except it will take a 300mm drum of wire and has a higher power output.
I'd not really considered the 205ic ac/dc as I already had decent dedicated single process, machines and the 205ic didn't seem like good value to me. But read on..
So, what does it look like?
First thing that impressed me was the size.
For some reason I was expecting it to be the same size as the 235. Ie. A workshop size machine but it's actually identical to the 215. That's a big plus as it means it's easy to stick it on the passenger seat of a car or carry sideways through a doorway.
Same construction as the 215, Metal box surround by a tough plastic cage.
The plastics are pretty tough although the light texture finish does show marks and scratches easily. There are 5 handles so it's pretty easy to grab/lift/drag from any position.
The cage/handles overhang the case. The downside of this is the machine takes up a bit more space than it actually needs. The upside is all the important parts are fairly well protected.
Rear Panel,

Decent thick rubber power cable that feeds in through a metal amphenol style gland.
Rocker switch for power, this feels a bit cheap but does have a rubber dust cover.
2x quick release fittings for gas (Rectus 21 size) this one actually came with dust covers over the connectors which is a nice touch.
Most importantly, there are 2 of them. The 215 only has a single gas inlet for the mig gas. That means you are limited to using a valved torch with the tig which is what you would expect on a <£100 tig set.
Front Panel,

The user interface, euro socket for the mig torch, 2 dinse sockets for the arc/tig leads, trailing cable to select mig polarity, remote control socket and gas outlet for tig.
The tig torch runs from the dinse sockets. Sounds obvious but some other manufacturers use the euro mig socket which means you need to buy a special tig torch and also remove the mig wire before using it!
The machine comes as standard with a threaded gas outlet for the tig. The thread is an odd size so if you buy this from an esab dealer get them to fit a matching quick-release to that as well! Due to the various tig processes available you'll want more than one tig torch to get the best use out of this and a quick fitting makes things easier all round. Get the female connection put onto the machine as the male ends are much cheaper and you might want a few of them.
There is a single remote/interface socket. Probably enough for most people but if you wanted a foot pedal, torch with power control, arc hand remote and a spool gun* you'll be swapping and removing the connector for each process.
I think my main gripe with all multi-process machines is the faffing about switching from one process to another but at least the rebel is easier than some.
Side door,

No feeder upgrades on the 205. Uses the same single roll wire feeder with a plain follower. The feeder is a decent quality all-metal unit and looks like it can be removed from the door side if required. The 2 gas solonides are also easily accessible from here.
There is an led strip light on the roof and a couple of storage trays on the floor. One looks like it holds mig torch consumables. Not sure about the other?
There is a comprehensive settings chart on the inside of the door although it's not that useful as several of the gas mixes are not common in the uk and most of the filler materials are given as esab names rather than generic material grades.
User interface,
This is pretty simple, a digital (tft?) display and 3 knobs.
The knobs are the infinite rotating type. The bigger one has a push to select function. They have a tactical click when rotated.
Functions change depending on what's shown on the screen.
They are also speed-sensitive, so turning normally 1 click = 1 amp. Turning quickly then 1 click = 5 amp. That makes it easily to quickly and accurately make adjustments over a wide range.
The display is crisp and clear (the screen protection film is still on in these photos)
The graphics don't have any fuzzy edges or blur like the cheaper machines with this sort of display so even the small text is easy to read. The colour scheme and contrast make it quite visible from most angles and it's bright enough to use outside in most conditions.
Functions,

Powering on the machine runs the fans up briefly then the machine goes silent and displays the home screen.
Start-up is quick unlike some other machines which feel the need to show you settings or safety warnings during the boot cycle.
The first obvious improvement is the home screen layout. It's the same as the other rebels except, because they have one less process they have an odd number of icons. Rather than change the size of each icon they just make one twice the size so it looks odd. My guess is that this is the machine the layout was designed for and they modified the others!
Process selection is easy, just rotate the big knob to highlight the process you want to use and press it in. As the different icons are highlighted the text in the centre changes so you don't need to remember what picture is for what. This follows through with all the various settings, all icons have a separate text description and some have further text descriptions available explaining what they do.


