slim_boy_fat
Member
- Messages
- 29,187
- Location
- Scottish Highlands
but don't ask me how to get it alinged
Verrrry careful measuring/marking/drilling.....

 Probably have to make a jig of some sort.
but don't ask me how to get it alinged

 Probably have to make a jig of some sort.
Dowels may be easier dont need a special tool just a drill but don't ask me how to get it alinged
Needs planning properly to be hiddenRouter or biscuit cutter should do it?
EDIT: Just seen the OP's post re tool availability so scrub this.

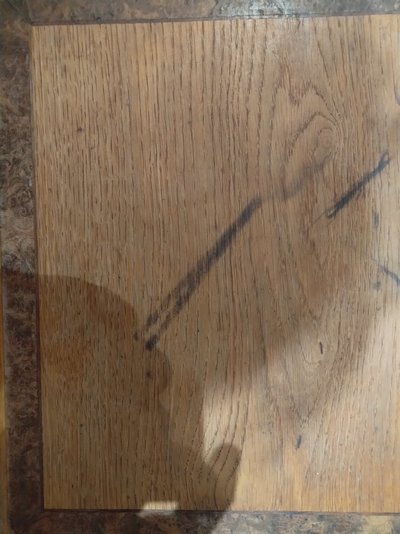
Acquired a slab of Ash very cheap as it was warped and cracking at the ends. Cut and sanded, some screws in the ends to arrest any further cracking, and oiled. It's to be a general purpose clothing shelf where flatness isn't important, but it should look cool
Also marked and cut some stainless sheets to fold up into firepit ash trays.
View attachment 324205 View attachment 324206 View attachment 324207


!!!!!!! YOU TWO have got me thinking about one of these nowI bent up some 60mm x 5mm stainless today as inserts for it, it reduces the width of the V to about 25mm from the 33 as delivered, it lets you bend a tighter radius on thinner stuff and also lets you bend shorter distances between bends. Might even make more up to reduce the V width more.
I still have to dress off the tops of them.
View attachment 324306

Loosely based on a Pak40. I may alter the wheels to straight spoke when I get some "spare" time, I think I will be able to mill them on the rotary table relatively easily (better than filing it all out).Really like that! I looked and thought how...it's a field gun...
Security bar for the inside of a pair of shop doors.View attachment 324402View attachment 324403View attachment 324403
No ,she didn’t want anything too complicated,just push resistance.
Its a lovely material especially when done well. Very crisp.Bent up some more copper flashing for my ongoing roof project:
View attachment 324455
View attachment 324456
Getting there, Weather has screwed me really.

I had no idea that led flashes to any particular rate.I made a start on the electricity monitor. First attach the LED pulse sensor to the meter. You can see it just below the meter's LCD screen. The pulse meter connects to a BAE0910 one-wire slave chip which is in the box bottom right. The switch on the right is the changeover switch for the gennie.
View attachment 324528
The slave chip is wired back to a one-wire bus on a raspberry pi that I have under the stairs, I'm using CAT5 cable as I have loads of external grade. Its called one-wire as there is only one data line, but there's +5v and 0v so its actually 3 wires
For once, something worked first time.
The one wire address for the slave chip is FC.0000000001D2 so I added it to my alias file and called it "emeter".
Now I can access the counter easily as follows from the command line,
pi@hapi01:~ $ owget /emeter/910/count ; echo
12520
pi@hapi01:~ $ owget /emeter/910/count ; echo
12996
The counter increments each time the LED flashes on the meter, and this flashes for every 1Wh, so 1000 flashes is 1kWh.
Now I know it works I shall get rid of the spiders and tidy up the cabling.
Next step is to poll the counter periodically, say every 5 minutes, and stick it into influxdb, a time series database. Once its in there it is easy to graph it. I shall get the kids to do that.
I'm quite impressed with the chip, it can do lots more.
One to four 16 bit PWM: two hardware (PWM1 & 2) + two software(PWM3 & 4)
One 8 to 10 bit ADC input 0 to 5V
One 32 bit counter
Up to 4 digital outputs (sink up to 20mA)
Up to 3 digital inputs
it also has a real time clock and and "automation engine" where you can write your own procedures as follows.
The BAE chips embed an Automation Engine that allows creating automatic (re)actions directly within the chip.
This is implemented as a virtual CPU that process up to four flow of instruction in parallel.
The AE programs are stored in non volatile chip memory (eeprom) which is remotely programmable under master
control


