


Earlier in the year I started to notice the handling on my Saab 900 was deteriorating and it seemed to handle differently depending on whether it was turning right or left.
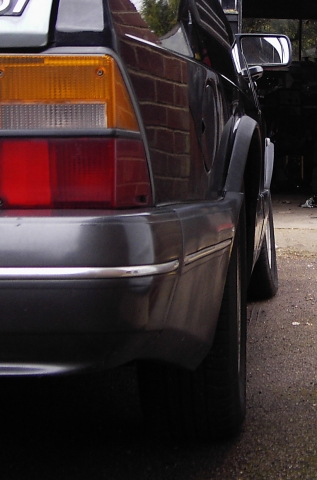
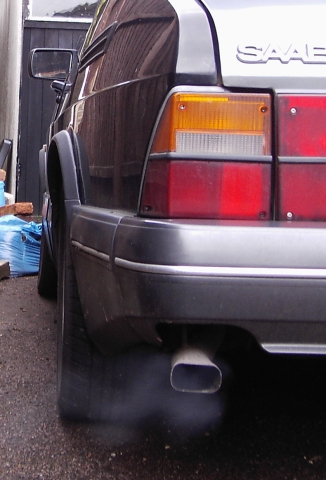
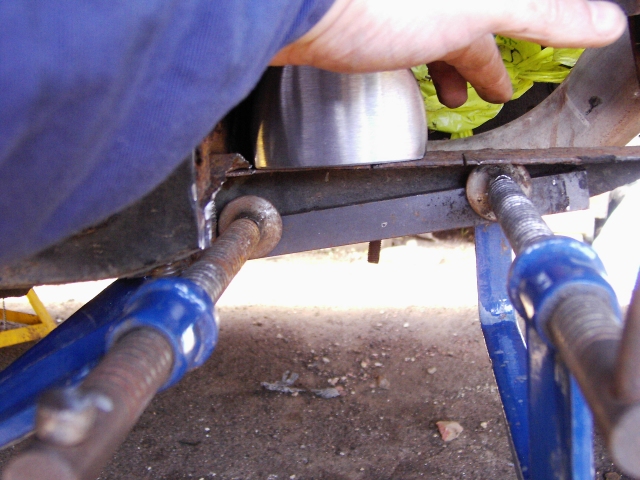
Looking at it on the driveway, I thought I noticed a difference between the left-hand and right-hand front wheel geometry. Can you spot the difference?
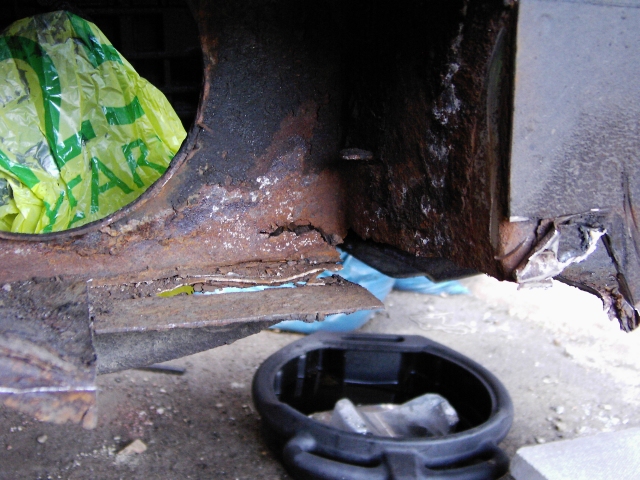
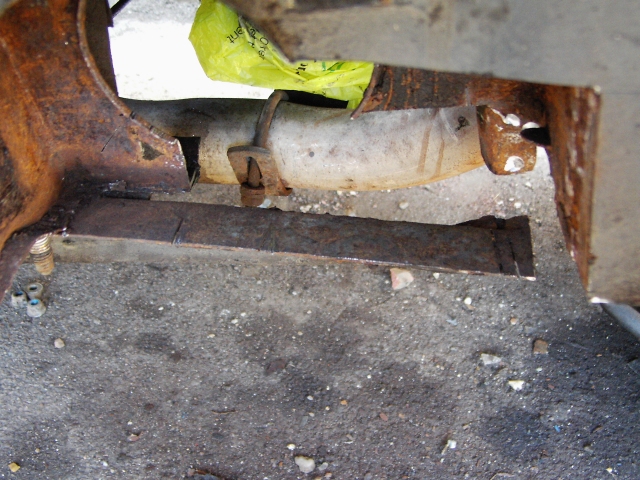
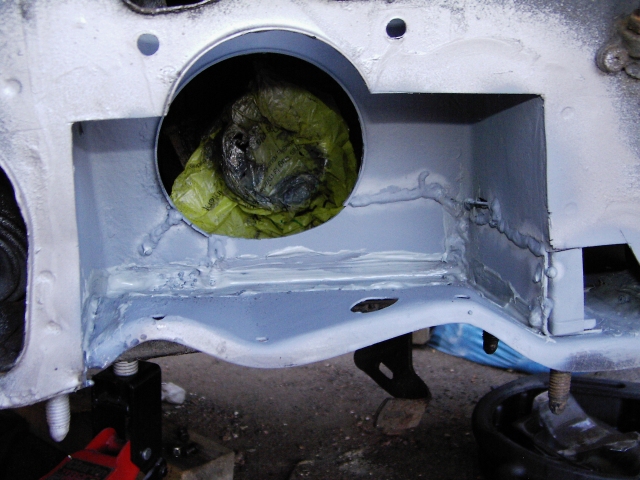
There was something amiss with the front right-hand wheel. Looking under the wheel-arch, my heart sank
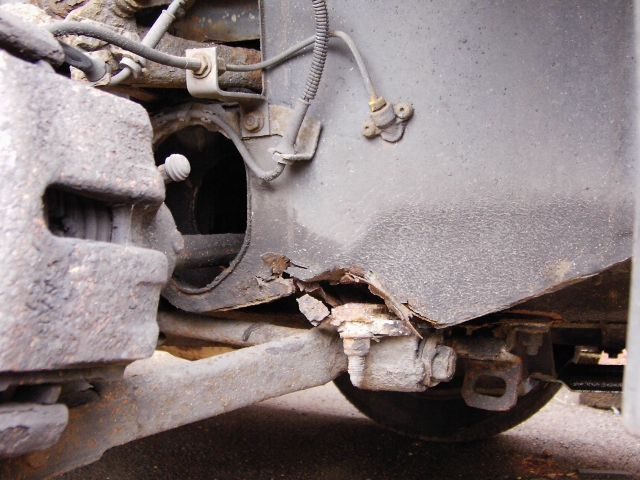
The driveshaft tunnel and the area in front of it had rusted so badly that the front wishbone mount had come away, also breaking the end off the aluminium cross-member that is bolted to that mount and its counterpart on the other side of the car.
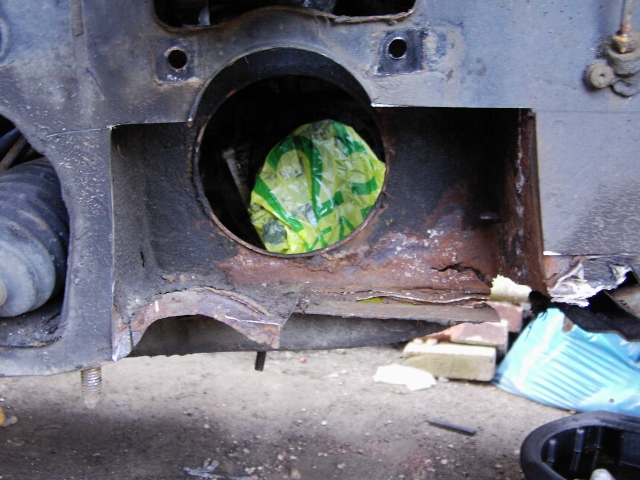
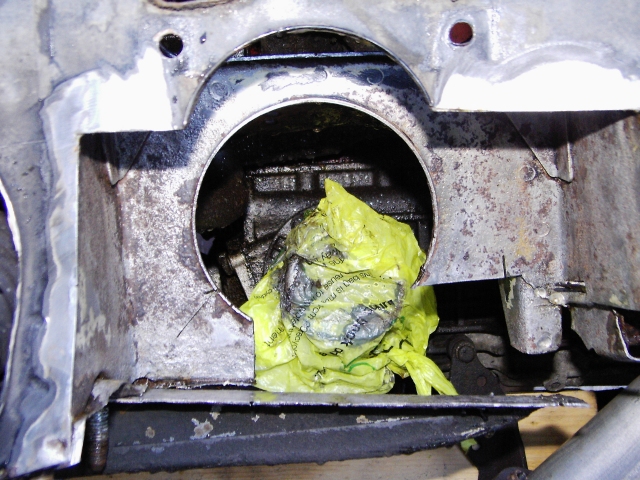
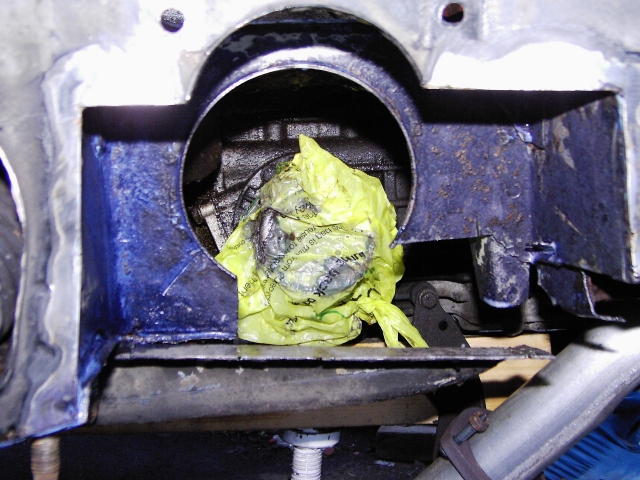
Rust in this area is not uncommon on the 900 but this is rather more serious than usual and somehow I hadn't seen it coming. Nor had the garage who had MOTd it not long before
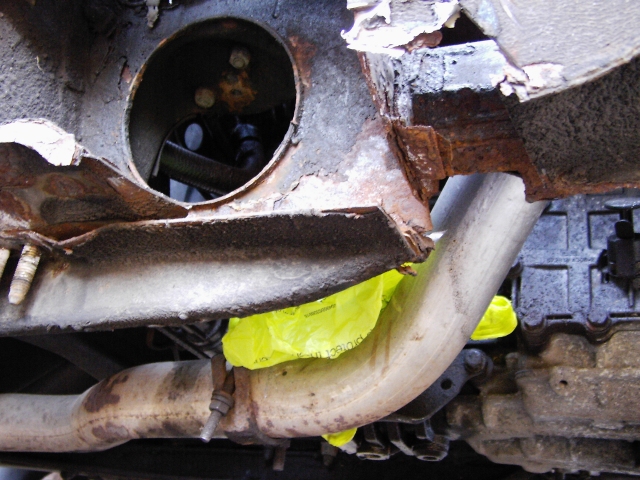
Anyway, I thought briefly about the car's future, then decided to go for a repair. To make it easier, there are aftermarket panels available (being a common repair) and although not cheap, I was glad I bought them.
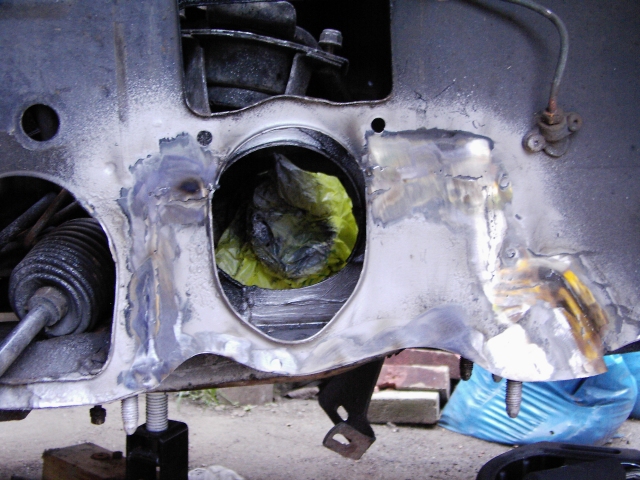
After dismantling the suspension, I set about cutting out the rust. This is the most major welding repair I've done on a car to date and it was pretty daunting.
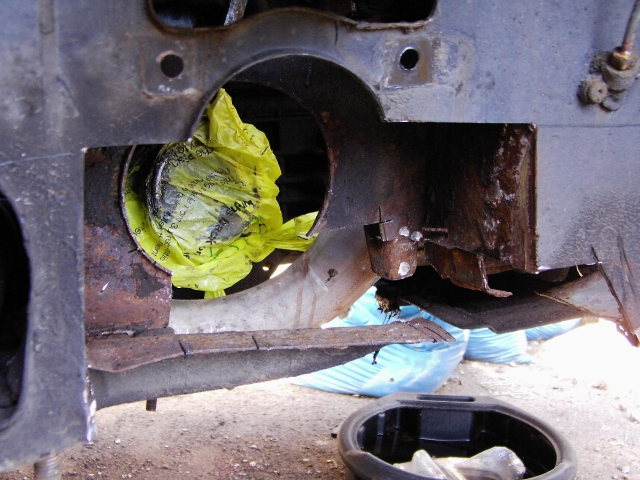
As expected, there was more rust than first appeared.
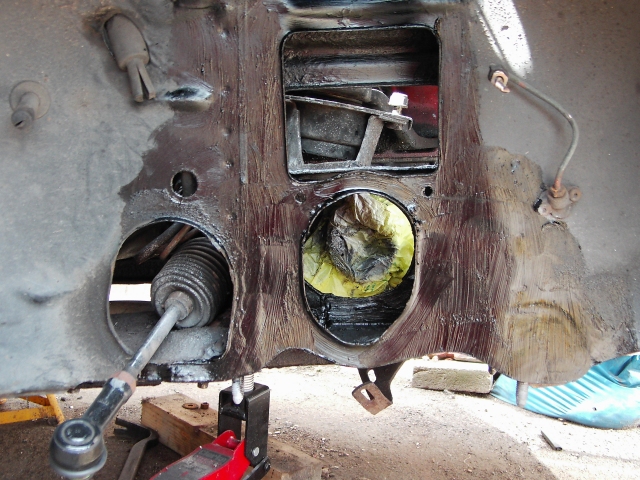
The longitudinal member was bent outwards, causing it to kink. Whether this was due to the wishbone mount breaking free or whether it was due to accident damage that caused the rust to start, I don't know. I do know that the last time the suspension was set up, the number of shims used on this side was suspiciously large.
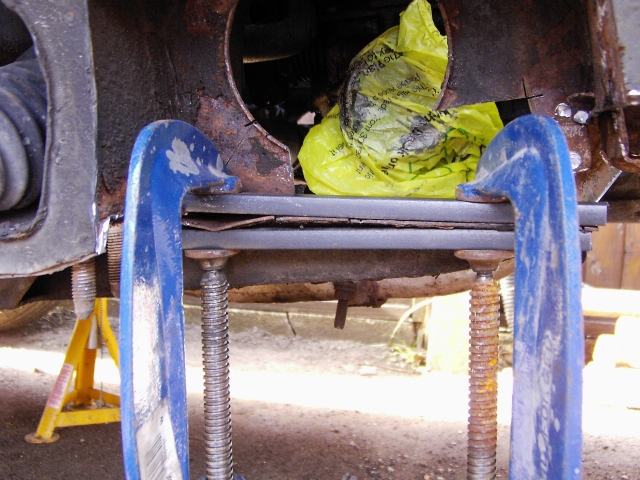
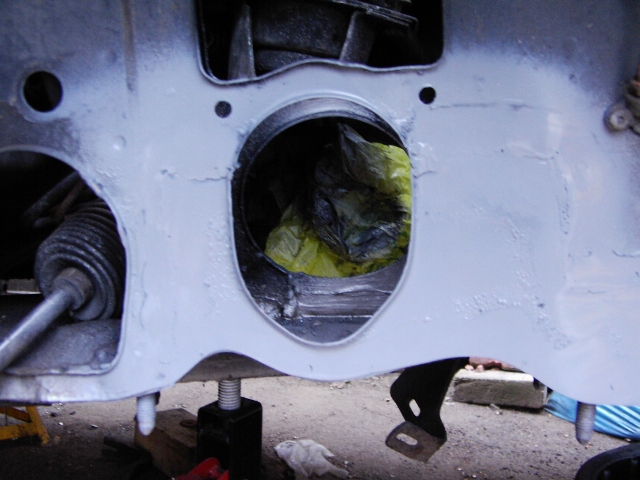
There was a scary amount to cut out. I braced under the front of the car in case it might be tempted to drop once I removed large parts of the structure but it didn't move at all, as far as I could see.
I tackled that support by first clamping some of the kink out of it.
Then I clamped it straight while hammering the kink flat.
It came out very straight. I was rather pleased with it.
Then I brushed off all the rust I could with a die-grinder fitted with a wire-brush and flap-disc.
Followed by a liberal treatment with rust converter.
Then onto the weldy bit. In addition to the new panels (cut down to fit the repair), I also had to make some other bits. The bit at the rear and the one at the right-hand side are 2mm steel to match the original strut tower. The lower panel is new and is about 1.2mm, again like the original. The thickness of the panels made the welding a lot easier than on a car with fag-paper panels...
All three pieces needed to be lined up and fitted together, since the studs on the suspension mounting point pass through them all and there is not room to fit the mounting point once the panels are in place.
I located the mounting point front-to-rear using the new panel, left-right using a new (secondhand) aluminium cross-member bolted and vertically by measurement. I must have measured and re-measured half a dozen times!

With these parts in place, I seam-sealed the joints and primed, since this part would be less accessible after fitting the outside panel.
The side-panel went on really nicely. I forgot to photograph it before grinding the welds down. Sorry. I plug-welded the lower lip (originally spot-welded) and seam-welded the rest. I have no idea why the ground-down welds look yellow in the photo. Must be a reflection.
Finally, a coat of primer...
... followed by a coat of underseal. Again, it's very reflective because it's wet but it has dried and weathered to a fairly inconspicuous appearance.
Having reassembled it, I had the suspension realigned (hardly any difference in the number of shims each side now ) and have given it some thorough testing since then, including a good hoon around Llandow circuit.
It's still in one piece and still handling nicely!
Looking at it on the driveway, I thought I noticed a difference between the left-hand and right-hand front wheel geometry. Can you spot the difference?
There was something amiss with the front right-hand wheel. Looking under the wheel-arch, my heart sank
The driveshaft tunnel and the area in front of it had rusted so badly that the front wishbone mount had come away, also breaking the end off the aluminium cross-member that is bolted to that mount and its counterpart on the other side of the car.
Rust in this area is not uncommon on the 900 but this is rather more serious than usual and somehow I hadn't seen it coming. Nor had the garage who had MOTd it not long before
Anyway, I thought briefly about the car's future, then decided to go for a repair. To make it easier, there are aftermarket panels available (being a common repair) and although not cheap, I was glad I bought them.
After dismantling the suspension, I set about cutting out the rust. This is the most major welding repair I've done on a car to date and it was pretty daunting.
As expected, there was more rust than first appeared.
The longitudinal member was bent outwards, causing it to kink. Whether this was due to the wishbone mount breaking free or whether it was due to accident damage that caused the rust to start, I don't know. I do know that the last time the suspension was set up, the number of shims used on this side was suspiciously large.
There was a scary amount to cut out. I braced under the front of the car in case it might be tempted to drop once I removed large parts of the structure but it didn't move at all, as far as I could see.
I tackled that support by first clamping some of the kink out of it.
Then I clamped it straight while hammering the kink flat.
It came out very straight. I was rather pleased with it.
Then I brushed off all the rust I could with a die-grinder fitted with a wire-brush and flap-disc.
Followed by a liberal treatment with rust converter.
Then onto the weldy bit. In addition to the new panels (cut down to fit the repair), I also had to make some other bits. The bit at the rear and the one at the right-hand side are 2mm steel to match the original strut tower. The lower panel is new and is about 1.2mm, again like the original. The thickness of the panels made the welding a lot easier than on a car with fag-paper panels...
All three pieces needed to be lined up and fitted together, since the studs on the suspension mounting point pass through them all and there is not room to fit the mounting point once the panels are in place.
I located the mounting point front-to-rear using the new panel, left-right using a new (secondhand) aluminium cross-member bolted and vertically by measurement. I must have measured and re-measured half a dozen times!
With these parts in place, I seam-sealed the joints and primed, since this part would be less accessible after fitting the outside panel.
The side-panel went on really nicely. I forgot to photograph it before grinding the welds down. Sorry. I plug-welded the lower lip (originally spot-welded) and seam-welded the rest. I have no idea why the ground-down welds look yellow in the photo. Must be a reflection.
Finally, a coat of primer...
... followed by a coat of underseal. Again, it's very reflective because it's wet but it has dried and weathered to a fairly inconspicuous appearance.
Having reassembled it, I had the suspension realigned (hardly any difference in the number of shims each side now
) and have given it some thorough testing since then, including a good hoon around Llandow circuit.It's still in one piece and still handling nicely!

