Here is a shot from the manual I found on line...I've also taken a measurement on the repair kit (pencil line on the right) but to my mind this seems excessive in my case as I'd basically be cutting the front member off which is something I don't want to do. I'd prefer to cut to the left and leave the member in place...the cut would need to be done carefully to avoid cutting the reinforcement plate inside the front member but to me it looks totally doable and preferable if I want to leave the member in place.
You can see the spot welds have been gone over in the last picture...this was part of the original repair I guess. To be fair I think it wasn't a bad job....they did add rust proofing inside the rail which is always a good sign....still not using it though as I prefer to use the second front end which is damage free.
New stuff is always great....I really like the colour too. This is only my second helmet....was really quite cheap too and came with a bunch of spare screen covers to boot as well as a baggie. Turns out the screen on the new helmet is so much clearer than the old one I had so hopefully my welding will improve too :-)...I used the spare screen covers provided on my old helmet so now I also have a spare one for visitors too!
Cheers ....progress has been a bit slow unfortunately. Work has being very busy and most of my spare time is still going on arguing with my insurer to try and get the house fixed....yes I know it's been nearly a year!!
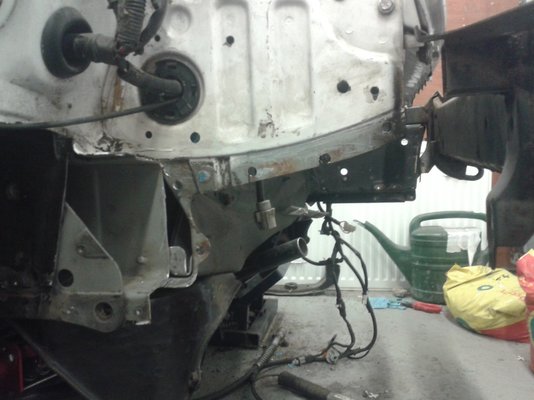
I have made a little more progress and removed one chassis rail crumple zone....I'll be doing one side at a time and using a jig to hold the front bar in place while I do each rail. The location of the bar isn't critical to the millimetre (I think) but I'd like it to be right! Used my favourite trick of welding a bolt to the end of a nut and tied it into the suspension top :-)....
So are you turning the rod to pull the frame and panels?
Great pics, sorry about the insurance. They're out to make money by not giving it to you though surely they must be close to folding. Have you made all the repairs you needed doing to the house?
I would say this is a journey and quest. it has gone far beyond "just" a repair....otherwise you would have buttoned everything up with all the old panels in place. Logic is not the question....though it makes perfect sense to me why you are tackling this the way you are. My hat is off to you! this is a very noble cause as I understand why you want to keep the car in the family so to speak.
Cheers guys...I needed some encouragement this week to be honest so very much appreciated. The rods are just holding one side of the bumper bar in place while I cut the repair section. No tension on anything at this stage...I used the bars originally to pull the rails back into position but figured I needed to get my full value for money out of them so they made a reappearance :-)
Anyone got any opinions on whether to leave a small or large gap for the welding...I'll be putting a packing piece behind the join so I can turn up the music on the welder.
It was a bit difficult but I managed to cut the repair in so that it fits the existing rail on the left and the bolt holes lined up nicely so I just bolted the bumper bar back on (bit difficult to see in the pics). Anyone got any opinions on whether I need a bigger gap please shout otherwise I'm going to practice my welding on the rail I cut off and then weld things up once I've checked the alignment again...I'm thinking I need a 1mm gap at least but will practice and post some pictures of my efforts.
I have welded using a wider gap when I used those body panel holders ( Eastwood Intergrip Panel Clamps ) and once I became familiar with the technique I liked the results quite a bit. they are good for bigger sections and designed more for basically flat areas. (you also cannot use them on an are that will not be accessible on both sides after you are done welding). As long as you dial in your welder to achieve good weld penetration, you should be fine. I would experiment on a scrap piece too!....
IT looks like you can clamp your new piece with any gap you choose to go with....bridging a small gap takes a little finesse with the torch...but you should be fine.....
Yea..I only get half an hour here and there these days. Here is first attempt at welding...please feel free to express opinions...it took me 4 or 5 goes to get this far to be honest. I think it looks OKish....maybe could have a bit more penetration perhaps? I did have to pause every 4-5 seconds so as not to burn through. I've got a Kemppi machine so it's easy to adjust if anyone out there would like to tell me what I should tweak. All that thin metal technique makes it hard to weld the thick stuff now...need more practice I think!
After a lot of practise and burning holes in everything I figured out that I was using way too much power....dialled it back and finally got a couple of continuous welds that I'm happy with (broadly in the centre of the picture!). Tidied up the repair area....got the weld thru primer on there...everything nicely aligned. Yea you know whats coming....of course the gas runs out just as I pull the trigger...poop. And it's a weekend where I have some spare time too!
the middle ones look great...are those continuous?...I would tack everything in place, check alignment once more then fill in between the tacks....I have heard, and done it this way, that if you weld like you torque a head gasket, you will be fine. start with tacks, check, then do a section on the right side...then switch to the left side opposite where you just welded. then go back to the right side, ect.....any distortion will at least be symmetrical. switching sides also gives things time to cool.
this may be overkill, but minimizes any warping to bare minimum....
Cheers mate..yea the middle one was continuous....also it was my last attempt too :-). I finally worked out a technique of pushing the weld pool along the two pieces being joined while zipping from 1 side to the other....kind of a "U" pattern (hard to describe). Good advice on the tacks....I'm totally with you as I think short bursts are going to be better at keeping the heat down. Gas has been ordered...I use Barnet welding and they are usually pretty quick + no bottle rentals to pay.
Overkill is my middle name...I'll post pics of my laser alignment next week :-)
sounds good...pushing the weld works for me too. (in most situations). Sometimes Ill just stack tacks one behind the other, overlapping and building the weld section...its nice to have good open sections of metal to weld to where you can run a continuous bead, or angle the torch any old way...but that just does not seem to be the case most of the time!....
nice to find a place that does not charge a rental fee....I have to find a new source myself.....
OK so a little more progress today...I have an old laser pointer so I used that to check the alignment of the rail on the vertical and horizontal - the target is an old magnet...I drew a couple of base lines and use these as the reference. Not perfect but close enough for this I think....I was able to get it pretty much where I wanted.