Engineer1964
Member
- Messages
- 1,055
Started work on a 2 story external stairway, not sure if its a fire escape but its outside, Galvanised.
I've added this to my own website and I thought it would be fun to show here also, what is involved in making something like this so, on a daily basis i will explain as well as post pictures of how i've done it, perhaps it may help anyone who has to do similar.
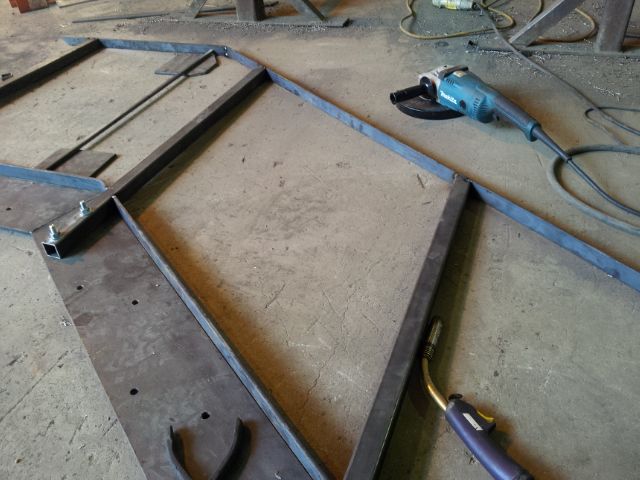
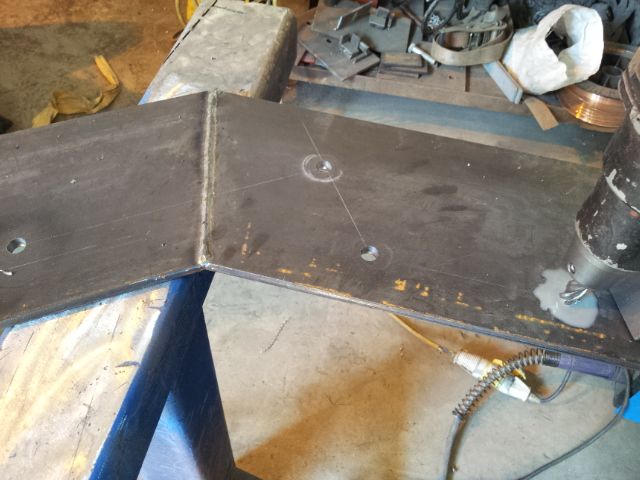
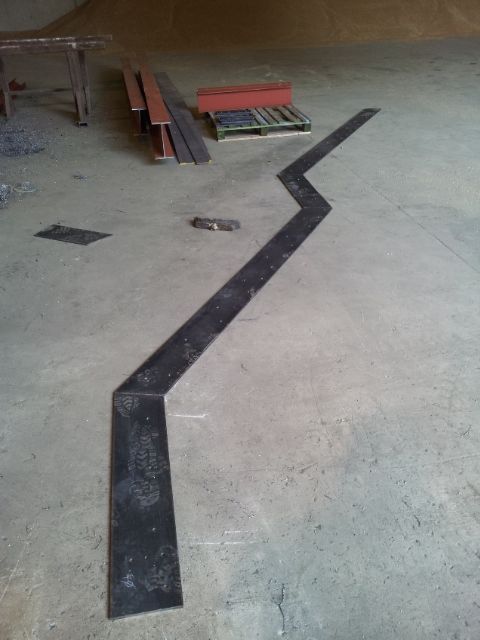
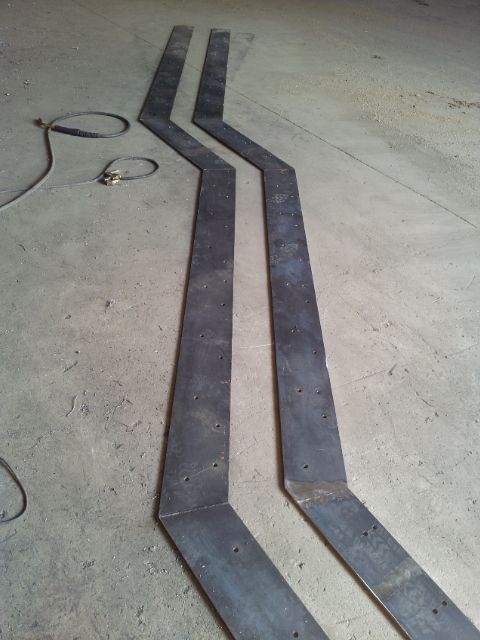
Firstly you need to cut the stringers the right lenght and angle, for this i'm using 200mm x 10mm flat
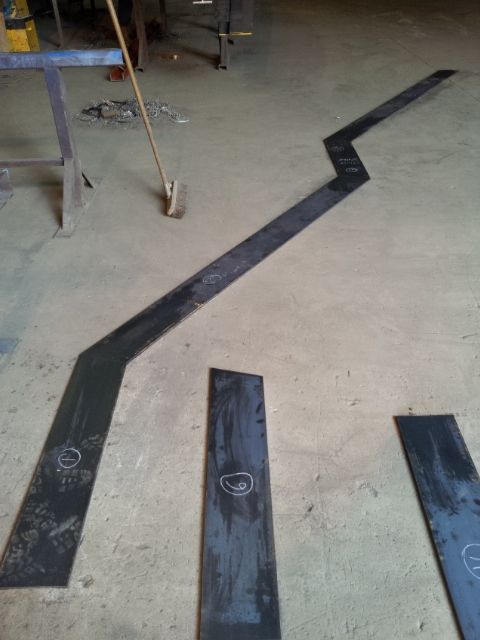
You need 2 sets of stringers, normally they are pretty much the same but i had an issue with the Drawing where 1 set was different from the other?? the dims on the drawing didn't quite work out with the angle of the stringer so i'm getting the drawing checked its not the first time i've come across drawing errors, anyway should be sorted soon
Ok, Now we have our stringers cut and laid out flat, once checked we need to vee prep our joins and get them welded up, so hopefully you should end up with 2 stringer lenghts all welded up, A trick i use is to weld the second one on top of the first so that way you get both stringers the same. You'd be suprised how different they would be if you tried to do them seperately.
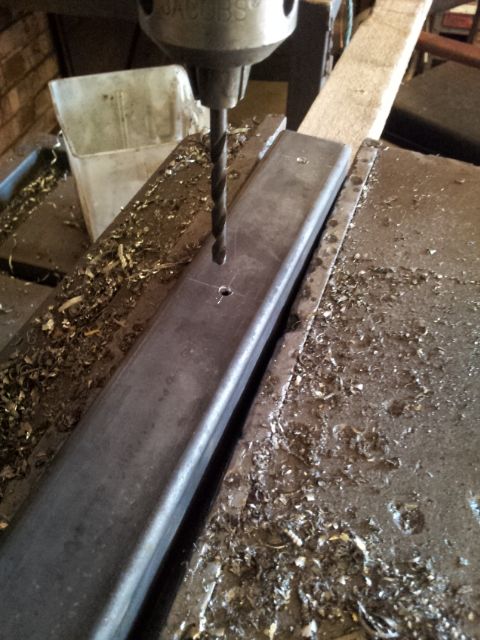
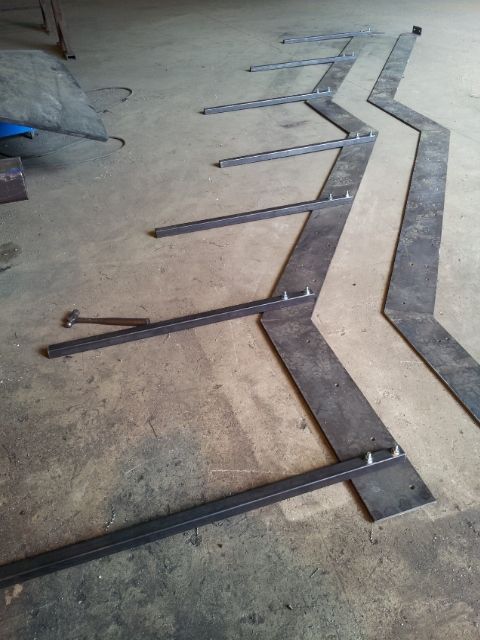
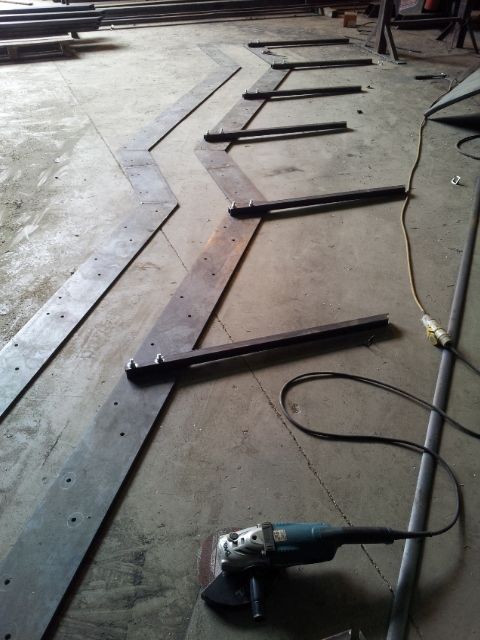
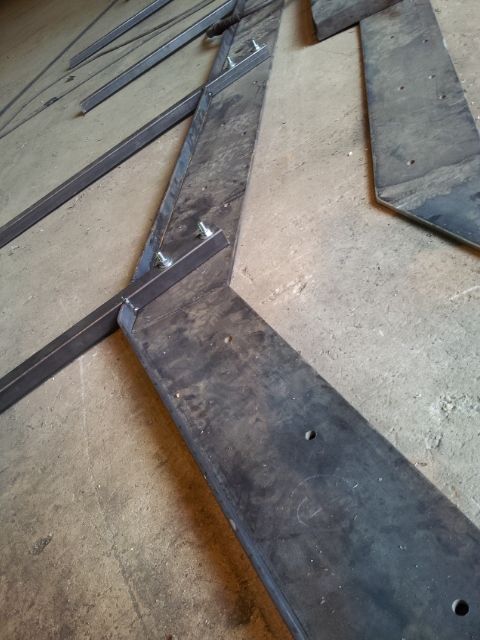
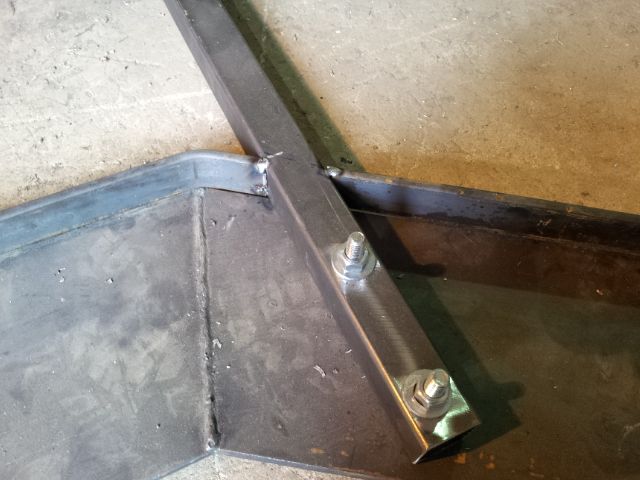
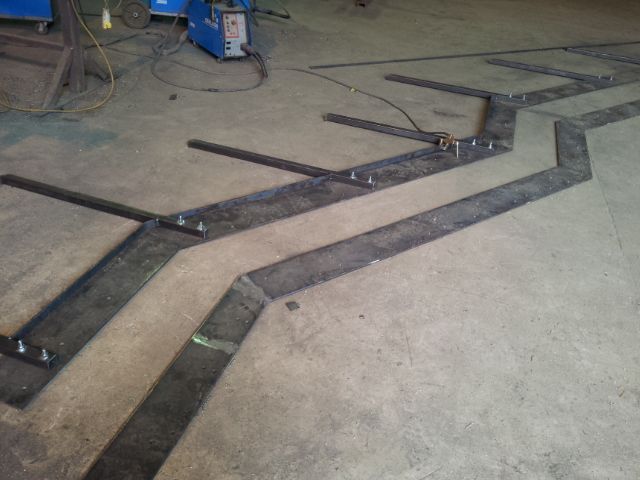
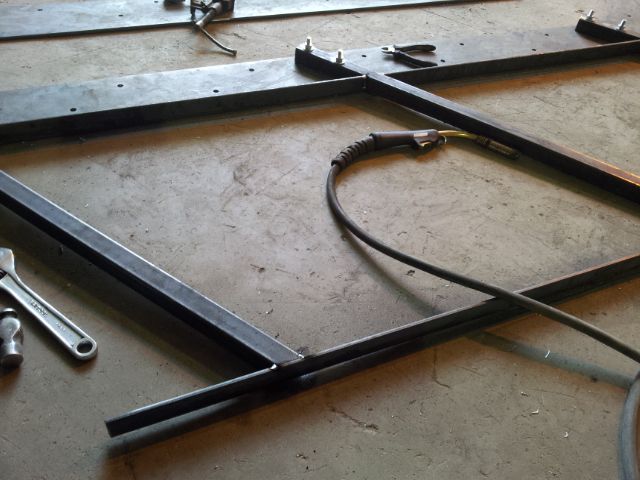
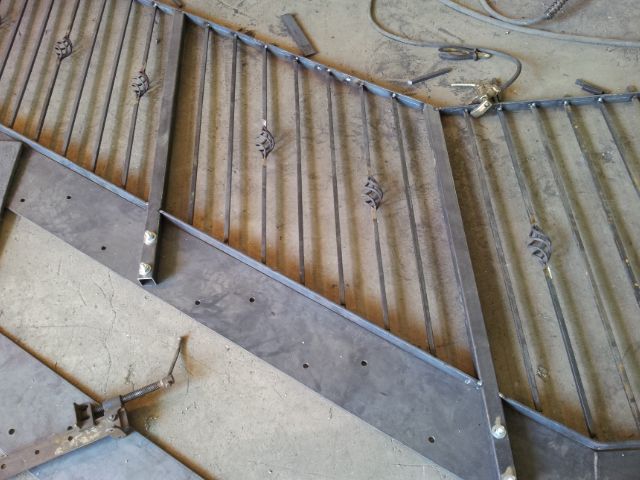
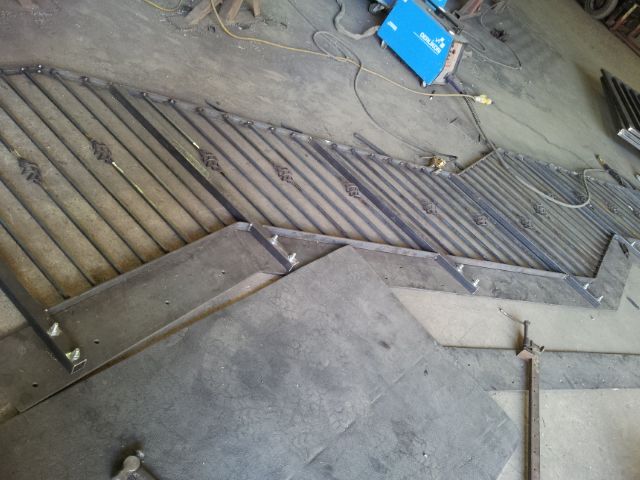
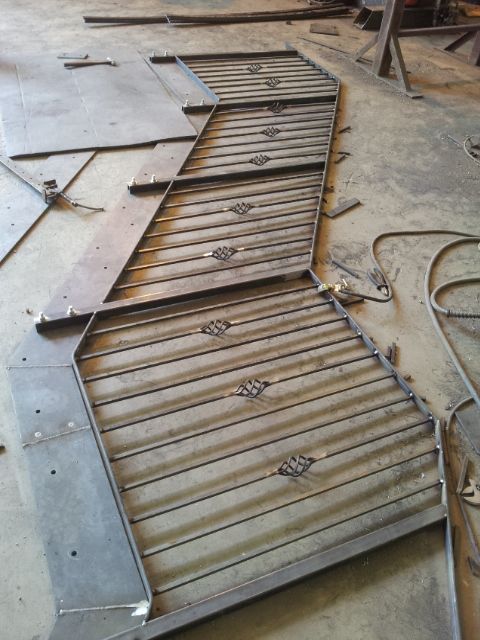
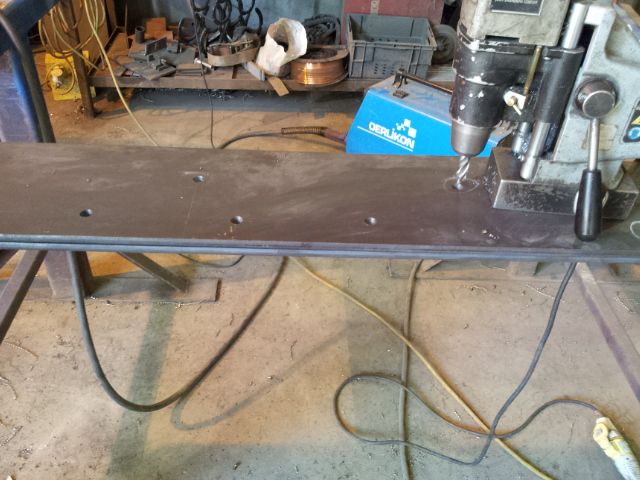
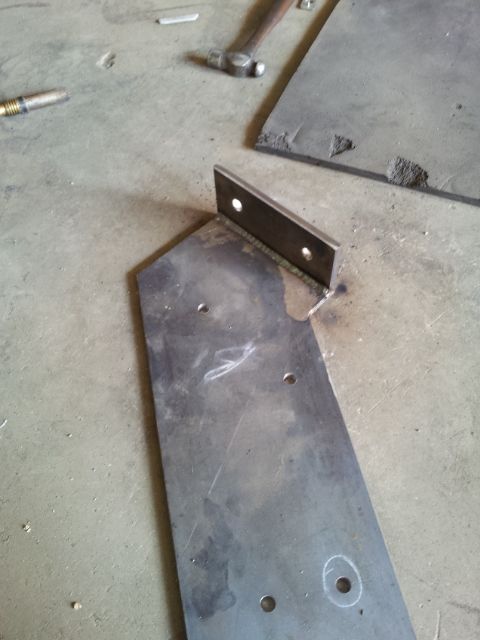
Next you need to mark out the holes, with this stairway i'm bolting 50x50 angles to the stringers to support the tread as well as the uprights supports of the balustrade
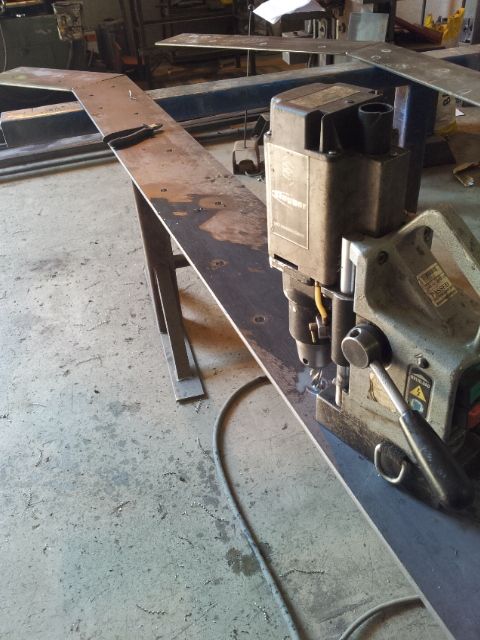
Drilling is quick and easy with a 14mm Broach in a Mag drill, remember to keep the cutting fluid on the go as the bits do wear out if they get too hot
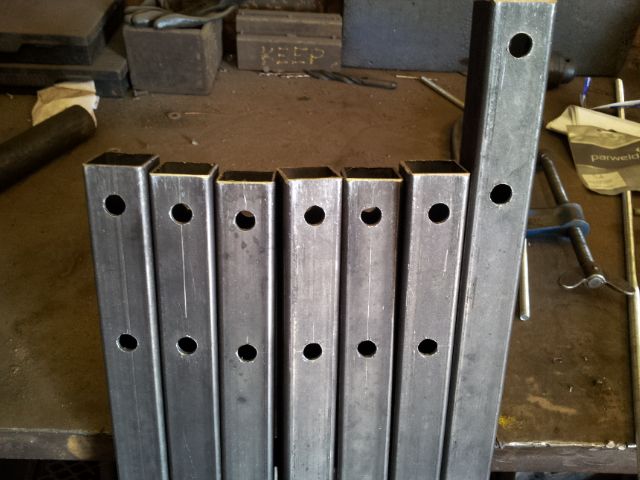
So now you should have one stringer fully drilled.
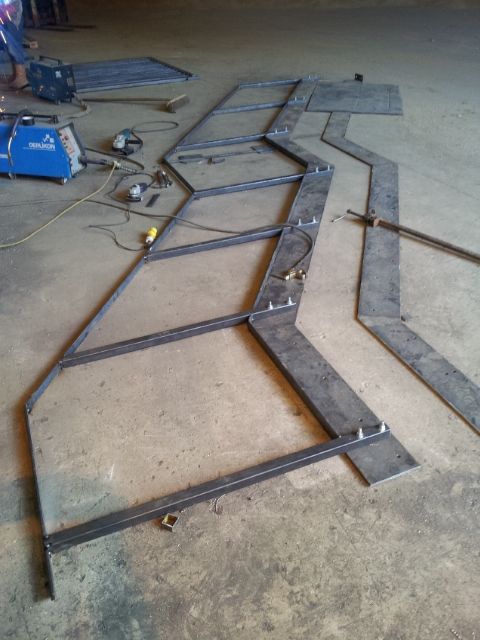
Now for the next trick
Rather than spend more time marking out the second Stringer, simply place the pre drilled stringer on top of the un-drilled stringer, Tack a weld along the edge just to hold it in place, or you could just clamp them, and then just drill through with the mag drill, you need to be sure which holes need to be drilled because since this stairway is going up against a wall, you dont need to drill the Balustrade support bar holes, there may be additional holes on the drawing which you would need to add afterwards, but the trick mainly is to ensure that the Tread Angle fixings are the same and true.
Just Mark out which Hole you need to drill through with a piece of chalk, they you won't get confused
and just keep on drilling until you finish the lenght. I've used a Mag drill because its quick and easy, No pre drilling, A clean 14mm Hole, you can punch the holes, but you would have to support the stringer either side of the punch as well as deburring any burrs from the punching process, but For Speed i used the mag Drill, a handy piece of kit
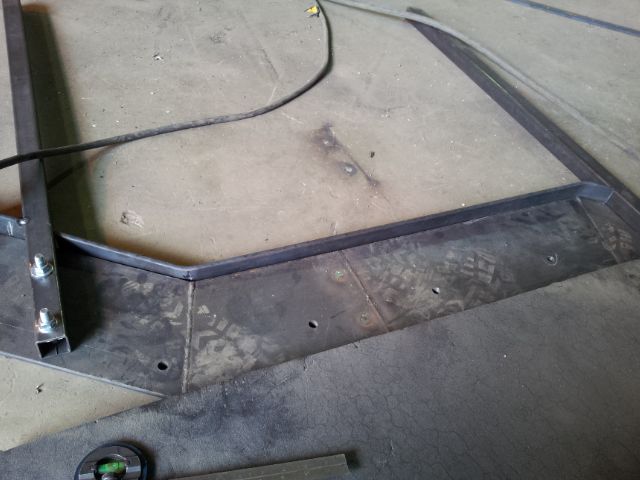
Thats It for day one, We have completed our stringers, Cut the angles, welded and drilled the Holes, tommorrow we're going to cut, the bottoms of the stringers and attach out bolting down plate, Do the centre splice plates and get the Balestrade Support bars drilled and bolted to our stringers in order to prepare the steel work for the railings.
I've added this to my own website and I thought it would be fun to show here also, what is involved in making something like this so, on a daily basis i will explain as well as post pictures of how i've done it, perhaps it may help anyone who has to do similar.
Firstly you need to cut the stringers the right lenght and angle, for this i'm using 200mm x 10mm flat
You need 2 sets of stringers, normally they are pretty much the same but i had an issue with the Drawing where 1 set was different from the other?? the dims on the drawing didn't quite work out with the angle of the stringer so i'm getting the drawing checked its not the first time i've come across drawing errors, anyway should be sorted soon
Ok, Now we have our stringers cut and laid out flat, once checked we need to vee prep our joins and get them welded up, so hopefully you should end up with 2 stringer lenghts all welded up, A trick i use is to weld the second one on top of the first so that way you get both stringers the same. You'd be suprised how different they would be if you tried to do them seperately.
Next you need to mark out the holes, with this stairway i'm bolting 50x50 angles to the stringers to support the tread as well as the uprights supports of the balustrade
Drilling is quick and easy with a 14mm Broach in a Mag drill, remember to keep the cutting fluid on the go as the bits do wear out if they get too hot
So now you should have one stringer fully drilled.
Now for the next trick
Rather than spend more time marking out the second Stringer, simply place the pre drilled stringer on top of the un-drilled stringer, Tack a weld along the edge just to hold it in place, or you could just clamp them, and then just drill through with the mag drill, you need to be sure which holes need to be drilled because since this stairway is going up against a wall, you dont need to drill the Balustrade support bar holes, there may be additional holes on the drawing which you would need to add afterwards, but the trick mainly is to ensure that the Tread Angle fixings are the same and true.
Just Mark out which Hole you need to drill through with a piece of chalk, they you won't get confused
and just keep on drilling until you finish the lenght. I've used a Mag drill because its quick and easy, No pre drilling, A clean 14mm Hole, you can punch the holes, but you would have to support the stringer either side of the punch as well as deburring any burrs from the punching process, but For Speed i used the mag Drill, a handy piece of kit
Thats It for day one, We have completed our stringers, Cut the angles, welded and drilled the Holes, tommorrow we're going to cut, the bottoms of the stringers and attach out bolting down plate, Do the centre splice plates and get the Balestrade Support bars drilled and bolted to our stringers in order to prepare the steel work for the railings.
")