Finishing a weld
Ever thought the weld finishes on TV hotrod programs were unachievable or that those guys must be able to weld awfully well? They can weld well, but if you can line everything up nicely at the start and get some decent penetration in your welds the finish isn't too difficult at all. Throw out that plastic body filler and finish welds the easy way.
Though be careful not to grind too far - always aim to retain 100% of the original metal thickness. You can always sort out the last bit with body filler.
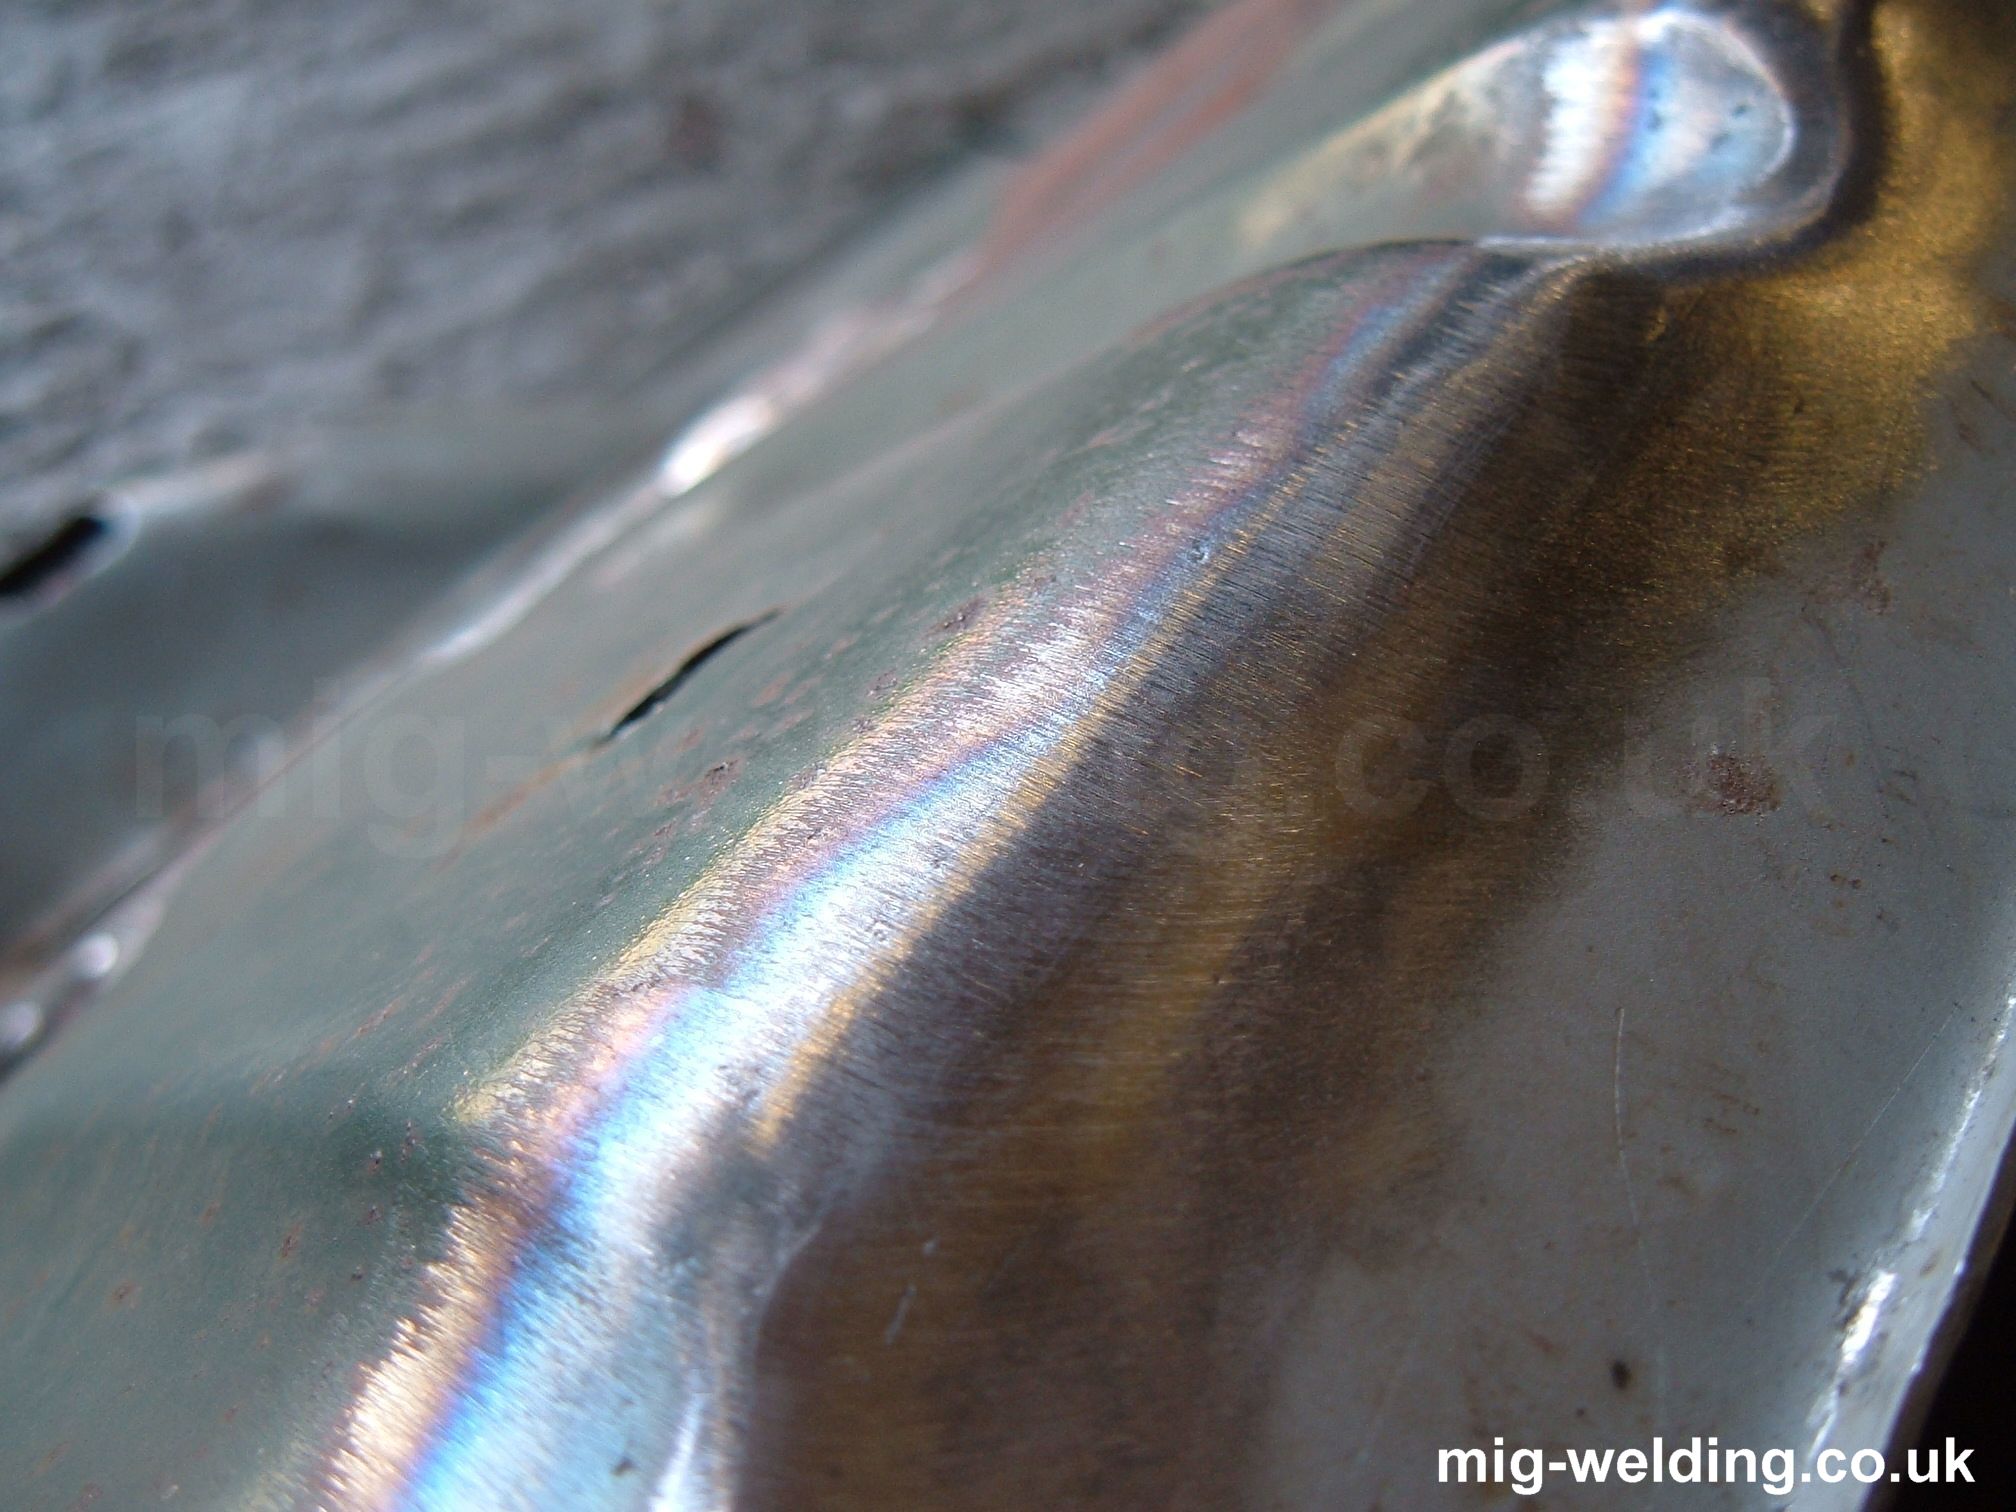
The repair in the photo is a repair to the top of a wing (fender) mounting panel. It's made from 1.0mm mild steel and I've made the repair section from 1.2mm sheet.
The real trick in a nicely finished weld is prep work. This is a butt weld (edge to edge) and I took some time making sure the top edges were level while tacking up.

I've always used angle grinding discs to finish welds, but the ordinary grinding discs are very coarse and difficult to control, so I tended to grind almost back to the parent metal then use a little body filler.
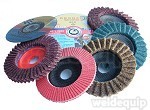
This is a (slightly worn - they come with straight edges) 40 grit flap disc. These are the way forward for finishing welds. If you don't have one then go out and get one.
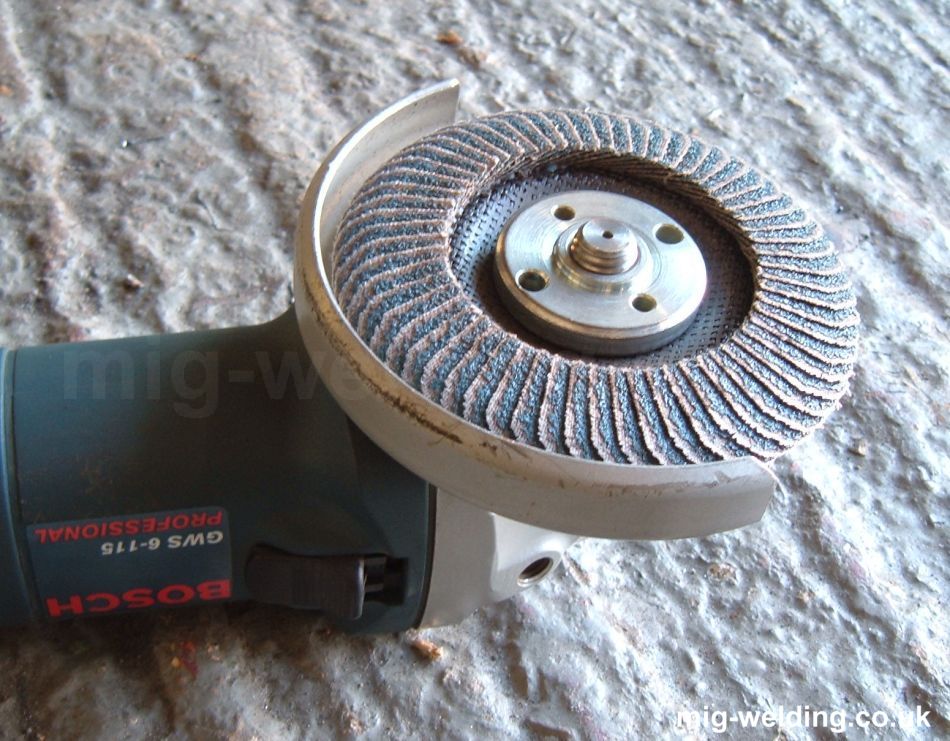
Flap discs are flexible, and will tend to follow the contours of whatever you are grinding. Not much use if you want to get rid of those contours. Trick is angling the disc (maybe 20 degrees for this job) and using light pressure.
Even with light pressure they are still quicker than a grinding disc.
The flexibility makes them directionally sensitive too. On a curve they seem to cut more from before the weld (as the disc spins). Here I've ground the weld just about level with the thicker repair section.
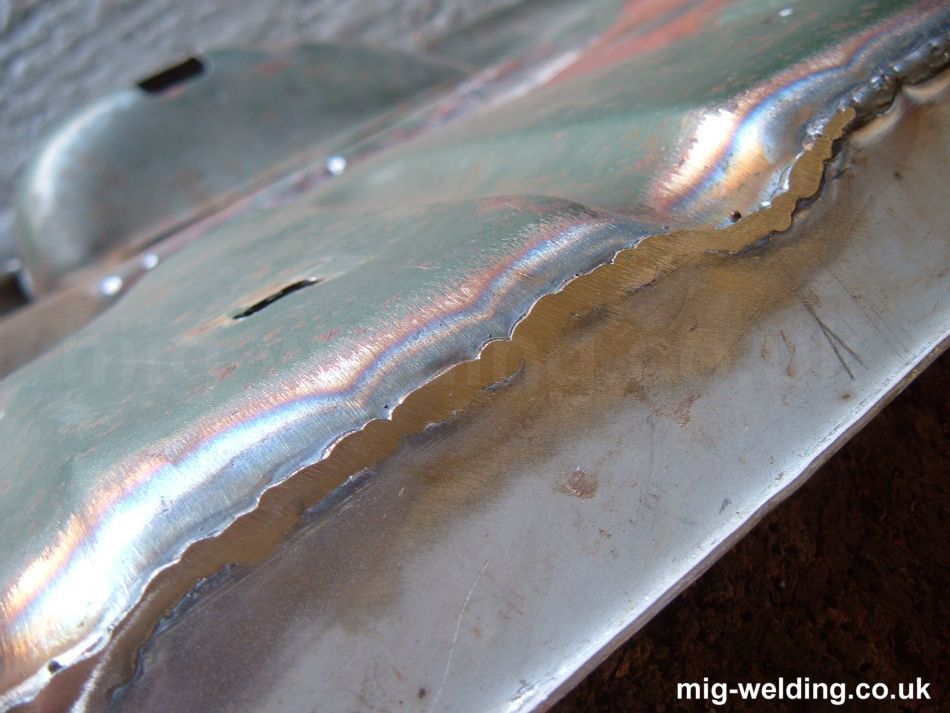
Next step was to grind the weld into a curve until I met the next panel.
Close comparison of this photo and the ones above show the weld has been finished, but the metal on either side has hardly been touched. There are still the couple of scribing marks to the right of the weld which are more visible if you enlarge the photos by double clicking them.
The advantage of the flap disc over the grinding disc is amazing.
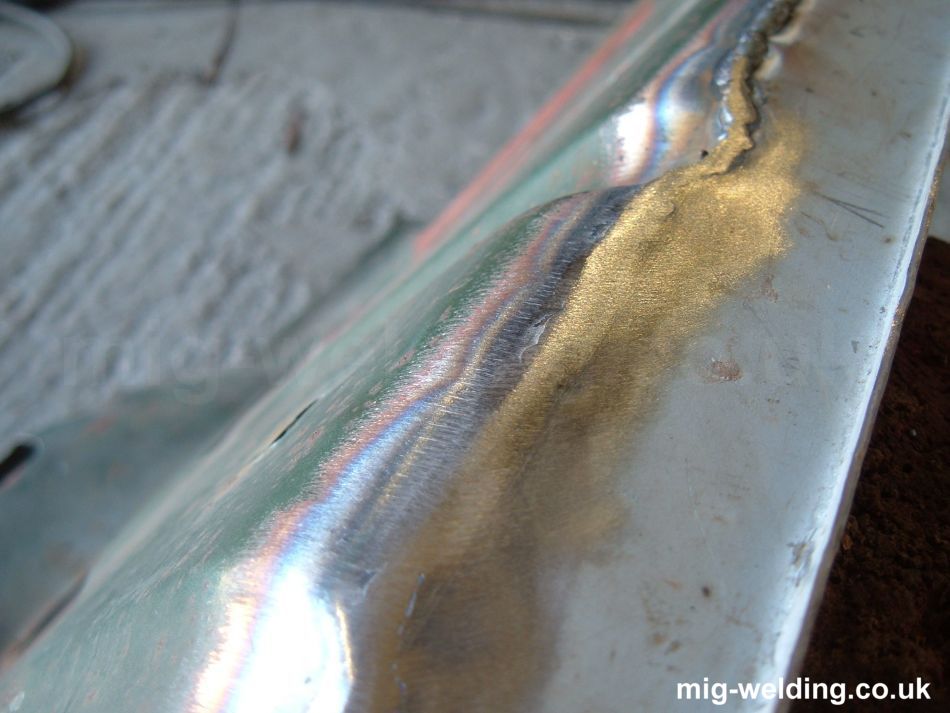
A tiny bit more finishing and the weld is invisible. I'll be able to paint that without using any body filler.
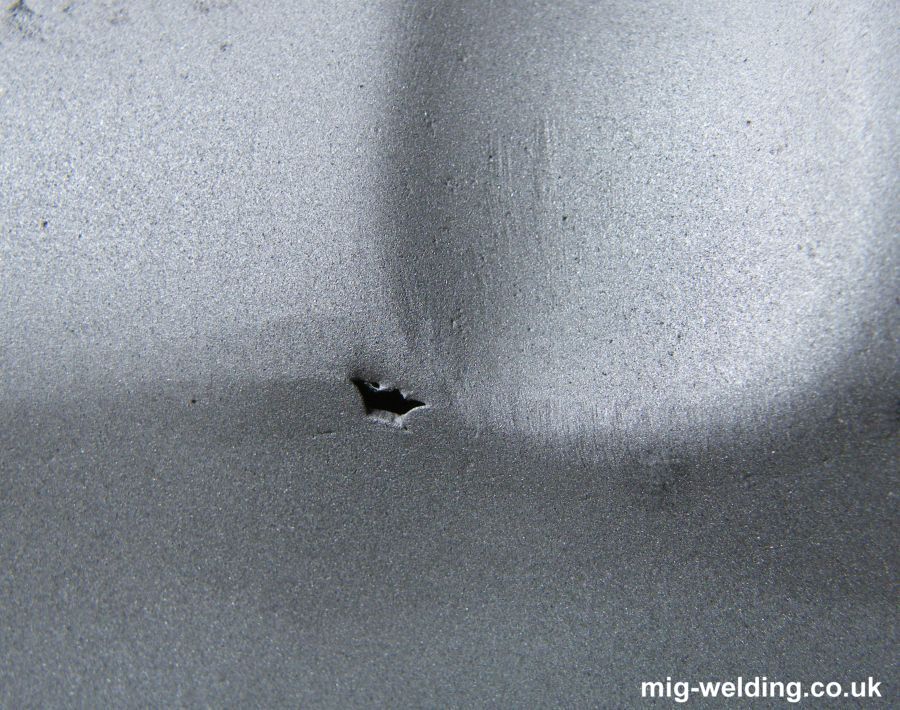
Got to be careful though - if everything isn't level to start with one sheet will be thinned getting it to this finish. In that case it would be better to go so far then finish with body filler.
Be careful not to over-grind. This is the same panel after sandblasting and I have thinned the metal too much on two of the corners.
For most of my other repairs on this car I've stopped grinding when the flap disc just starts to touch the metal beside the weld. The rest can be left to plastic body filler or seam sealant. This would be especially the right approach in a structural area as it's very easy to overgrind and end up with thin weak metal.
Those flap discs seem to have been a secret known only by the TV hot rod builders. Now I know and I'm really bad at keeping secrets. 40 grit is good for the weld finishing in the photos, and a little finer for final shaping and preparing for paint might be handy, though I'll probably use a load of filler primer.
Go get a flap disc and try it out. You'll love the things. Or if you are now really enthusiastic about fender mountings there's a whole page about the repairs with some real craftsmanship on it.
Flap discs can now be bought from the shop on this website together with a number of other speciality discs.