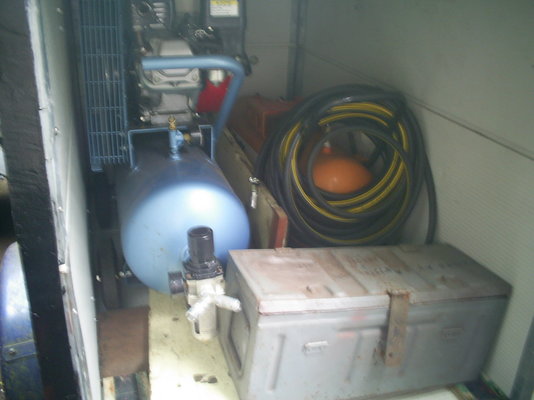
I decided to replace the front of my 5x3x3.5ft trailer due wood rot but on further inspection it was obvious that it would not be a good idea as I had already repaired the sides a couple of years ago and they were showing signs of more damage. Basically the trailer had a plywood floor and roof with wood planks for the sides and front and a wood door. So I set to taking all the box apart just leaving the metal structure. This had been a 15in high sided jobby that had been stretched vertically to make it a 3.5ft compartment. It came with a Jap mobile generator in it which, as it happened, did not last long even though it was new! I then bought a petrol driven air compressor and that went in it champion along with another air tank and hoses. The stretch in height was by means of welding extra angle iron to the four corner stanchions but the chap who did it made the nearside two 3/4 in shorter than the offside. De-welding those seams and lifting them level and re-welding sorted that out. The rear box floor area behind the axle was just a hole with no cross braces so 3 were added as were roof braces as they were in short supply to!
Now came the decision on what to use for the box structure. I would have liked to have used Buffalo board but to buy the thickness I wanted was out of the question as they are not cheap!! Even normal good quality ply is not cheap so I was at/in a quandary as the best and most economic solution to the problem.
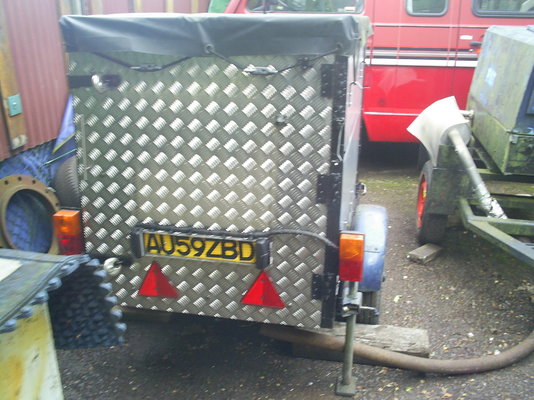
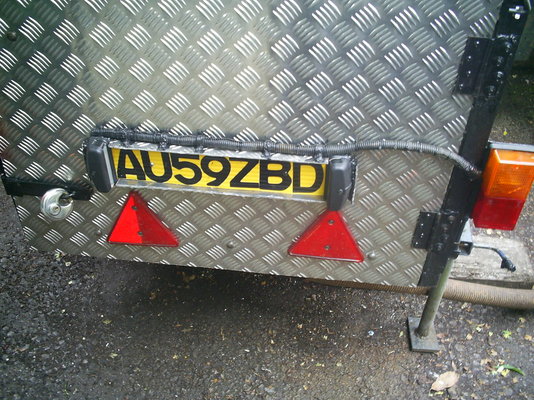
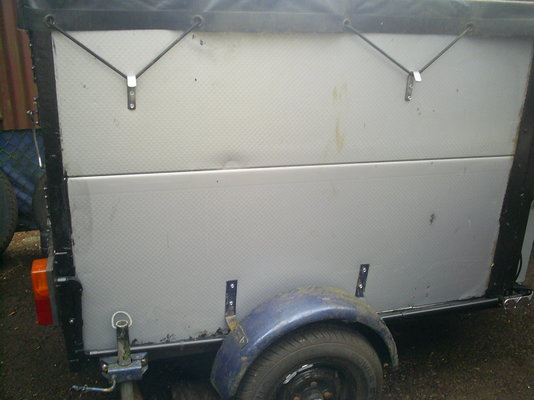
I do go to auctions and lo and behold I spotted what I thought was the answer. There were a number of panels that were listed as roofing. But when I looked they were actually panels used on industrial up and over segmented doors. Just over a inch thick consisting of steel rippled sheets sandwiching insulating foam. They slot into each other with built in seals and so I bid for and won the beautys. They are quite a length and just fitted in my LDV Convoy. Once measured and cut the were a treat to fit. I bolted them to the stanchions having first fitted the floor and roof panels. The roof panels were fitted inside upto the roof cross stanchions and the side panels then cut to hold them in place. They were easy to cut with my battery operated angle grinder and did not take long getting the five sides of the cube fitted. That left the door. As luck would have it was at my local steel merchant picking up the bits I needed for the mods to the chassis when I noticed they had a part sheet of alloy chequer plate for sale, £25. It was perfect so I bought that and out of it I got the door and the numberplate holder made. I was quite surprised how ductile that stuff is as it bent a treat when making the plate, no cracking. Getting the door to fit was another thing. The door aperture was not square both outside and inside so I had to make a couple of wooden guides to allow me to get the door to fit. I bolted the alloy plate to a angle iron structure which allowed me to add a couple of the panels to the door to give it more stiffness.
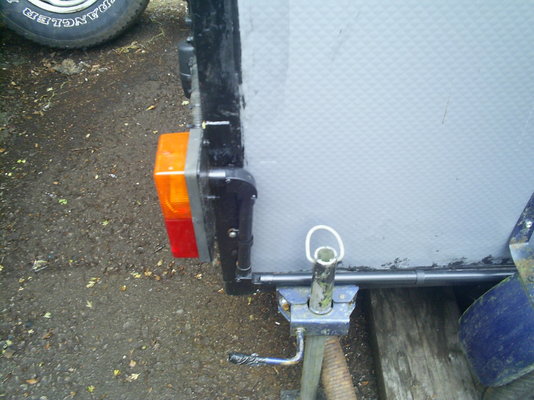
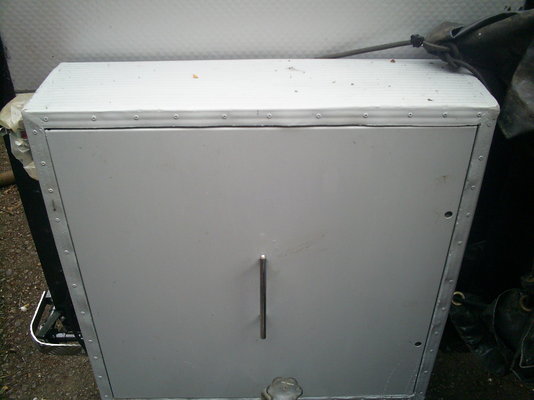
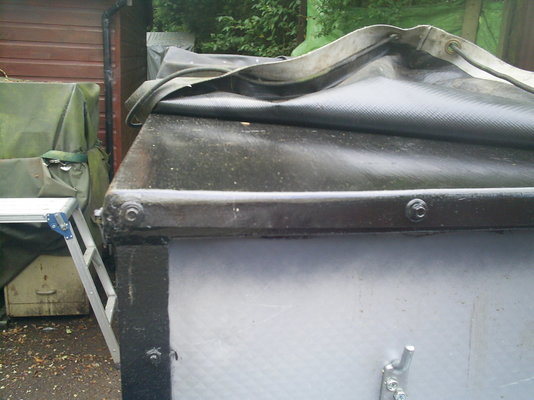
Where to put the spare wheel and jack etc was solved by building the box I fitted to the front. This consisted of two electrics switching/relay cabinet door assemblies joined together with bolts then plates welded to them and then again utilising the garage panels cut and shaped to skin them. These were riveted to the carcass. I had to modify the door to slide in and out as opposed to swinging out as the jockey wheel was in the way. I had to modify the locking of that by using a bolt instead of the normal angled rod. The electrics on trailers is always a mess, like this one, of a cable just run under the floor and junction blocks taped up allowing all the muck and stuff to get in. I decided to use plastic conduit with a junction box in the cabinet. The conduit runs from the box to either side to the lights at the rear. So no connector blocks apart from the one in the cabinet out of the dirt. The light units had to be modified to allow the conduits to enter them and the offside unit also modified to allow the number plate to be lit. To cap the roof I cut and shaped a sheet of 1.6 steel which I then stuck with Tiger seal and then secured the edges with roofing bolts. As I had the canvas cover already made for the other roof I refitted that too. I made the nearside steady and fitted that . To protect the conduit at the front I made up some brackets and some bump strips using some bits of the alloy so along with the strap that holds the panels to the inside of the door I just about used all of the panel I bought.
Hope you like it. I am only sorry I did not take some before shots!
I have a dozen whole panels left and two Half width panels so if anybody thinks they could use some let me know and we could sort something out.
Now came the decision on what to use for the box structure. I would have liked to have used Buffalo board but to buy the thickness I wanted was out of the question as they are not cheap!! Even normal good quality ply is not cheap so I was at/in a quandary as the best and most economic solution to the problem.
I do go to auctions and lo and behold I spotted what I thought was the answer. There were a number of panels that were listed as roofing. But when I looked they were actually panels used on industrial up and over segmented doors. Just over a inch thick consisting of steel rippled sheets sandwiching insulating foam. They slot into each other with built in seals and so I bid for and won the beautys. They are quite a length and just fitted in my LDV Convoy. Once measured and cut the were a treat to fit. I bolted them to the stanchions having first fitted the floor and roof panels. The roof panels were fitted inside upto the roof cross stanchions and the side panels then cut to hold them in place. They were easy to cut with my battery operated angle grinder and did not take long getting the five sides of the cube fitted. That left the door. As luck would have it was at my local steel merchant picking up the bits I needed for the mods to the chassis when I noticed they had a part sheet of alloy chequer plate for sale, £25. It was perfect so I bought that and out of it I got the door and the numberplate holder made. I was quite surprised how ductile that stuff is as it bent a treat when making the plate, no cracking. Getting the door to fit was another thing. The door aperture was not square both outside and inside so I had to make a couple of wooden guides to allow me to get the door to fit. I bolted the alloy plate to a angle iron structure which allowed me to add a couple of the panels to the door to give it more stiffness.
Where to put the spare wheel and jack etc was solved by building the box I fitted to the front. This consisted of two electrics switching/relay cabinet door assemblies joined together with bolts then plates welded to them and then again utilising the garage panels cut and shaped to skin them. These were riveted to the carcass. I had to modify the door to slide in and out as opposed to swinging out as the jockey wheel was in the way. I had to modify the locking of that by using a bolt instead of the normal angled rod. The electrics on trailers is always a mess, like this one, of a cable just run under the floor and junction blocks taped up allowing all the muck and stuff to get in. I decided to use plastic conduit with a junction box in the cabinet. The conduit runs from the box to either side to the lights at the rear. So no connector blocks apart from the one in the cabinet out of the dirt. The light units had to be modified to allow the conduits to enter them and the offside unit also modified to allow the number plate to be lit. To cap the roof I cut and shaped a sheet of 1.6 steel which I then stuck with Tiger seal and then secured the edges with roofing bolts. As I had the canvas cover already made for the other roof I refitted that too. I made the nearside steady and fitted that . To protect the conduit at the front I made up some brackets and some bump strips using some bits of the alloy so along with the strap that holds the panels to the inside of the door I just about used all of the panel I bought.
Hope you like it. I am only sorry I did not take some before shots!
I have a dozen whole panels left and two Half width panels so if anybody thinks they could use some let me know and we could sort something out.