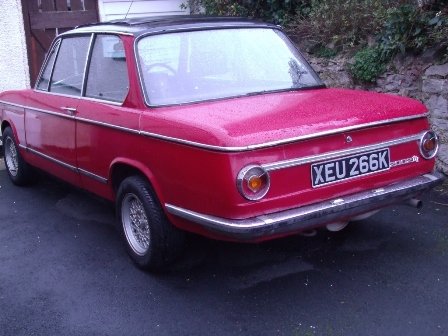
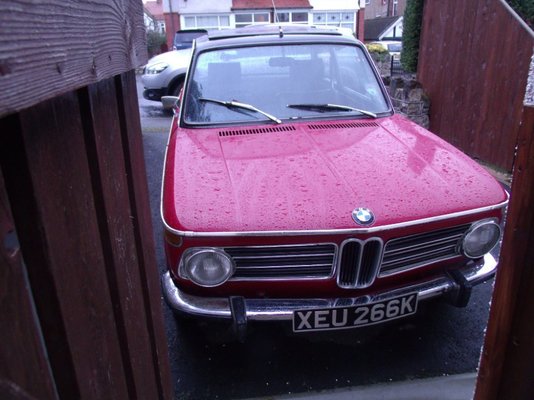
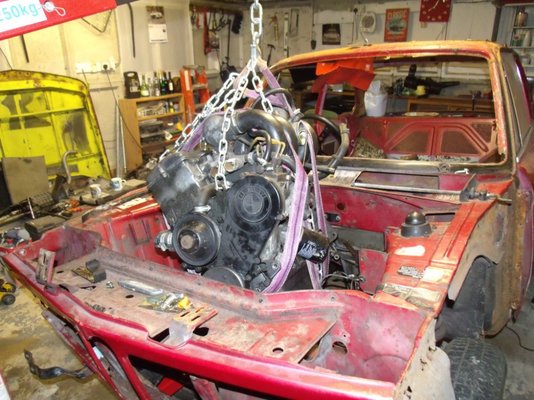
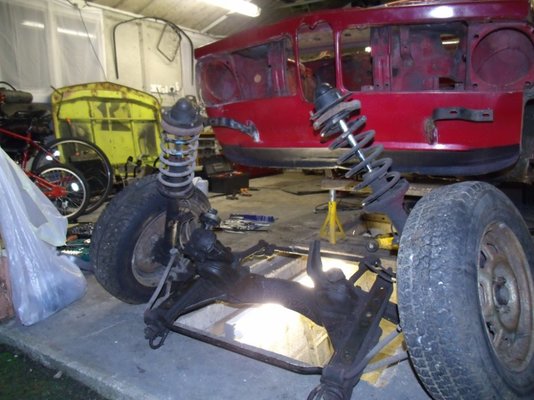
Well, I may as well start a thread on my project. It has been ongoing for about 18 months, but only the last 12 have been in anger !!! Once I managed to get myself a decent place to work on it. I bought the car, knowing it needed a 'bit' of work and intended on it being a nice little project, but as with most 70's cars...the more you dig, the more rust you will find !!! I think I knew when I bought it, but went with my heart rather than my head and bought it without really giving it a good look over...idiot !!. But, it is an early model and was all original, matching numbers car, so if I didn't take it on, someone else would AND the guy had a second 1602 project, so I took them both !!! I should explain, that I am not a welder, or bodyshop guy, or even in the car trade. I work as a radio engineer, so I am on a steep learning curve and welcome ANY comments, better if they are constructive. So, here is the car when I bought it. Doesn't look too bad !! Eh !! So initially the plan was a quick tidy up, get the bad areas welded up by a pro and off she goes. But once I started removing the interior and saw some old poor MOT patching, I knew I would need to dig deeper and decided to wait till, I had somewhere better to work on it. We were looking to move house anyway, but this kind of pushed us along and I now needed to find a house with a decent garage. So, we finally moved 6 months later and I inherited a nice double garage with an inspection pit !!! Bonus !!! I have since extended the rear of the garage with a 6x3M extension, so it is a really good size. So the tear down began properly about 12 months ago. Engine out: Subframes out: And then, onto the body inspection......
Early round-cluster tail light model, well worth saving. I like threads like this, keep the progress updates coming. [saw your other thread re panelling......
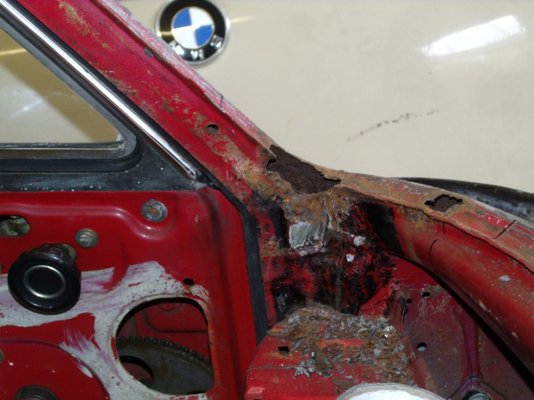
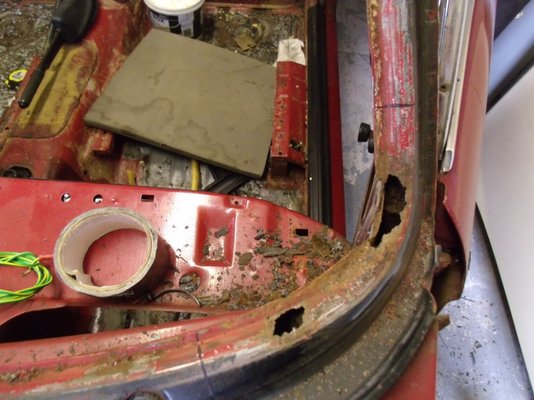
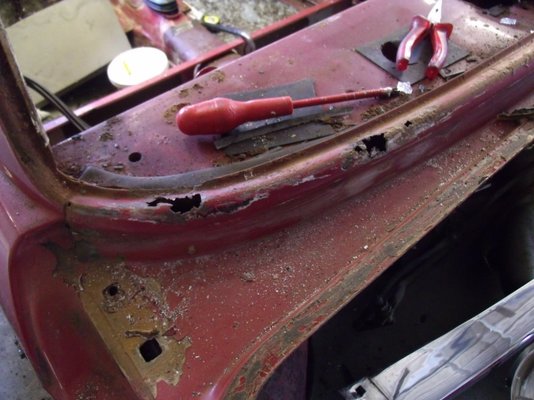
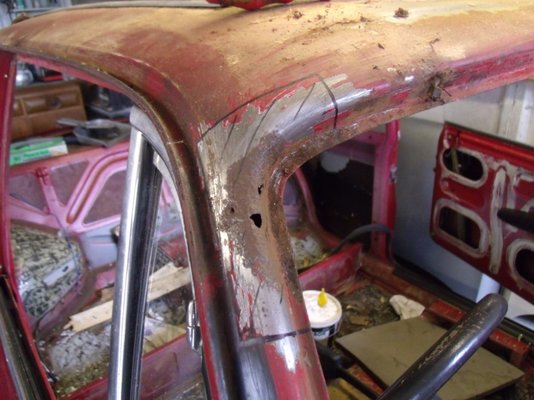
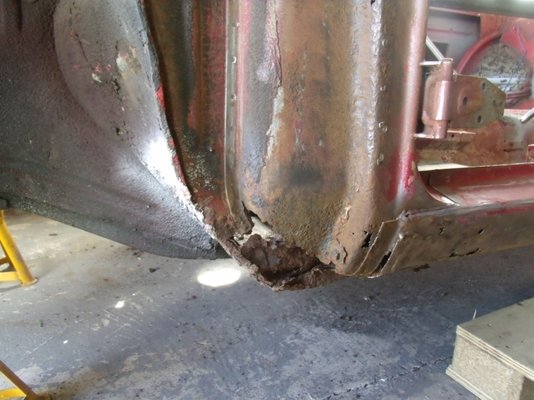
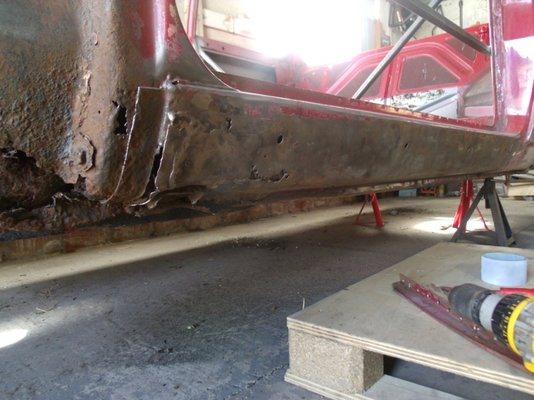
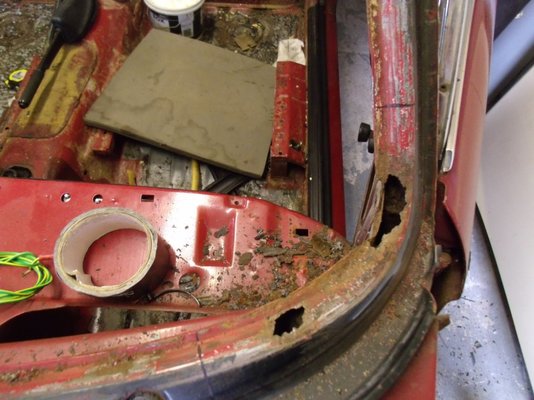
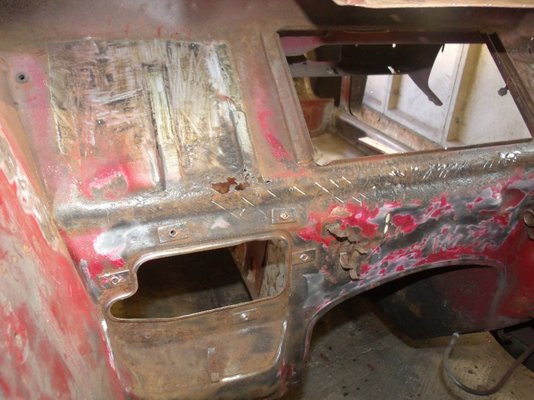
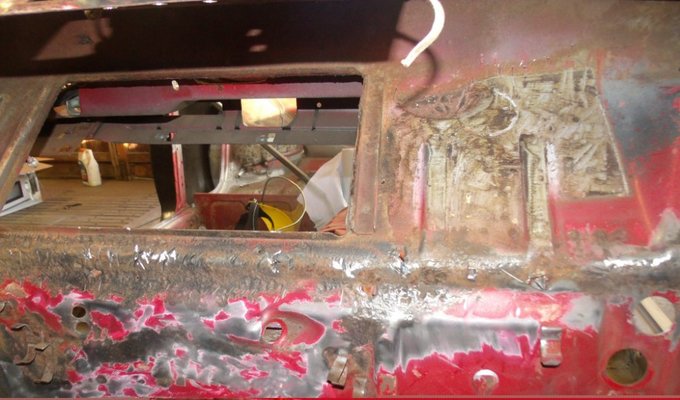
The bodywork was in pretty poor state, so, I just kept digging !!! Once the glass was out, even the frames were rotten Here is what I have found !!!! So, like I said, I kept digging !!!! Passenger side. Drivers side was pretty much the same. Inner and out sills and A posts all rotten.
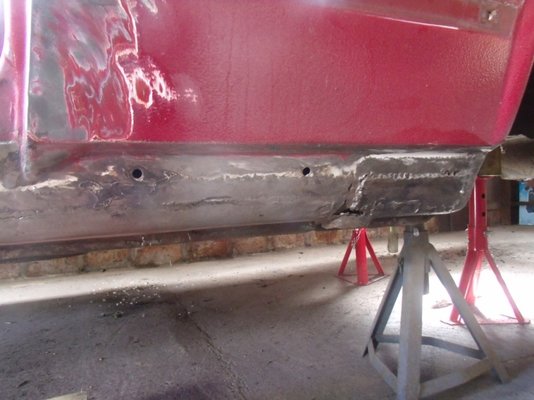
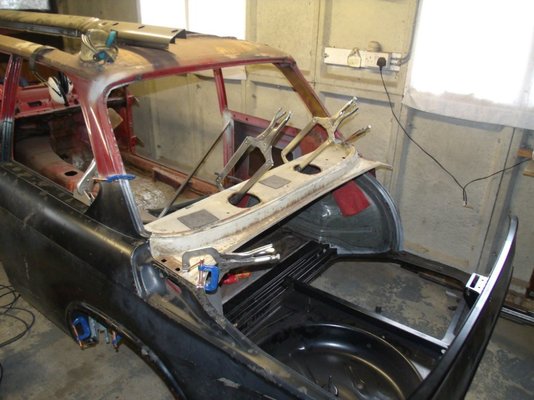
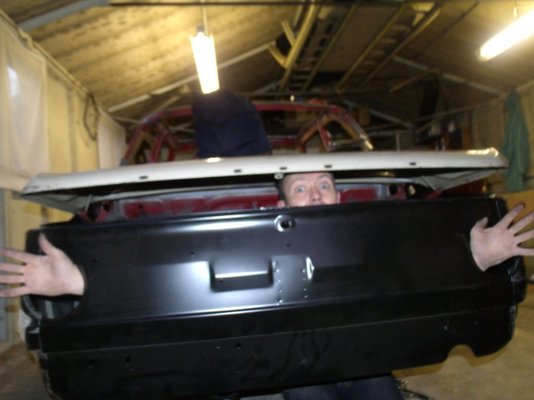
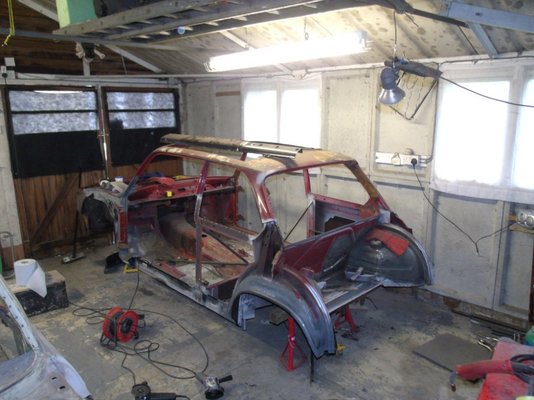
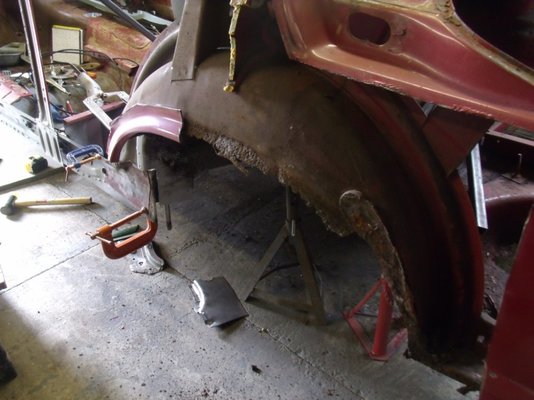
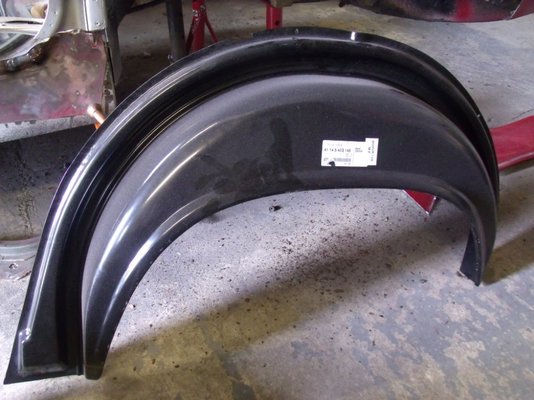
In all, I would be here all night showing pics of all the rot !!! . So, Basically it goes like this: All new Inner and outer sills, both sides. New A posts both sides. New Boot floor New rear quarter panels (my choice really, as I couldn't be arsed trying to straighten the old ones) !!! Repairs to both front floors and a section of the rear drivers floor. New passenger door, possibly a drivers door, if I can stomach the cost !!!! The original isn't too bad, but needs work. 2 x new wings New front panel (Found a good 2nd hand one) Replace the roof, since it was rotten following a Webasto install. Replace the parcel shelf Bulkhead repairs 2 x rear inner wheel arches. New rear panel. Repairs to A frame, both sides. As you can tell, I do enjoy a challenge !!!!! . Work done so far. Both Passenger and Driver side sills and A post repairs done. Passenger side floor repairs done. Cut out rear panel, boot and rear quarters and parcel shelf. All panels have been test fitted (numerous times), I am waiting on a spot welder to proceed with fitting. Pic is just a quick shot taken during one of the on/off, test fitting jobs !!! Here is the rear panel, test fitted : The indicators will need more work though !!!
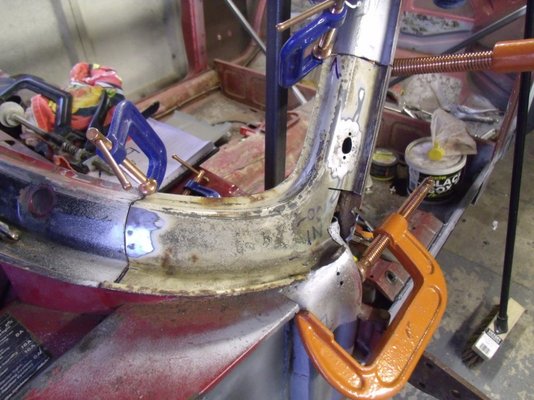
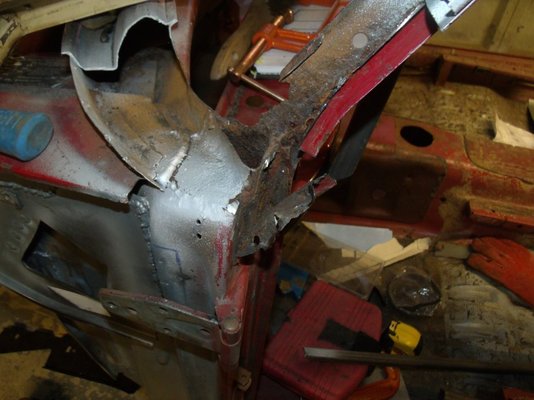
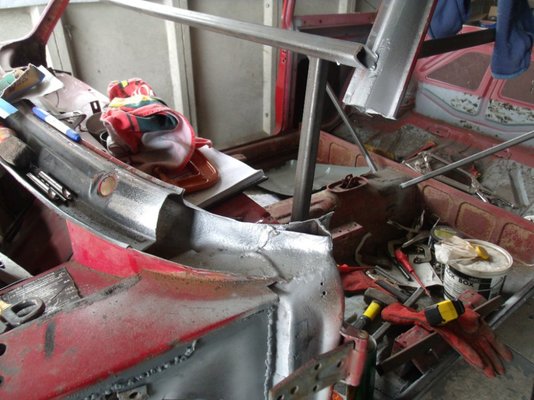
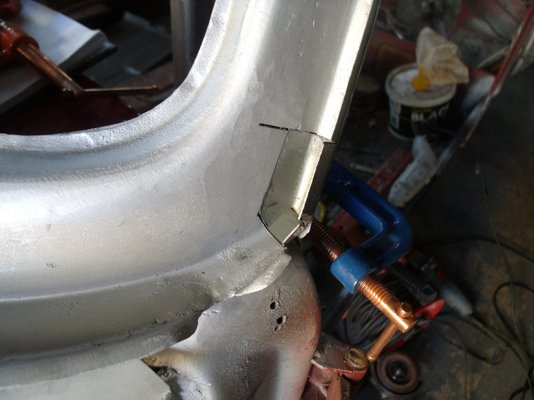
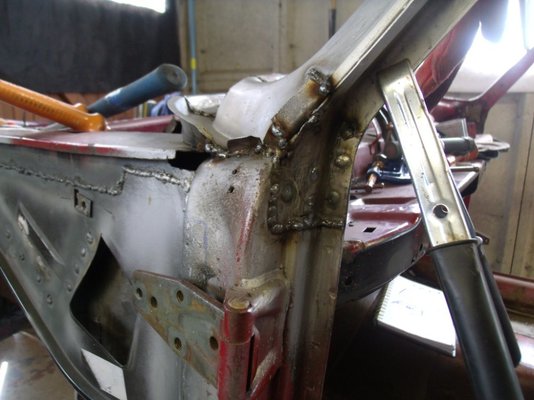
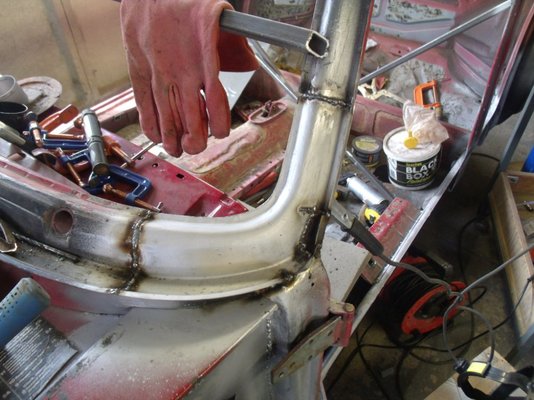
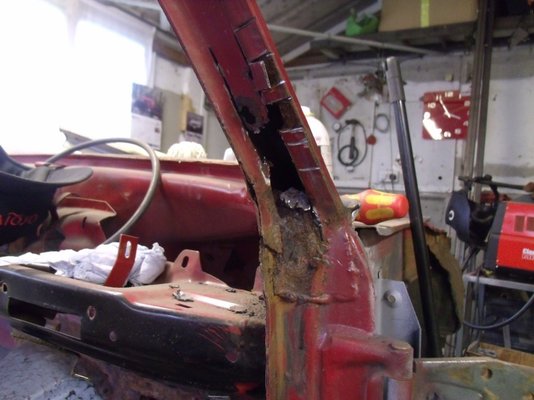
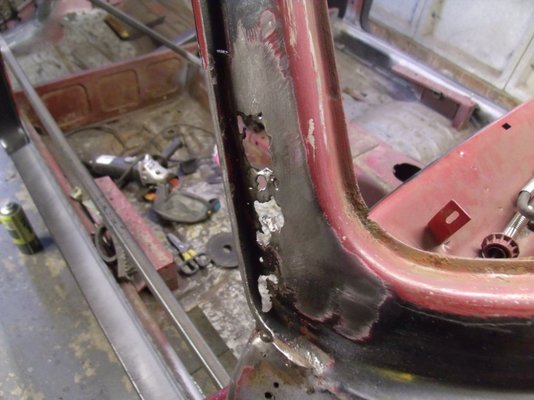
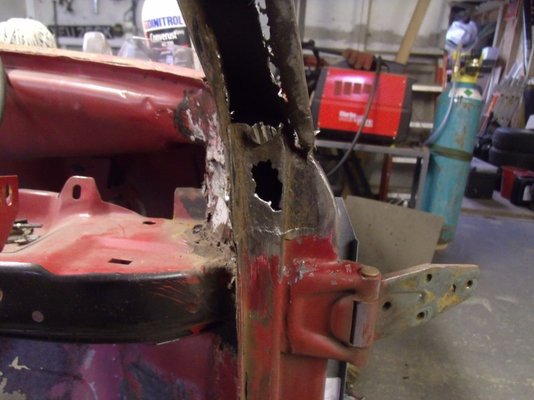
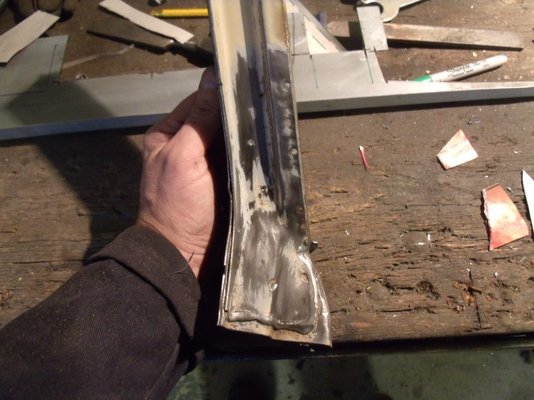
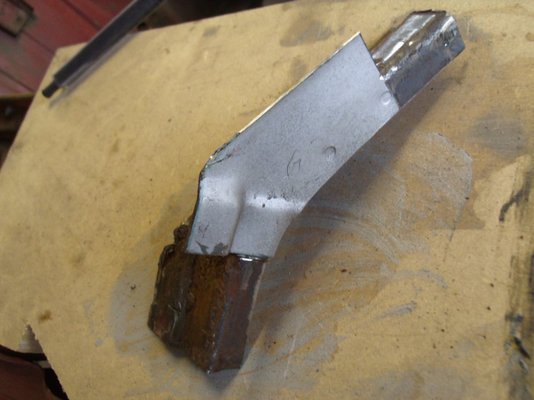
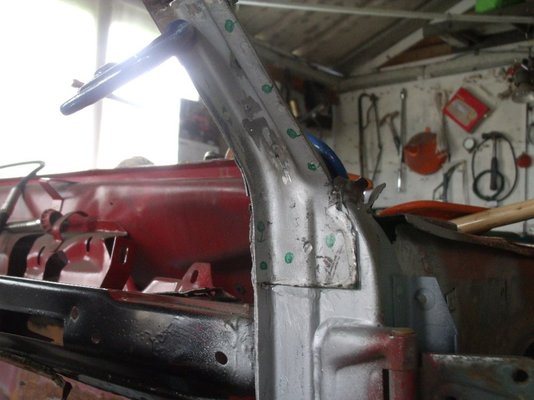
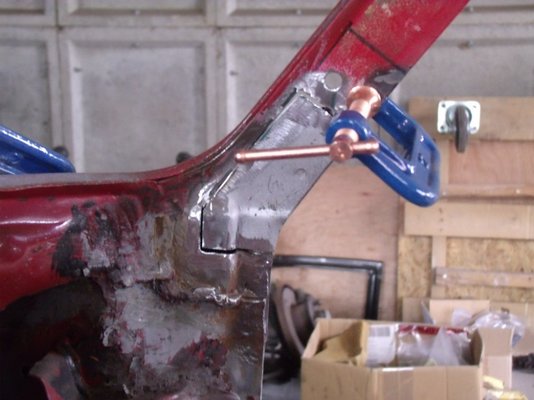
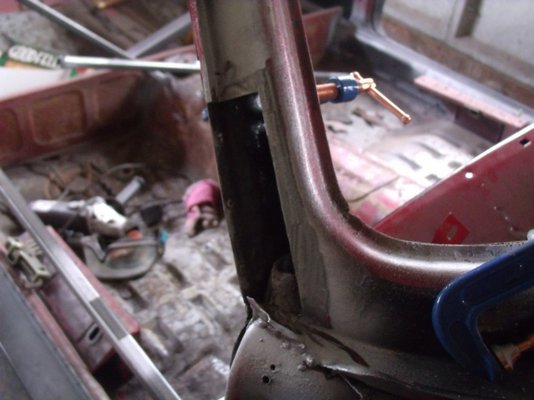
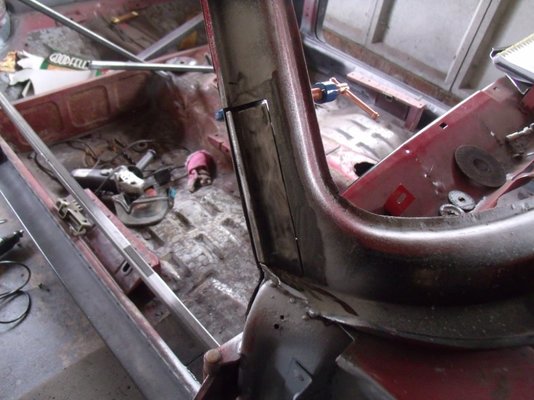
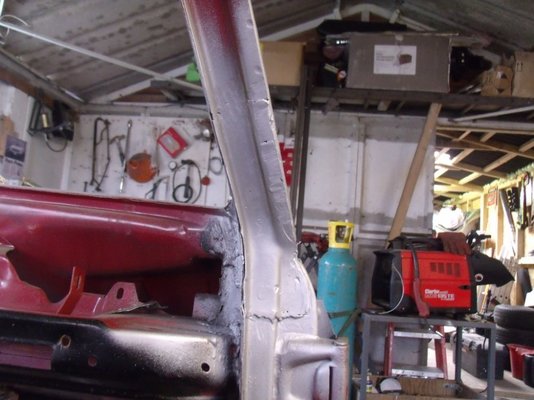
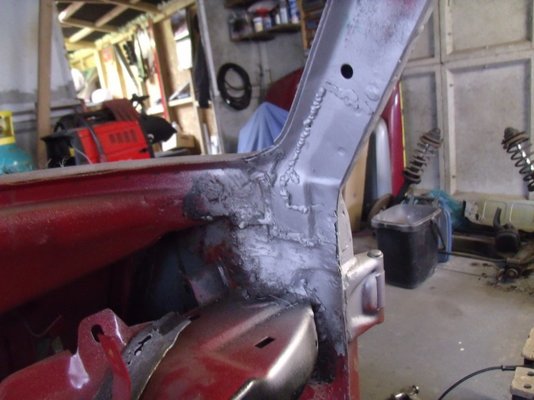
Carried out major repairs to the front window frame, common area to rot and I had a donor shell, with good metal here, so I had no choice but to chop out the old and insert a new piece on the passenger side. The drivers side, was also rotten, but I have managed to repair that side. The most difficult bit of this job, was deconstructing the donor car to get what I needed. But both side, now look really good, they will need a skim of filler, but still pretty good. Anyway, remember this !! Deconstructed the area. After a few hours of grinding and a Dremel, I had this left, rot free !!! And all braced. Test fitted the 'new' part. There was a small area of rot on the 'new' section, that I cut out and fabbed a new piece. But there was a single weld, inside to the top of the A post, so this was actually not a bad thing !! Since I could get the torch through the gap. Plug welded to the A Post. Remember, I am not a welder, so don't gasp !!! You can also see my other repairs, to the inner wing area...mmm !!! All of this lot has since been tidied and it looks good !!! And all welded in at the top.
Not bad for somebody who says he cant weld. Thin car body welding is a skill all by itself and you look to have a good mastery of it. Keep up the good work.
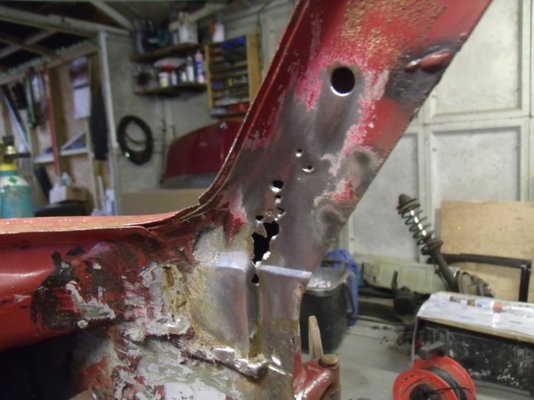
Drivers side, looked just as nasty, but was actually repairable, using a donor. Amazing how good metal can look, until you give it a good rub !! This was INSIDE, after removing the initial rotten bit !! The top of the A post. So, I decided, these areas could be patched, since there was enough good metal around the rotted bits. So That's what I did. Donor part. After much chopping and shaping, I ended up with repair panel. The rusty bit in the pic, was just surface rust and cleaned off fine and the whole part got a healthy dose of Dinitrol rust treatment. Test fitted. The other 'top' section was patched using a separate piece from the donor.
Continued. Almost finished. Needs some tidying up. And on this weld.... You can see why I joined this forum !!!!!
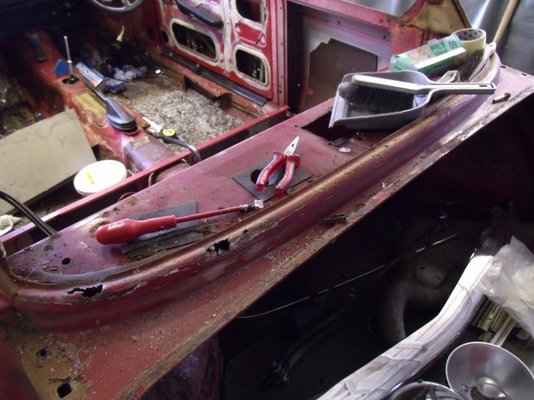
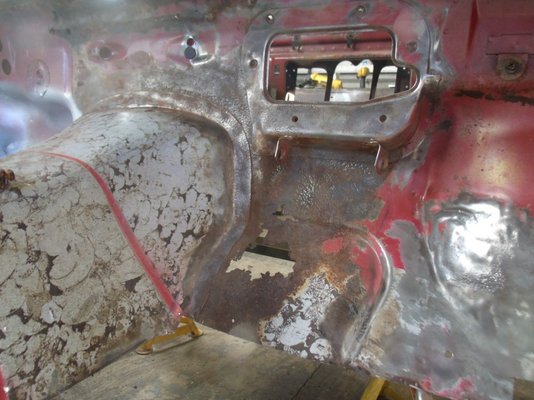
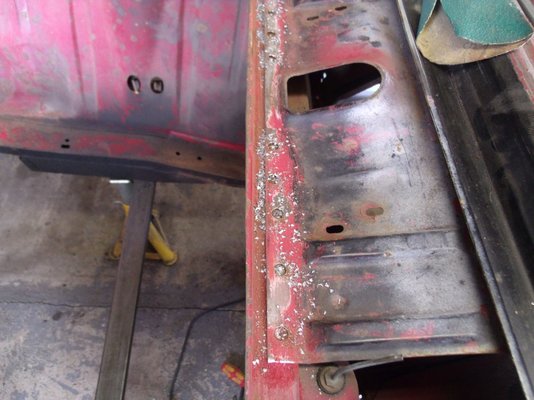
So. I am now at the stage of about start fitting the rear end...All of it. Then onto the drivers floor panel and chassis rail. More of that later !! And today, I decided to see how bad the bulkhead repairs are going to be and I need some advice on where to start. there are some complicated looking shapes, so not really sure. Anyone ? I removed the scuttle panel, to get better access to the area. There is basically, the bit below the pedal box, where the master cylinder has been leaking (common issue) and then the main area is where the scuttle panel was spot welded to the bulkhead, which has rotted out beneath. Any suggestions on how to tackle this mess ? I will try and get some better pics, but my camera is messing about at the moment.
Thanks mate. You are right, it is taking practice to get this welding malarkey done !!!! But I have to admit, I am absolutely loving it !!!
Cheers Slim_boy. Definitely worth saving, emotionally though, rather than economically !!!! It is costing me a fortune !!
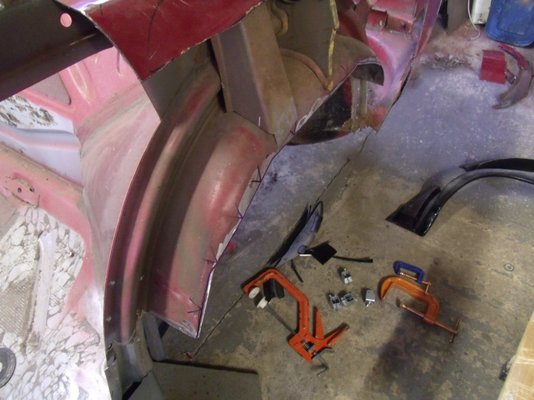
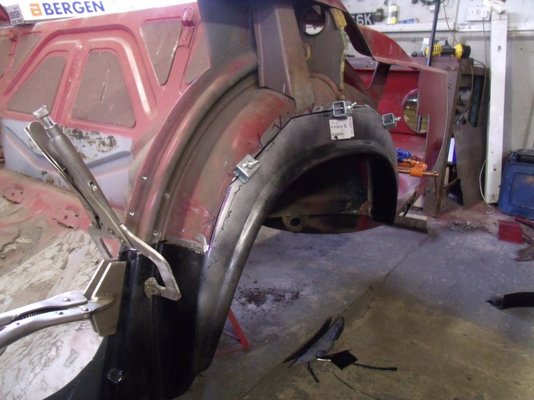
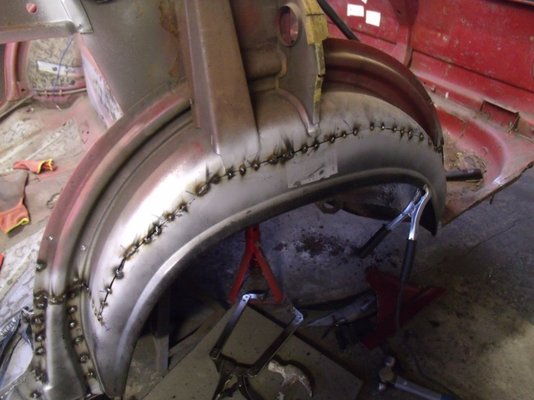
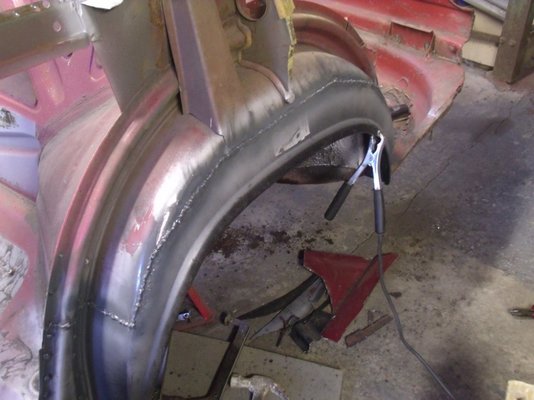
Cheers Dean. I have only posted a few pics, as I would be here all night mate, there are tons. Here's a few more of the inner wheel well. Both sides got the same treatment.
Very nice..great job. I had a 2002tii lux I think it was on a M plate. It was 33 years ago. Fantastic car, proper wolf in sheeps clothing! It had the square back lights. I put new wings and a front panel on it and did a full respray. I sold it to by a mk1 RS2000 escort.. wish I still had them both. I was only 18 and I remember the insurance was a fortune!
Wow. I bet you wish you still had both !!! MK 1 RS2K's are fetching 35k and still going strong !!! The Tii's are starting to realise good money, but they'll never be as popular as a fast Ford here in the UK. I might break even, if I am extremely lucky !!! LOL. I do have a 5 speed box and a LSD to go in, so it should be a nice drive.
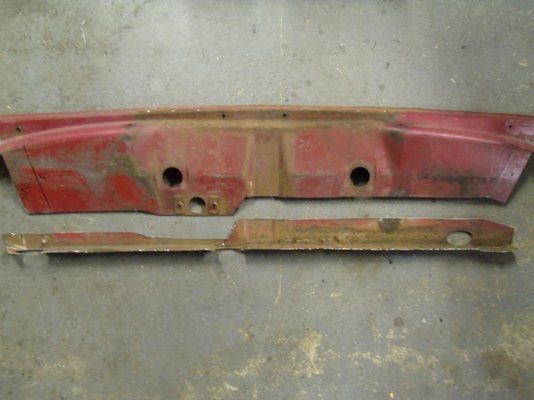
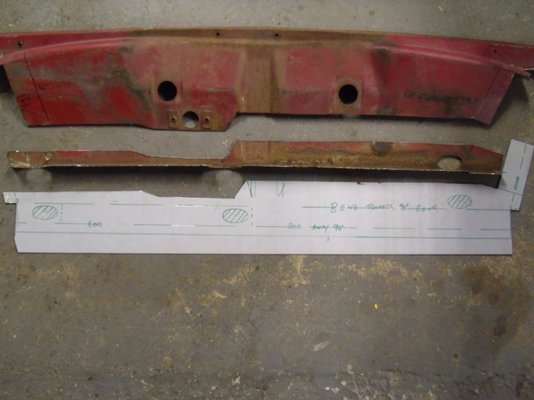
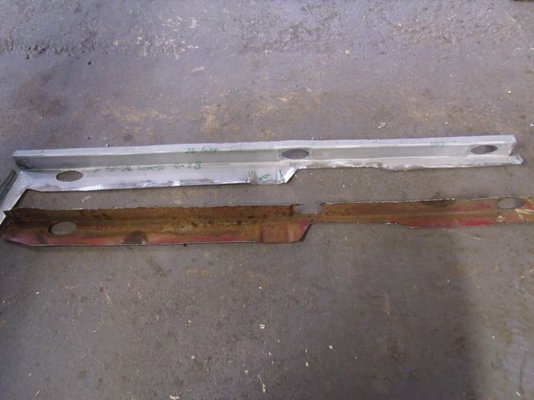
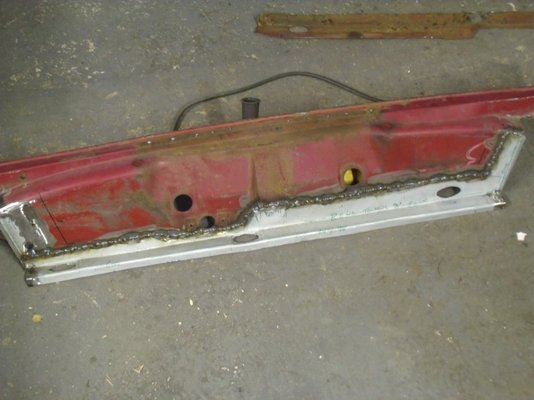
Been a bit slow on this lately. Still in the process of doing the bulkhead repairs. Today, I decided to tackle the repairs to the scuttle panel. The lower edge was damaged on removal and was rotten anyway. So, it had to be cut out and replaced. No donor available, so I had to scratch this piece from some 1mm sheet. I have since tidied the welds and added a bit of filler, but no pics of that yet, sorry. I am waiting for some epoxy primer to arrive, then I'll give it a coat and leave to one side until it's ready to fit.
Very good results- your welding still needs fine honning but kudos to you for undergoing such a major project with relatively zero experience !