This project started almost two years ago and I was going to document it as I went but I've just installed the staircase and this is the first post about it.
I did a loft conversion in the house and for the last three years I've been using a makeshift staircase untii about four weeks ago.
I originally took inspiration from a timber staircase in a church that had been converted for self catering. I will try and find a link. It had two 6x3 spines supporting heavy treads which sat on huge posts as it changed direction.
The idea was sown but it was too bulky for my modest hallway and stairwell. I decided to use RHS as the spines and hopefully eliminate the need for any posts. The treads were to be one piece timber, 45mm thick with open risers. The rest I would make up as I went along.
I built the house four years ago as a bungalo with attic trusses and allowed approx a 2.1x2.1m stairwell within the entrance hall. Typically stair regs changed with the local Building Standards once the house was built but I pled my case and they let me away with the original stair plan (I must have shown it as a proposal on an original drawing first time around).
Over 3 or 4 months I made some life size drawings on 8x4 ply and came up with the basic structure and layout.
Once I was happy with some details I ordered some 100x50x3RHS and 50x6 flat and in the meantime re-constructed my hallway in the workshop with some ply and framing. I'd add that from the time I started the drawings I was as acurate as possible and worked within a half millimeter. I'm a joiner to trade and very seldom is it necessary to be quite as exact but I found it paid dividends.
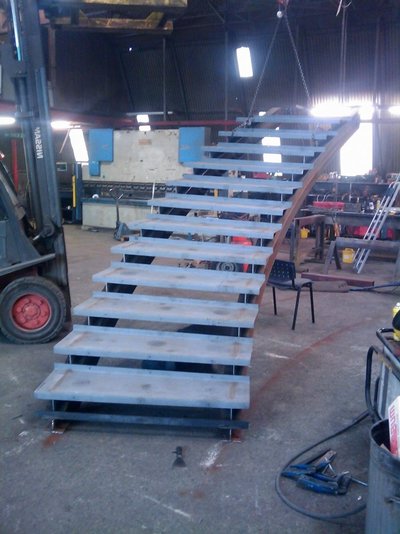
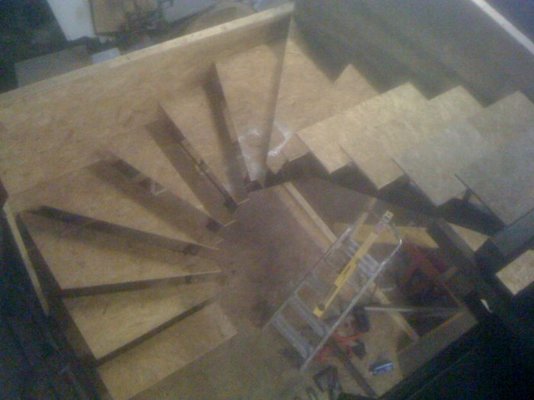
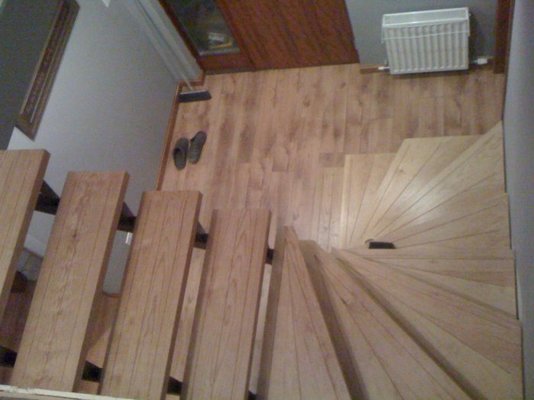
The stair begins with a straight tread then turns 180 through two winder boxes and finishes with four straight treads before the nosing.
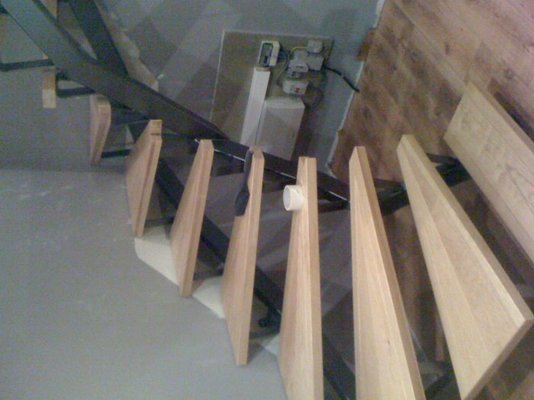
The treads ended up in Pitch Pine with detail grooves on top for some grip.
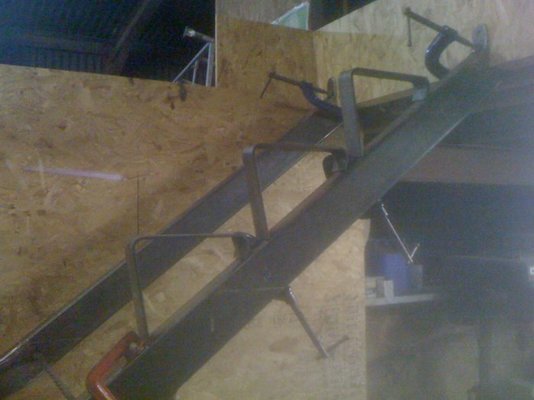
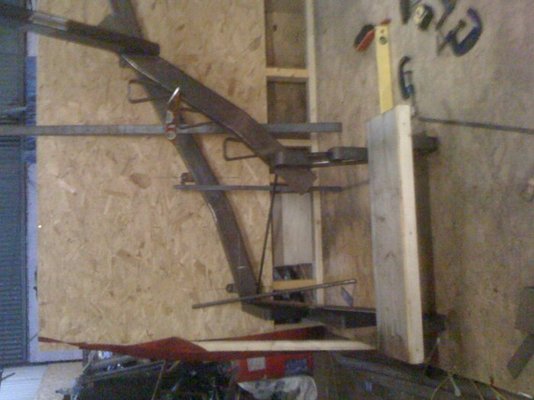
The undercarraige or spines consisted of the 100x50 RHS mitred and welded regularly as they wound around the stair. On top of the RHS I formed seats for the treads from the 50x6 flat and used 8mm stainless button bolts and timber inserts to hole the treads.
Both spines are fixed to the floor and birdsmouthed over the top trimmer. The longer outer spine is bolted to the wall through the middle section. The only thing re-inforcing the inner spine is the 45mm Pitch Pine connecting it to the outer spine as the treads spiral around it.
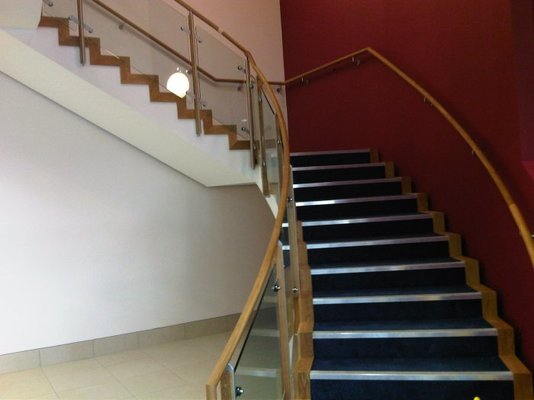
The steel is finished in a graphite enamel with floor varnish on the treads. There will be stub risers to close the gaps for Building Control (temporarily) and the ballustrading will be glass from the fourth tread up and around the landing.
I hope you enjoy the pics, it's definately been my best project so far even though it took so long. Enjoy
JF
(sorry a couple of the pics need rotating but they can stay now)
I did a loft conversion in the house and for the last three years I've been using a makeshift staircase untii about four weeks ago.
I originally took inspiration from a timber staircase in a church that had been converted for self catering. I will try and find a link. It had two 6x3 spines supporting heavy treads which sat on huge posts as it changed direction.
The idea was sown but it was too bulky for my modest hallway and stairwell. I decided to use RHS as the spines and hopefully eliminate the need for any posts. The treads were to be one piece timber, 45mm thick with open risers. The rest I would make up as I went along.
I built the house four years ago as a bungalo with attic trusses and allowed approx a 2.1x2.1m stairwell within the entrance hall. Typically stair regs changed with the local Building Standards once the house was built but I pled my case and they let me away with the original stair plan (I must have shown it as a proposal on an original drawing first time around).
Over 3 or 4 months I made some life size drawings on 8x4 ply and came up with the basic structure and layout.
Once I was happy with some details I ordered some 100x50x3RHS and 50x6 flat and in the meantime re-constructed my hallway in the workshop with some ply and framing. I'd add that from the time I started the drawings I was as acurate as possible and worked within a half millimeter. I'm a joiner to trade and very seldom is it necessary to be quite as exact but I found it paid dividends.
The stair begins with a straight tread then turns 180 through two winder boxes and finishes with four straight treads before the nosing.
The treads ended up in Pitch Pine with detail grooves on top for some grip.
The undercarraige or spines consisted of the 100x50 RHS mitred and welded regularly as they wound around the stair. On top of the RHS I formed seats for the treads from the 50x6 flat and used 8mm stainless button bolts and timber inserts to hole the treads.
Both spines are fixed to the floor and birdsmouthed over the top trimmer. The longer outer spine is bolted to the wall through the middle section. The only thing re-inforcing the inner spine is the 45mm Pitch Pine connecting it to the outer spine as the treads spiral around it.
The steel is finished in a graphite enamel with floor varnish on the treads. There will be stub risers to close the gaps for Building Control (temporarily) and the ballustrading will be glass from the fourth tread up and around the landing.
I hope you enjoy the pics, it's definately been my best project so far even though it took so long. Enjoy
JF
(sorry a couple of the pics need rotating but they can stay now)
")
 Probably a bit of a tight radius to helically roll?