


- Forums
- Tools, Compressors and Metal Coatings
- Tools, Materials and Techniques
- Machining
- Lathes and other Machining Equipment
You are using an out of date browser. It may not display this or other websites correctly.
You should upgrade or use an alternative browser.
You should upgrade or use an alternative browser.
New Harrison M300 owner
- Thread starter M K
- Start date
Shaggershaw
New Member
- Messages
- 16
- Location
- England nottingham
After removing the gear boxes the gaskets have turned to mush. Will I get away with making replacements with gasket paper? If so how thick should they be?
Does anyone have the gear selection plates on an engraving file? I think it is a .dxf
I have access to an engraver to reproduce the plates.
Does anyone have the gear selection plates on an engraving file? I think it is a .dxf
I have access to an engraver to reproduce the plates.
Shaggershaw
New Member
- Messages
- 16
- Location
- England nottingham
It had a gasket on the top cover -mushGearbox shouldn't have a gasket, only bottom access plate on the apron, also the headstock cover. Might be few more on the headstock, but none you'd need to take off
Also the thread cutting gearbox where it fits to the bedway - mush
I'm thinking of using a liquid Instant gasket. Any opinion?
indy4x
Member
- Messages
- 3,137
- Location
- Pontypool, South Wales. UK
Mine also had a gasket, looked factory to me either that or someone did a very good job of making one. Gasket only sat on the 3 faces, top face was some sort of thick sealer that stayed soft
Reused the gasket, just sprayed either side with instant gasket and used RTV along the top
Reused the gasket, just sprayed either side with instant gasket and used RTV along the top
Shox Dr
Chief Engineer to Carlos Fandango
- Messages
- 17,986
- Location
- East Yorkshire
Well I stand to be corrected. I was sure it said NOT to use one
Shaggershaw
New Member
- Messages
- 16
- Location
- England nottingham
Started on the proper wiring last nite
Got all the end cover wiring in and dropped down to the cabinet area,
Wired in a 10k potentiometer for the speed control, cost £2.50 roughly from maplins and works perfect
Have ordered some 4 core for the motor 3 phase and earth and some 7 core for the vfd inputs etc so will get some more done later this week hopefully
Also I cut the plug off the DRO main lead as I don't want 2 seperate plugs for latheand DRO so cut plug off and the DRO power will come direct from the isolator via a 6amp breaker
The suds pump, foot brake switch and the DRO power cable are run neatly through some cable glands that are a direct fit into the original threaded holes so no risk of any chaffed wires over time either
What is the black cable housing you have used called. I've found the glands on eBay but can't find a cable housing/hose
Thanks
- Messages
- 14,356
- Location
- UK
Managed to move the lathe into the shed from the garage on my own today
Decided to do it while still in primer so any scratches can be re primered before paint and the was a few but nothing major
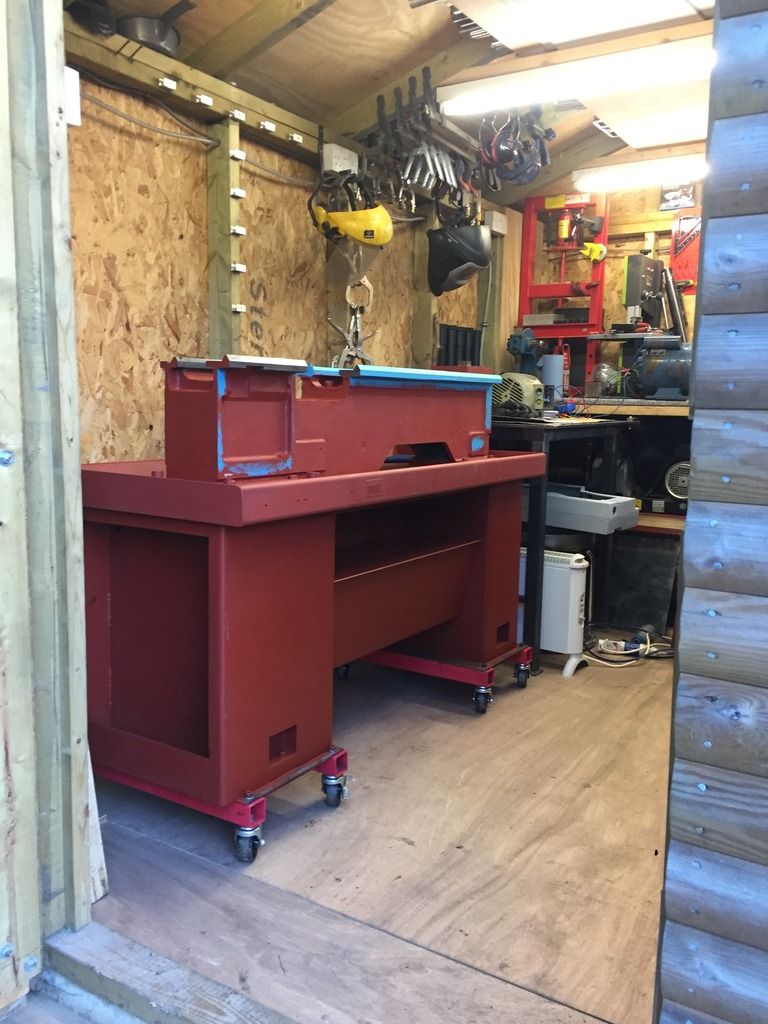
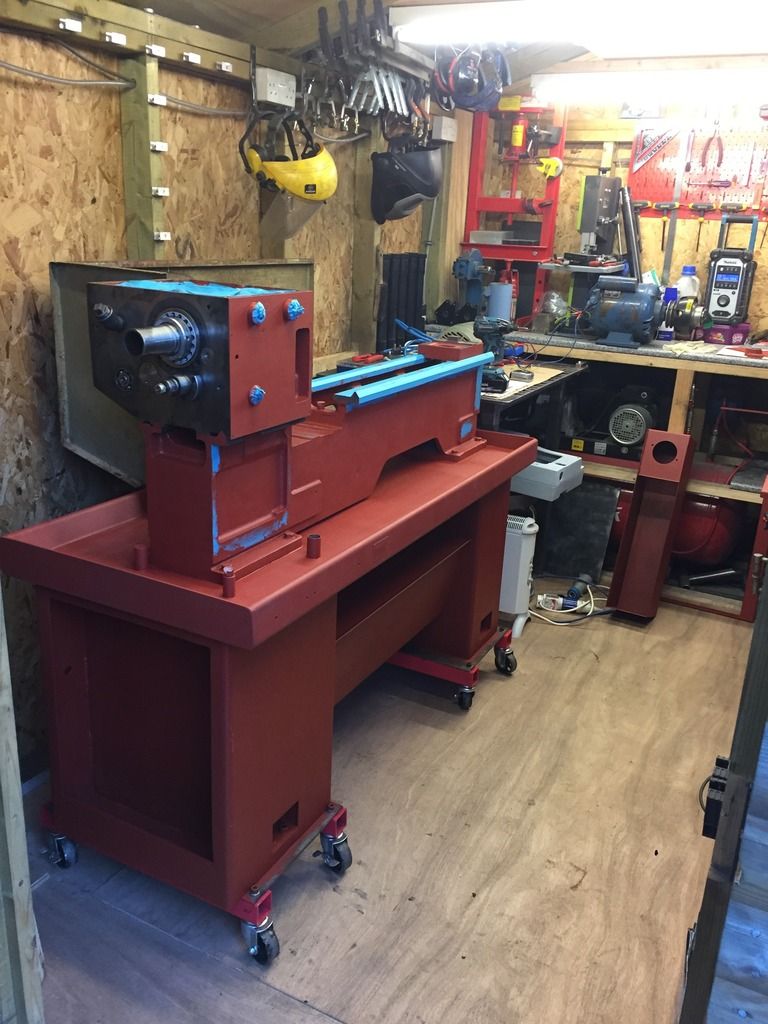
Rested the headstock back on to keep it safely out of harms way
Also sized up the rear chip guard but it's far too big to be fitted in my little shed as it is so what I am going to do is chop 150mm out of the depth and weld it back together then that I think will be more than adequate for me and still catch most of the chips and spray and still leave room for cross slide full travel etc

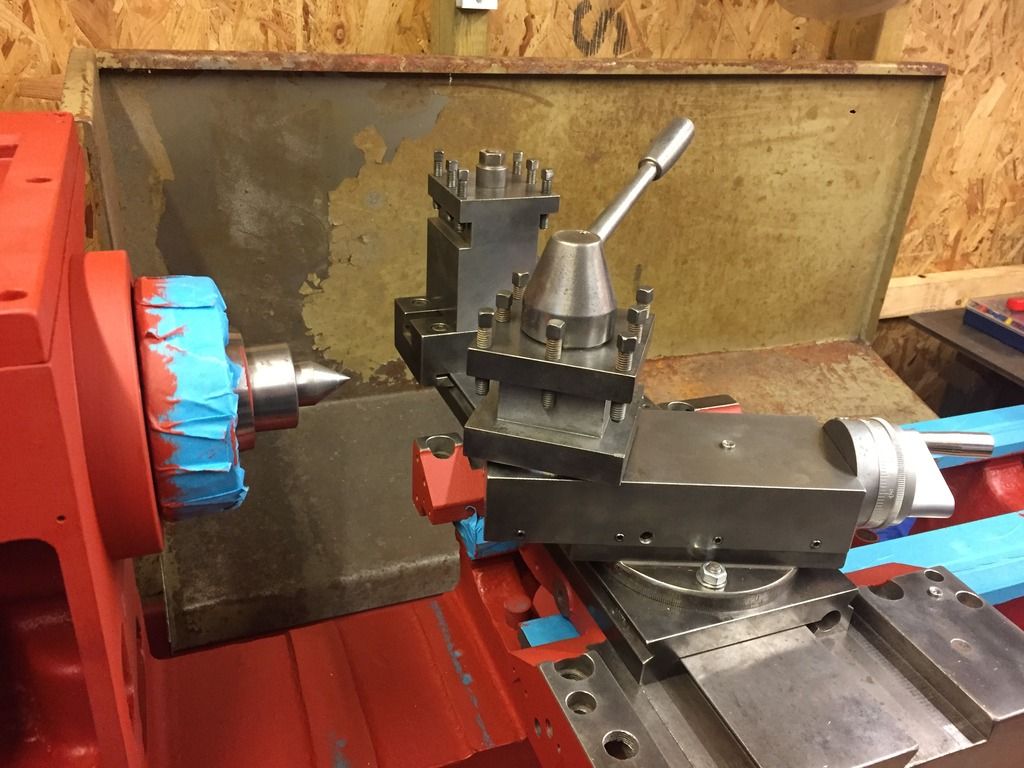
Rested the saddle on and the cross slide so I could measure the distance between compound slide and spindle center height so I can work out what size multifix tool post to order from create tool

Will touch up the primer chips tomorrow hopefully then look at getting on with painting all the cabinet Drab green the following day

Hi MK, do you know what holds the top of the compound slide on? Taken everything off that could stop it coming free but it doesn't want to let go!
Hi MK, do you know what holds the top of the compound slide on? Taken everything off that could stop it coming free but it doesn't want to let go!
Hi
unfortunately I can not remember now off the top of my head and don’t have the lathe anymore
sorry
Marc
Shox Dr
Chief Engineer to Carlos Fandango
- Messages
- 17,986
- Location
- East Yorkshire
Hi MK, do you know what holds the top of the compound slide on? Taken everything off that could stop it coming free but it doesn't want to let go!
on to what? The crosslide? 2 nuts and a pin in the middle, should just pull off. If you mean the top slide loosen gib strip, and wind it off the lower base, note the protractor and base are one.
hth
- Messages
- 14,356
- Location
- UK
on to what? The crosslide? 2 nuts and a pin in the middle, should just pull off. If you mean the top slide loosen gib strip, and wind it off the lower base, note the protractor and base are one.
hth
Yes the top slide. Taken all the grub screws out against the side of the gib but it won't wind off - it comes to a hard stop. Can't identify anything in the exploded diagram to suggest anything else holding it on.
Can hear the swarf grating underneath!
daedalusminos
Member
- Messages
- 2,150
- Location
- Norwich
You can't just wind the top of the compound off since the nut hits the top casting...
First remove leadscrew (two hex bolts and wind it out)
Then loosen grub screw (front end face of lower section of compound) holding nut in place.
Now push nut down into lower half of compound and slide top section of compound off.
That's the way I did it...you may be able to remove top section of compound after removing leadscrew by removing gib strip and 'unlocking' dovetails but I'm not sure there's adequate clearance.
Shox Dr
Chief Engineer to Carlos Fandango
- Messages
- 17,986
- Location
- East Yorkshire
You can't just wind the top of the compound off since the nut hits the top casting...
First remove leadscrew (two hex bolts and wind it out)
Then loosen grub screw (front end face of lower section of compound) holding nut in place.
Now push nut down into lower half of compound and slide top section of compound off.
That's the way I did it...you may be able to remove top section of compound after removing leadscrew by removing gib strip and 'unlocking' dovetails but I'm not sure there's adequate clearance.
I had a feeling there was more to it. Its been a while since I had it apart
- Messages
- 14,356
- Location
- UK
You can't just wind the top of the compound off since the nut hits the top casting...
First remove leadscrew (two hex bolts and wind it out)
Then loosen grub screw (front end face of lower section of compound) holding nut in place.
Now push nut down into lower half of compound and slide top section of compound off.
That's the way I did it...you may be able to remove top section of compound after removing leadscrew by removing gib strip and 'unlocking' dovetails but I'm not sure there's adequate clearance.
Great, thanks. Had to push the nut down through the bottom of the compound - the dovetails won't pass each other. Needed a good clean.
If anyone has a 12mm ID x 26mm OD x 1mm thick shim washer doing nothing..found why it was jamming - the washer is in 3 pieces and jamming. Obviously been like that years. The max dia shim washer available seems to be 24mm. Might just get a few of these, can't see it makes much difference.
daedalusminos
Member
- Messages
- 2,150
- Location
- Norwich
If anyone has a 12mm ID x 26mm OD x 1mm thick shim washer
That's the thrust washer for the thrust bearing...
https://www.ebay.co.uk/itm/KOYO-AS1...481370?hash=item1ccd999f5a:g:IyMAAOSwuUlcmlTc
and race here...
https://www.ebay.co.uk/itm/AXK1226-...848385&hash=item1cb3c3f08c:g:iZ4AAOSwVb5bWtX1
